Super Satisfying Ramen Stir Fry
Enjoy this satisfying, versatile dish. Like fried rice, but it uses plain ramen instead of leftover rice. We buy plain ramen in bulk and keep it in our pantry.
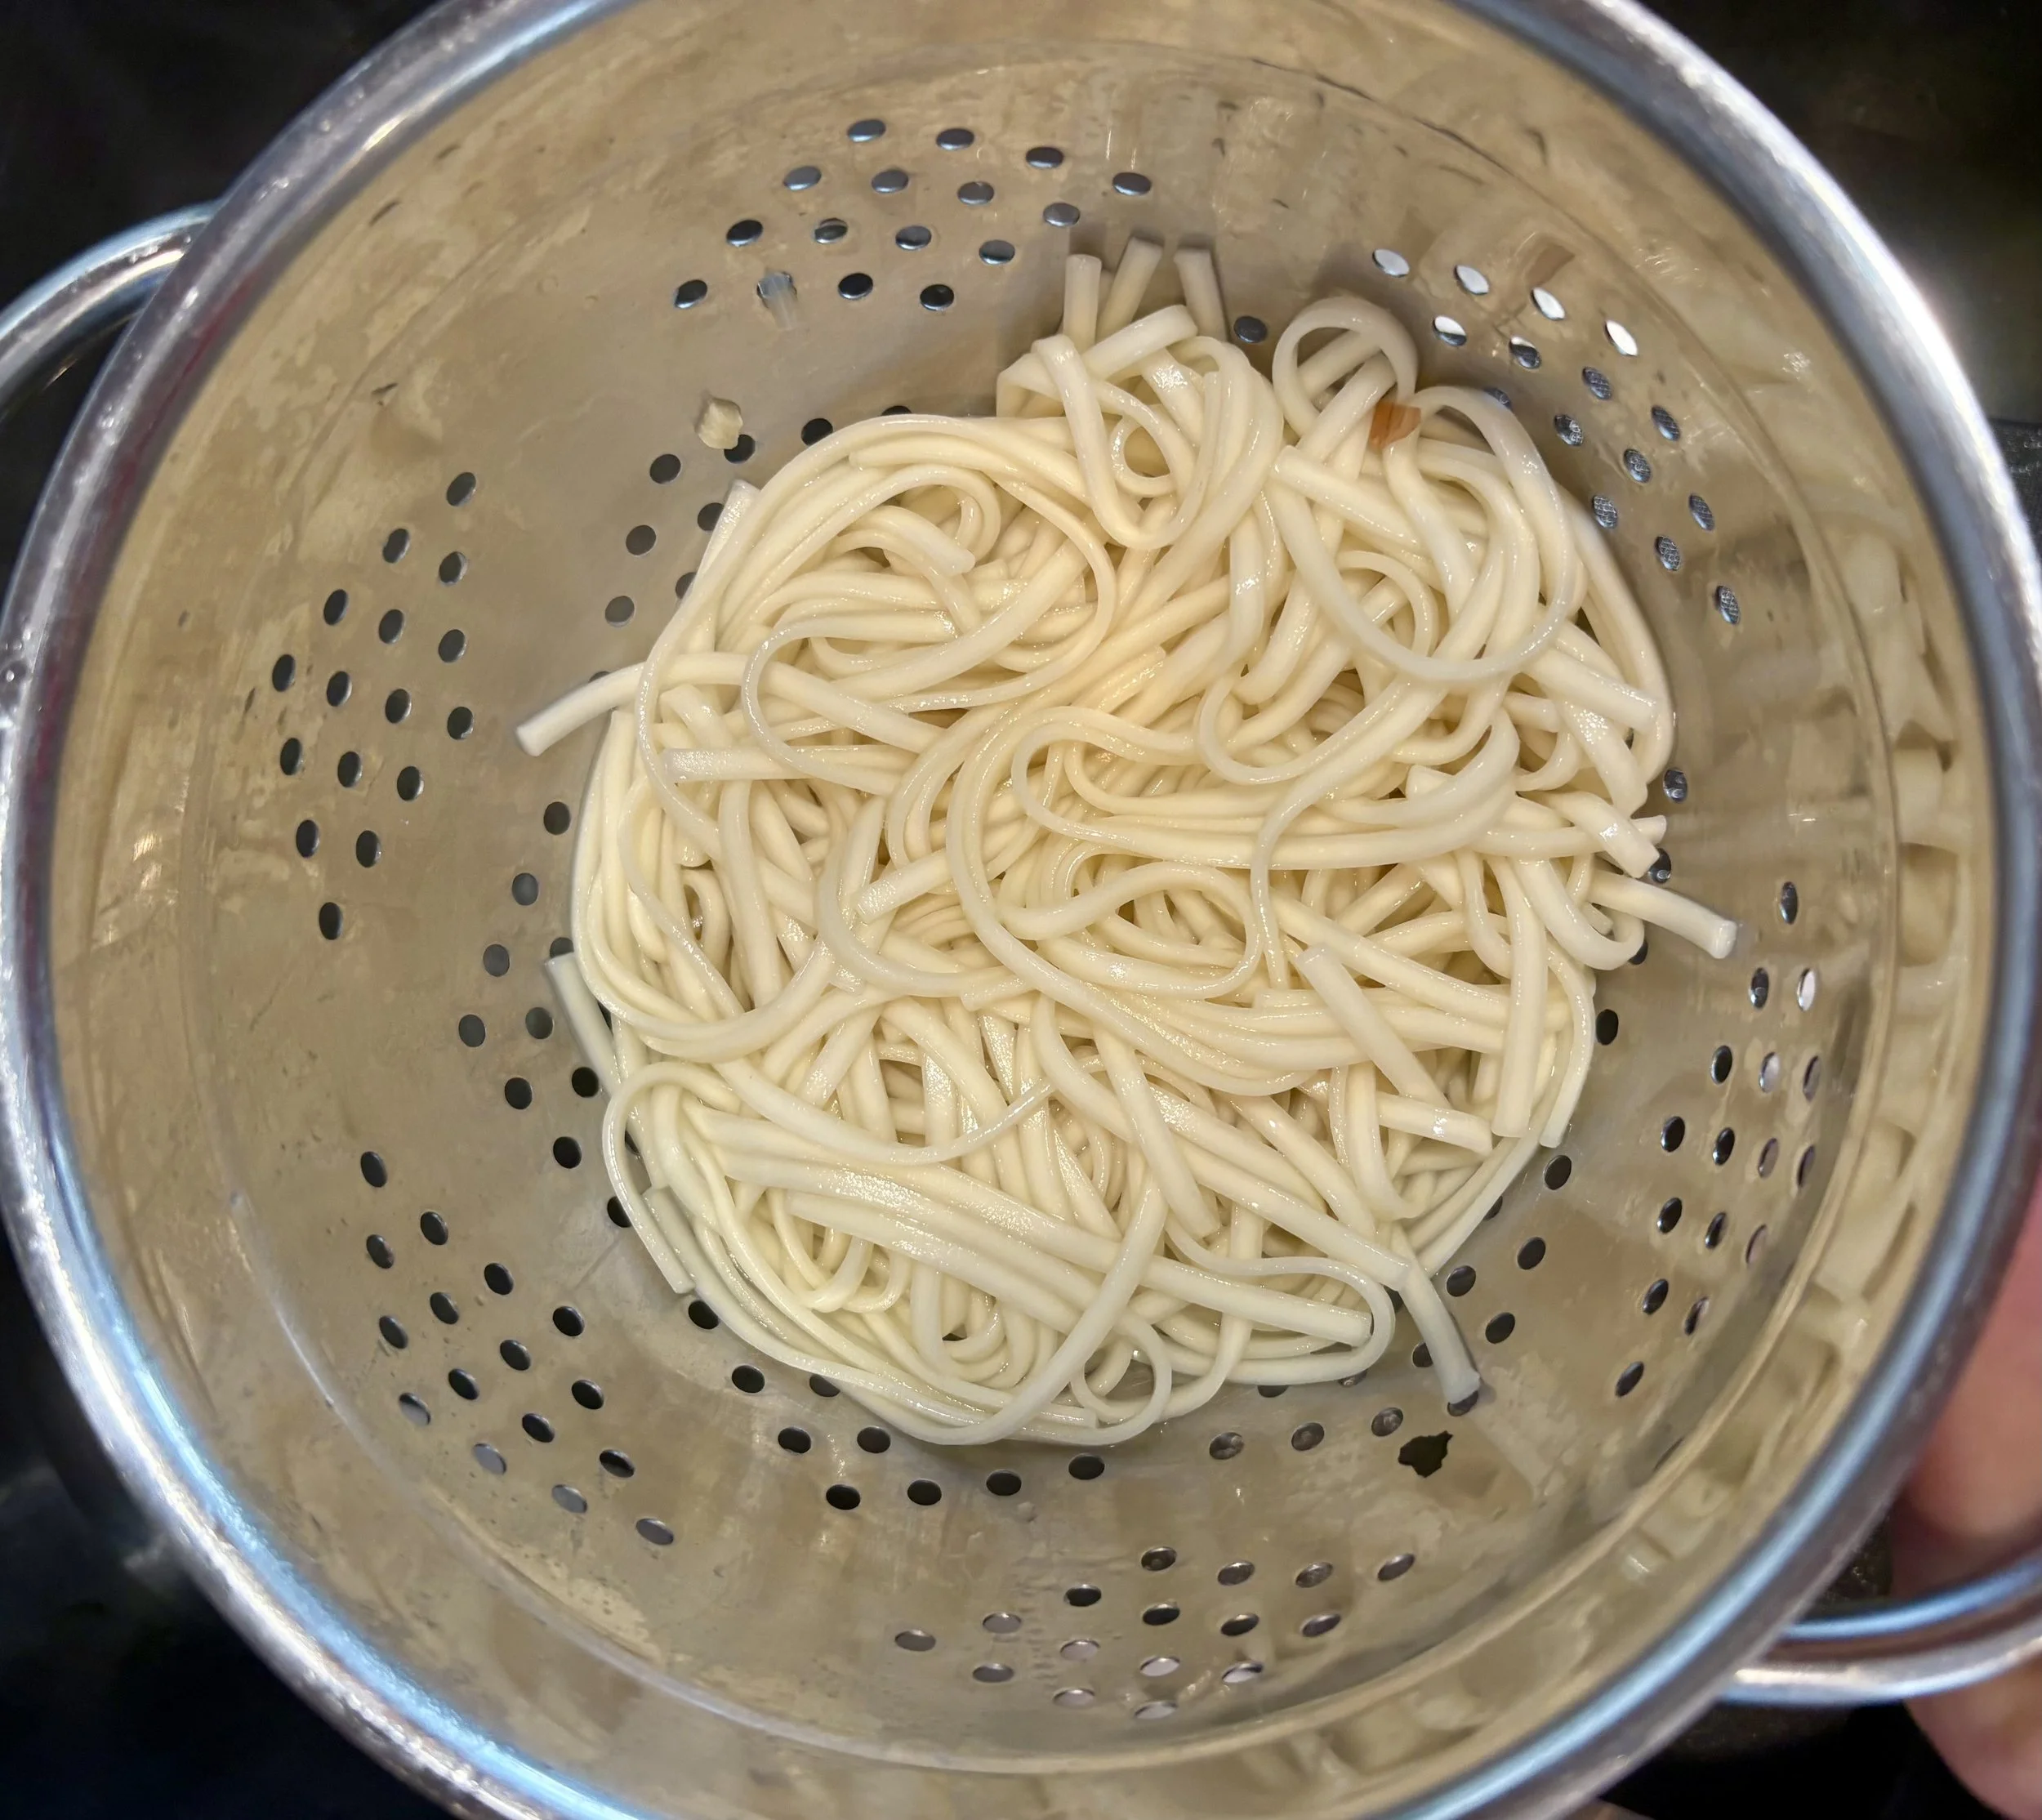
ramen cooks quickly, in just 5 minutes
Boil ramen noodles for 5 minutes, then drain and rinse with cold water. Set aside while you prepare the other ingredients.
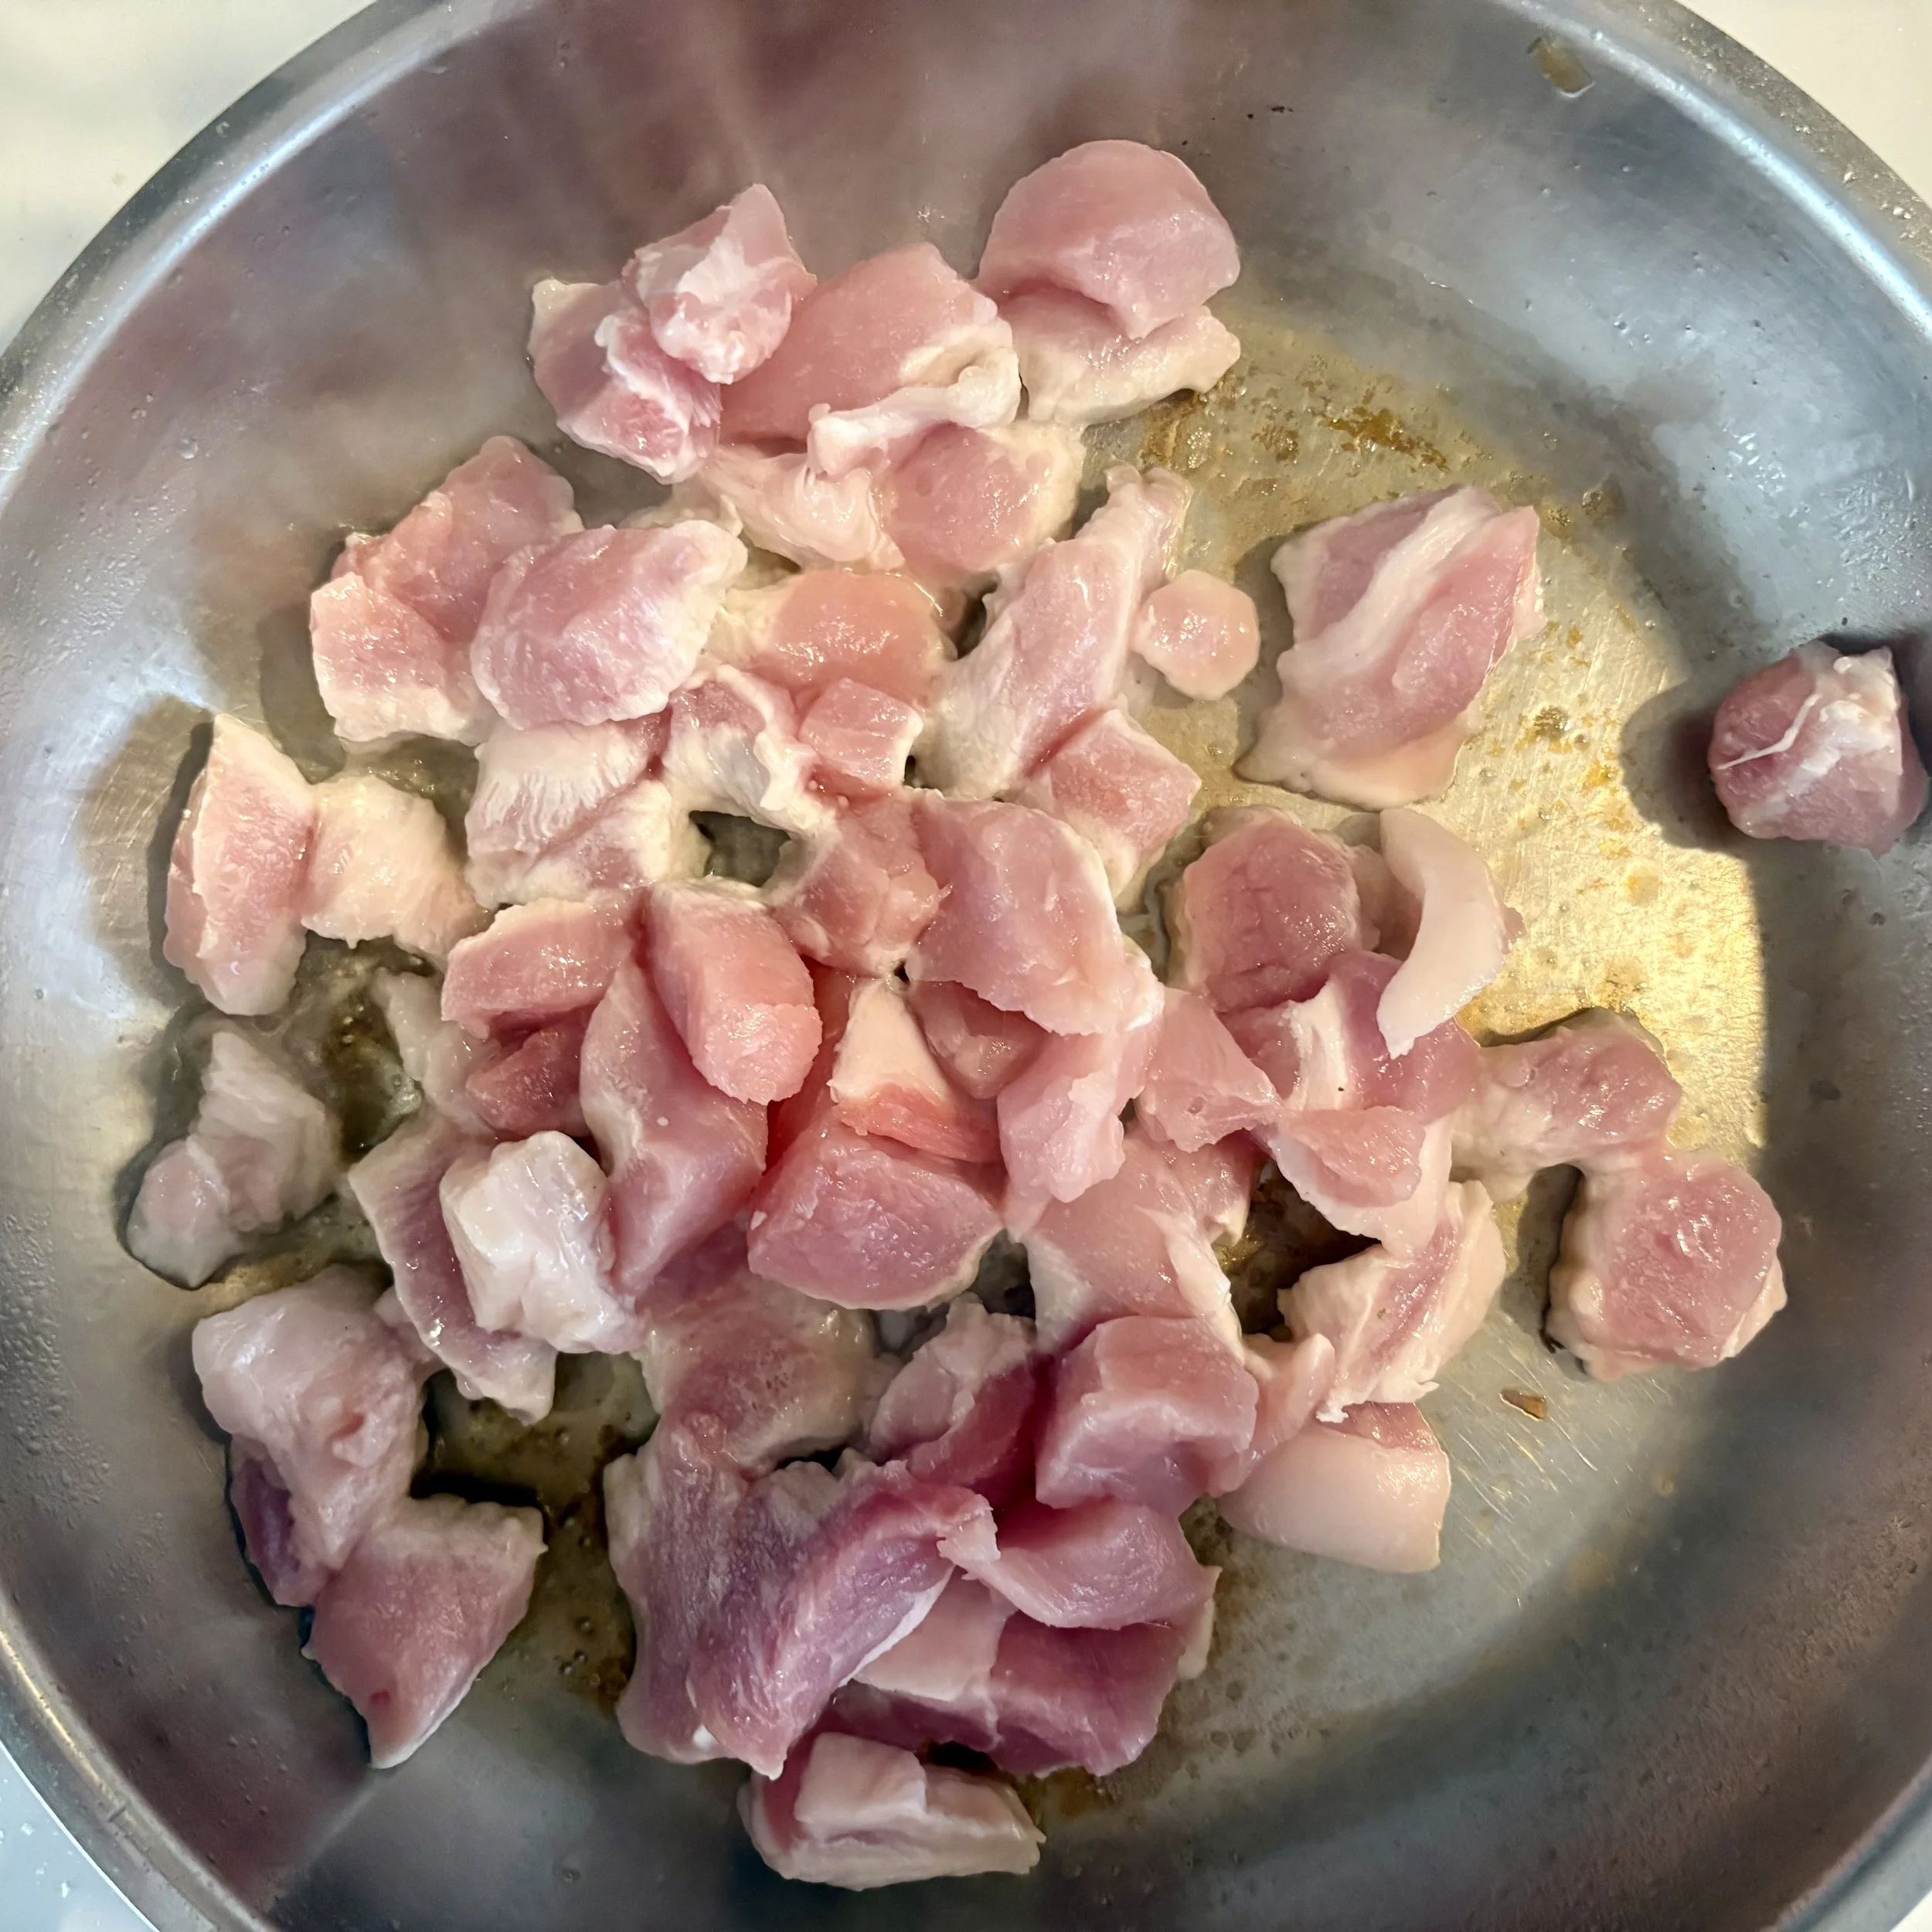
Protein should be cut small enough so that is mostly cooks through during the browning
Chop animal protein, such as chicken, pork, turkey, or beef, into small pieces. Cook in olive oil over medium-high heat in a wide sauté pan (avoid non-stick). When browned and mostly cooked, remove from the pan and set aside.
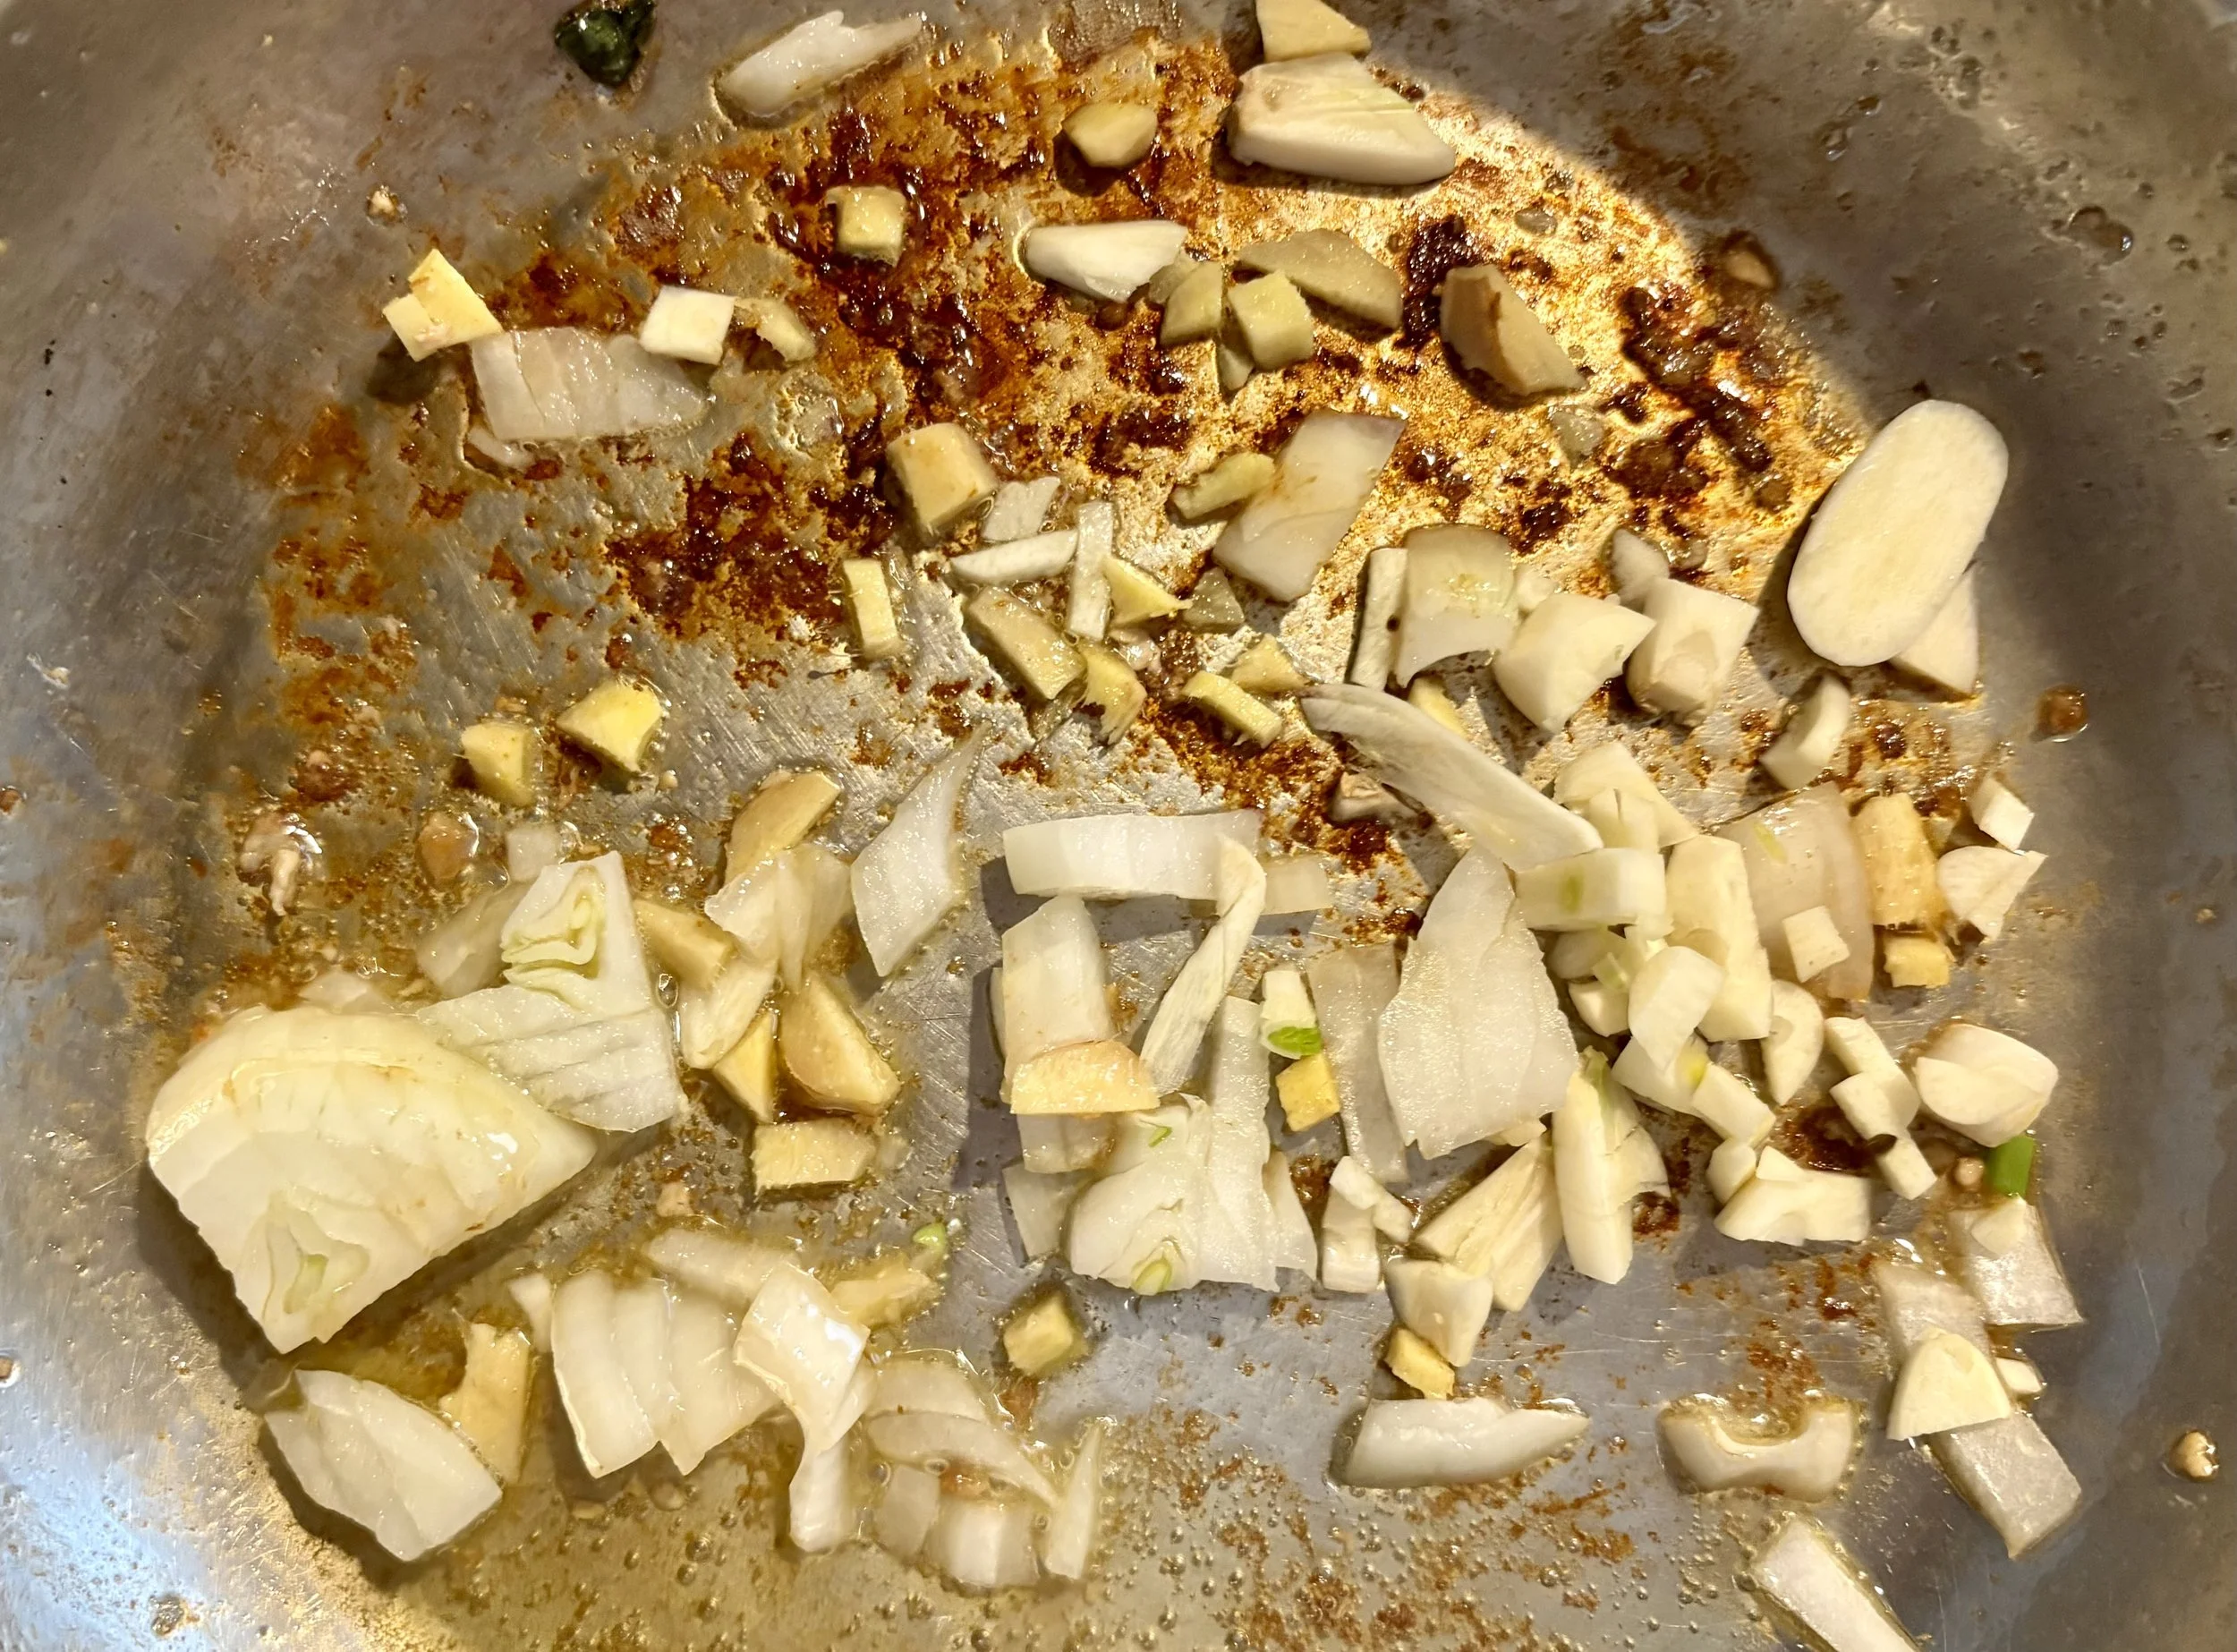
In the same wide sauté pan, finely chop and sauté fresh ginger, garlic, and onion on medium heat until the onion is translucent.
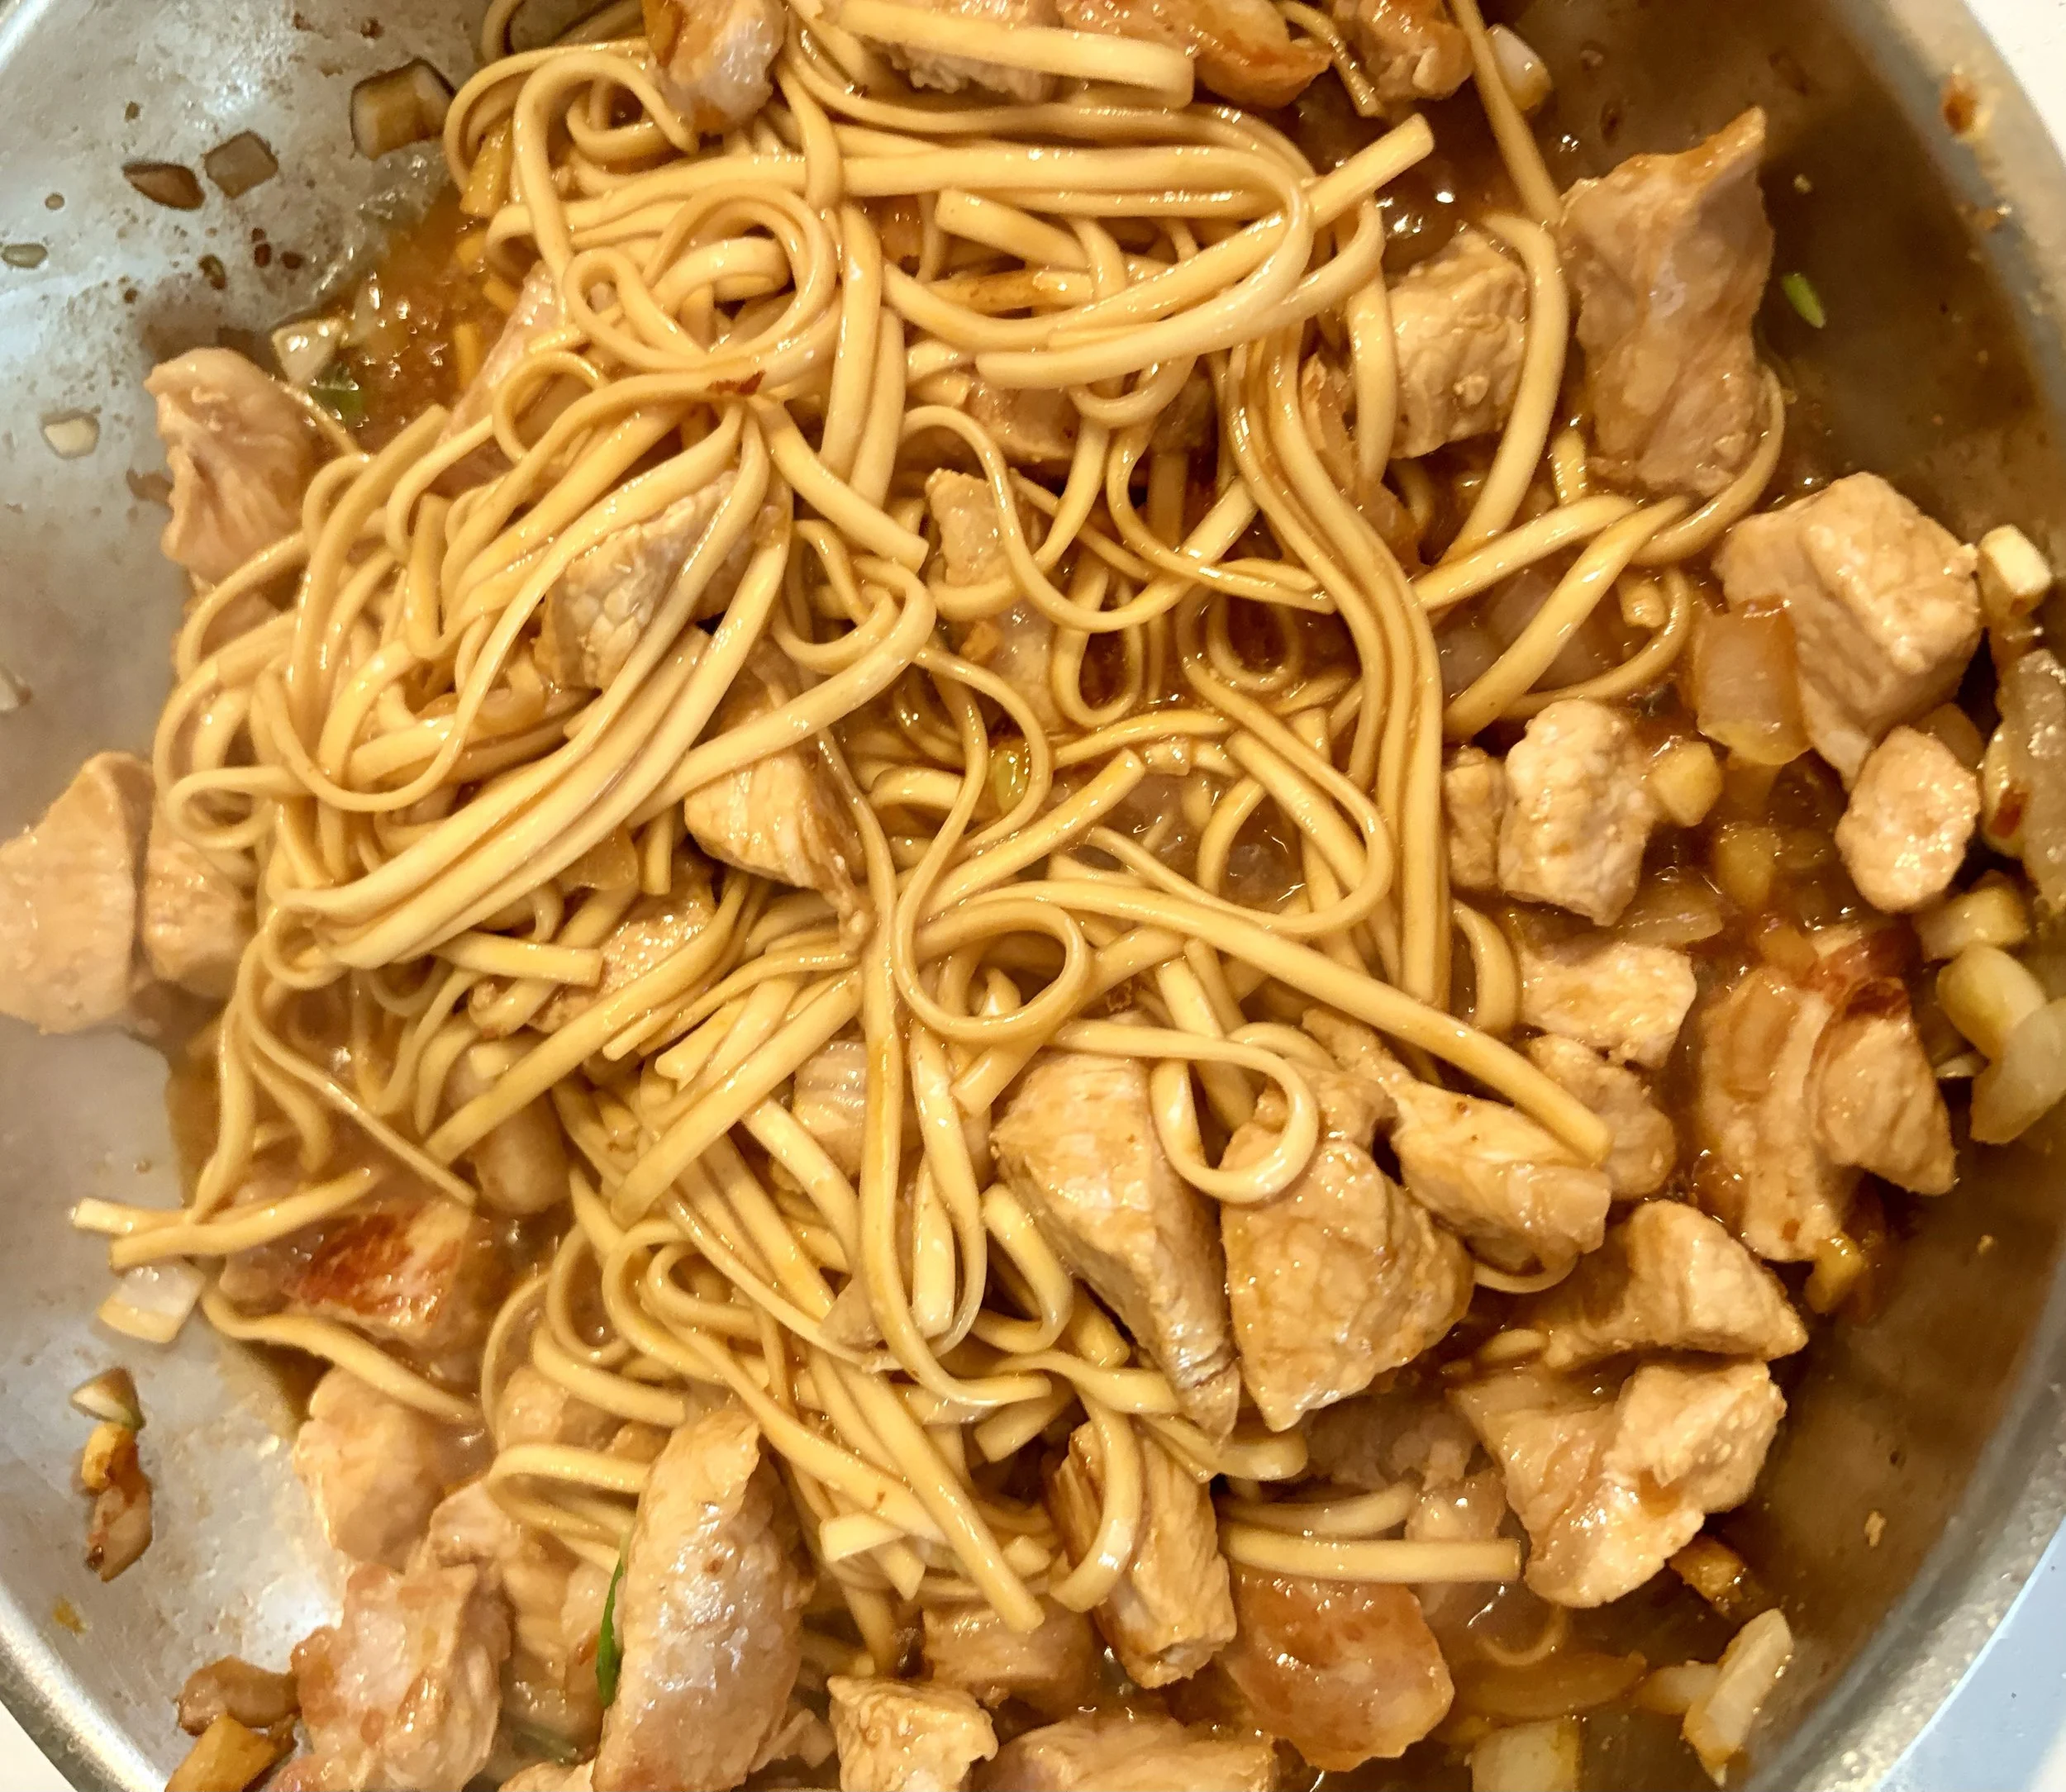
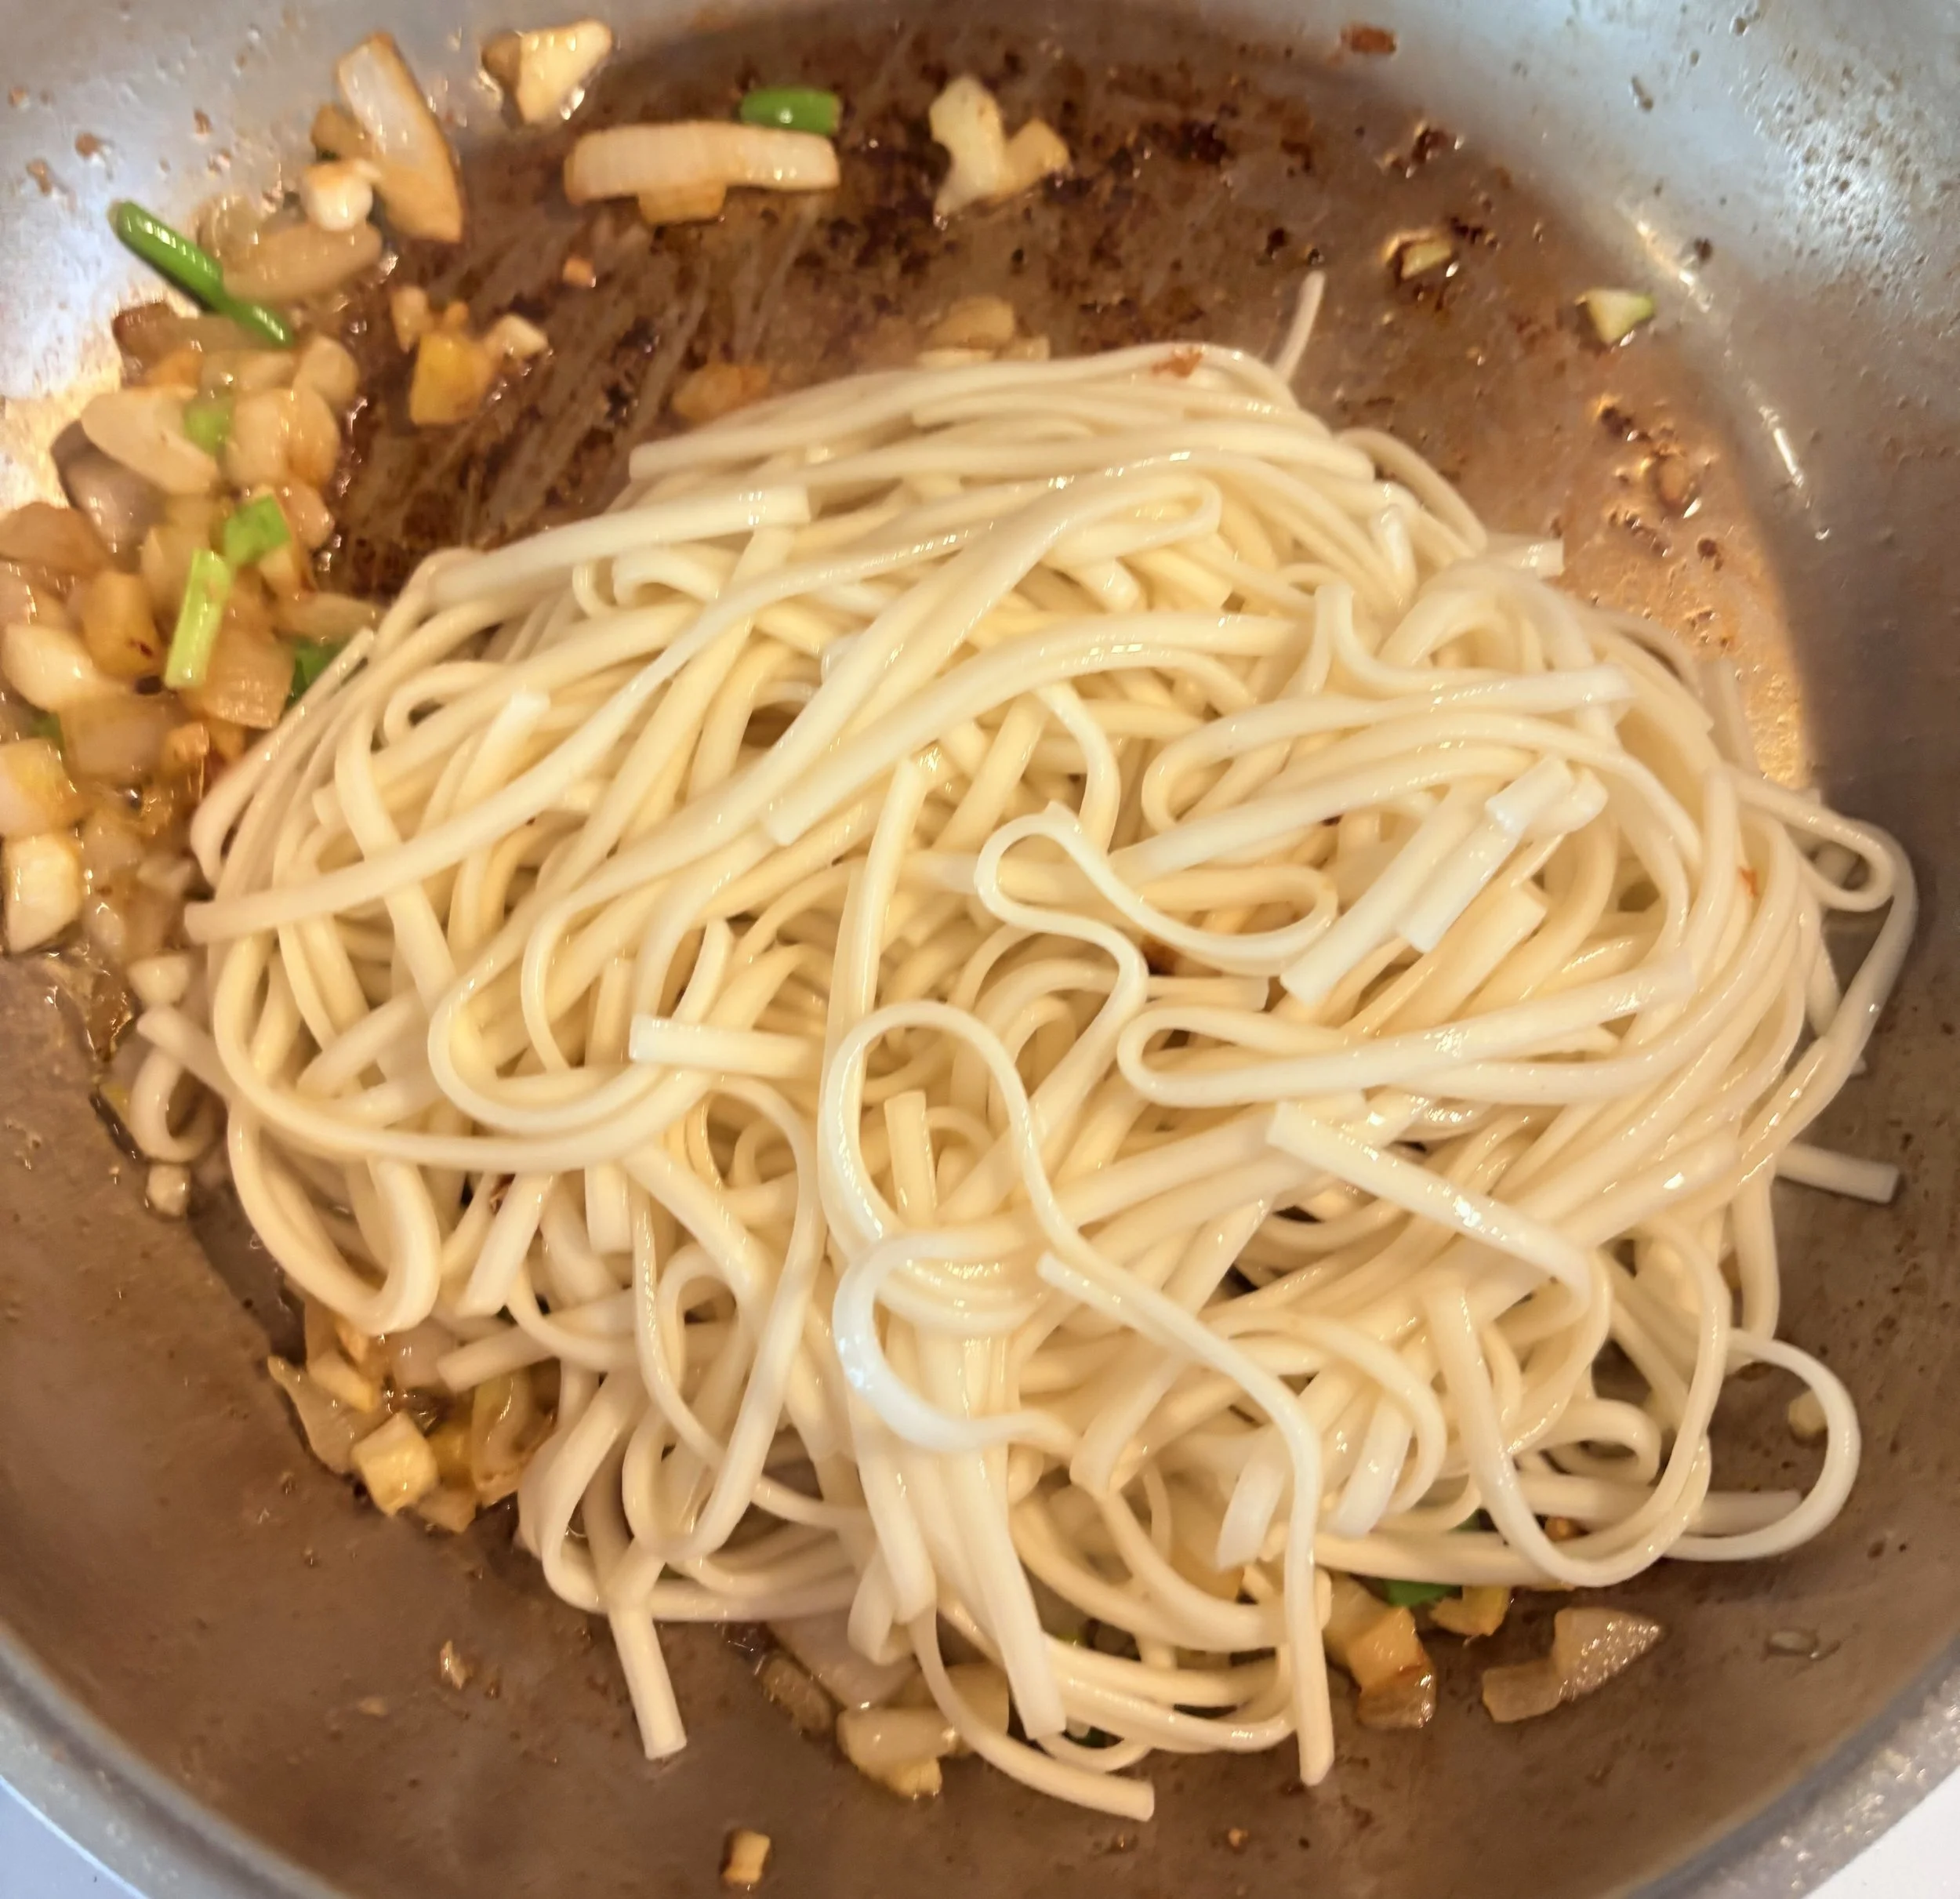
Return the cooked meat to the pan, then add the cooked ramen. Increase the heat.
Add soy sauce, white vinegar, brown sugar, and sesame oil. Mix well to evenly coat the noodles and ingredients.
Cover and cook for about 5 minutes, stirring often to prevent sticking and evenly distribute the flavors, then finish cooking the meat.
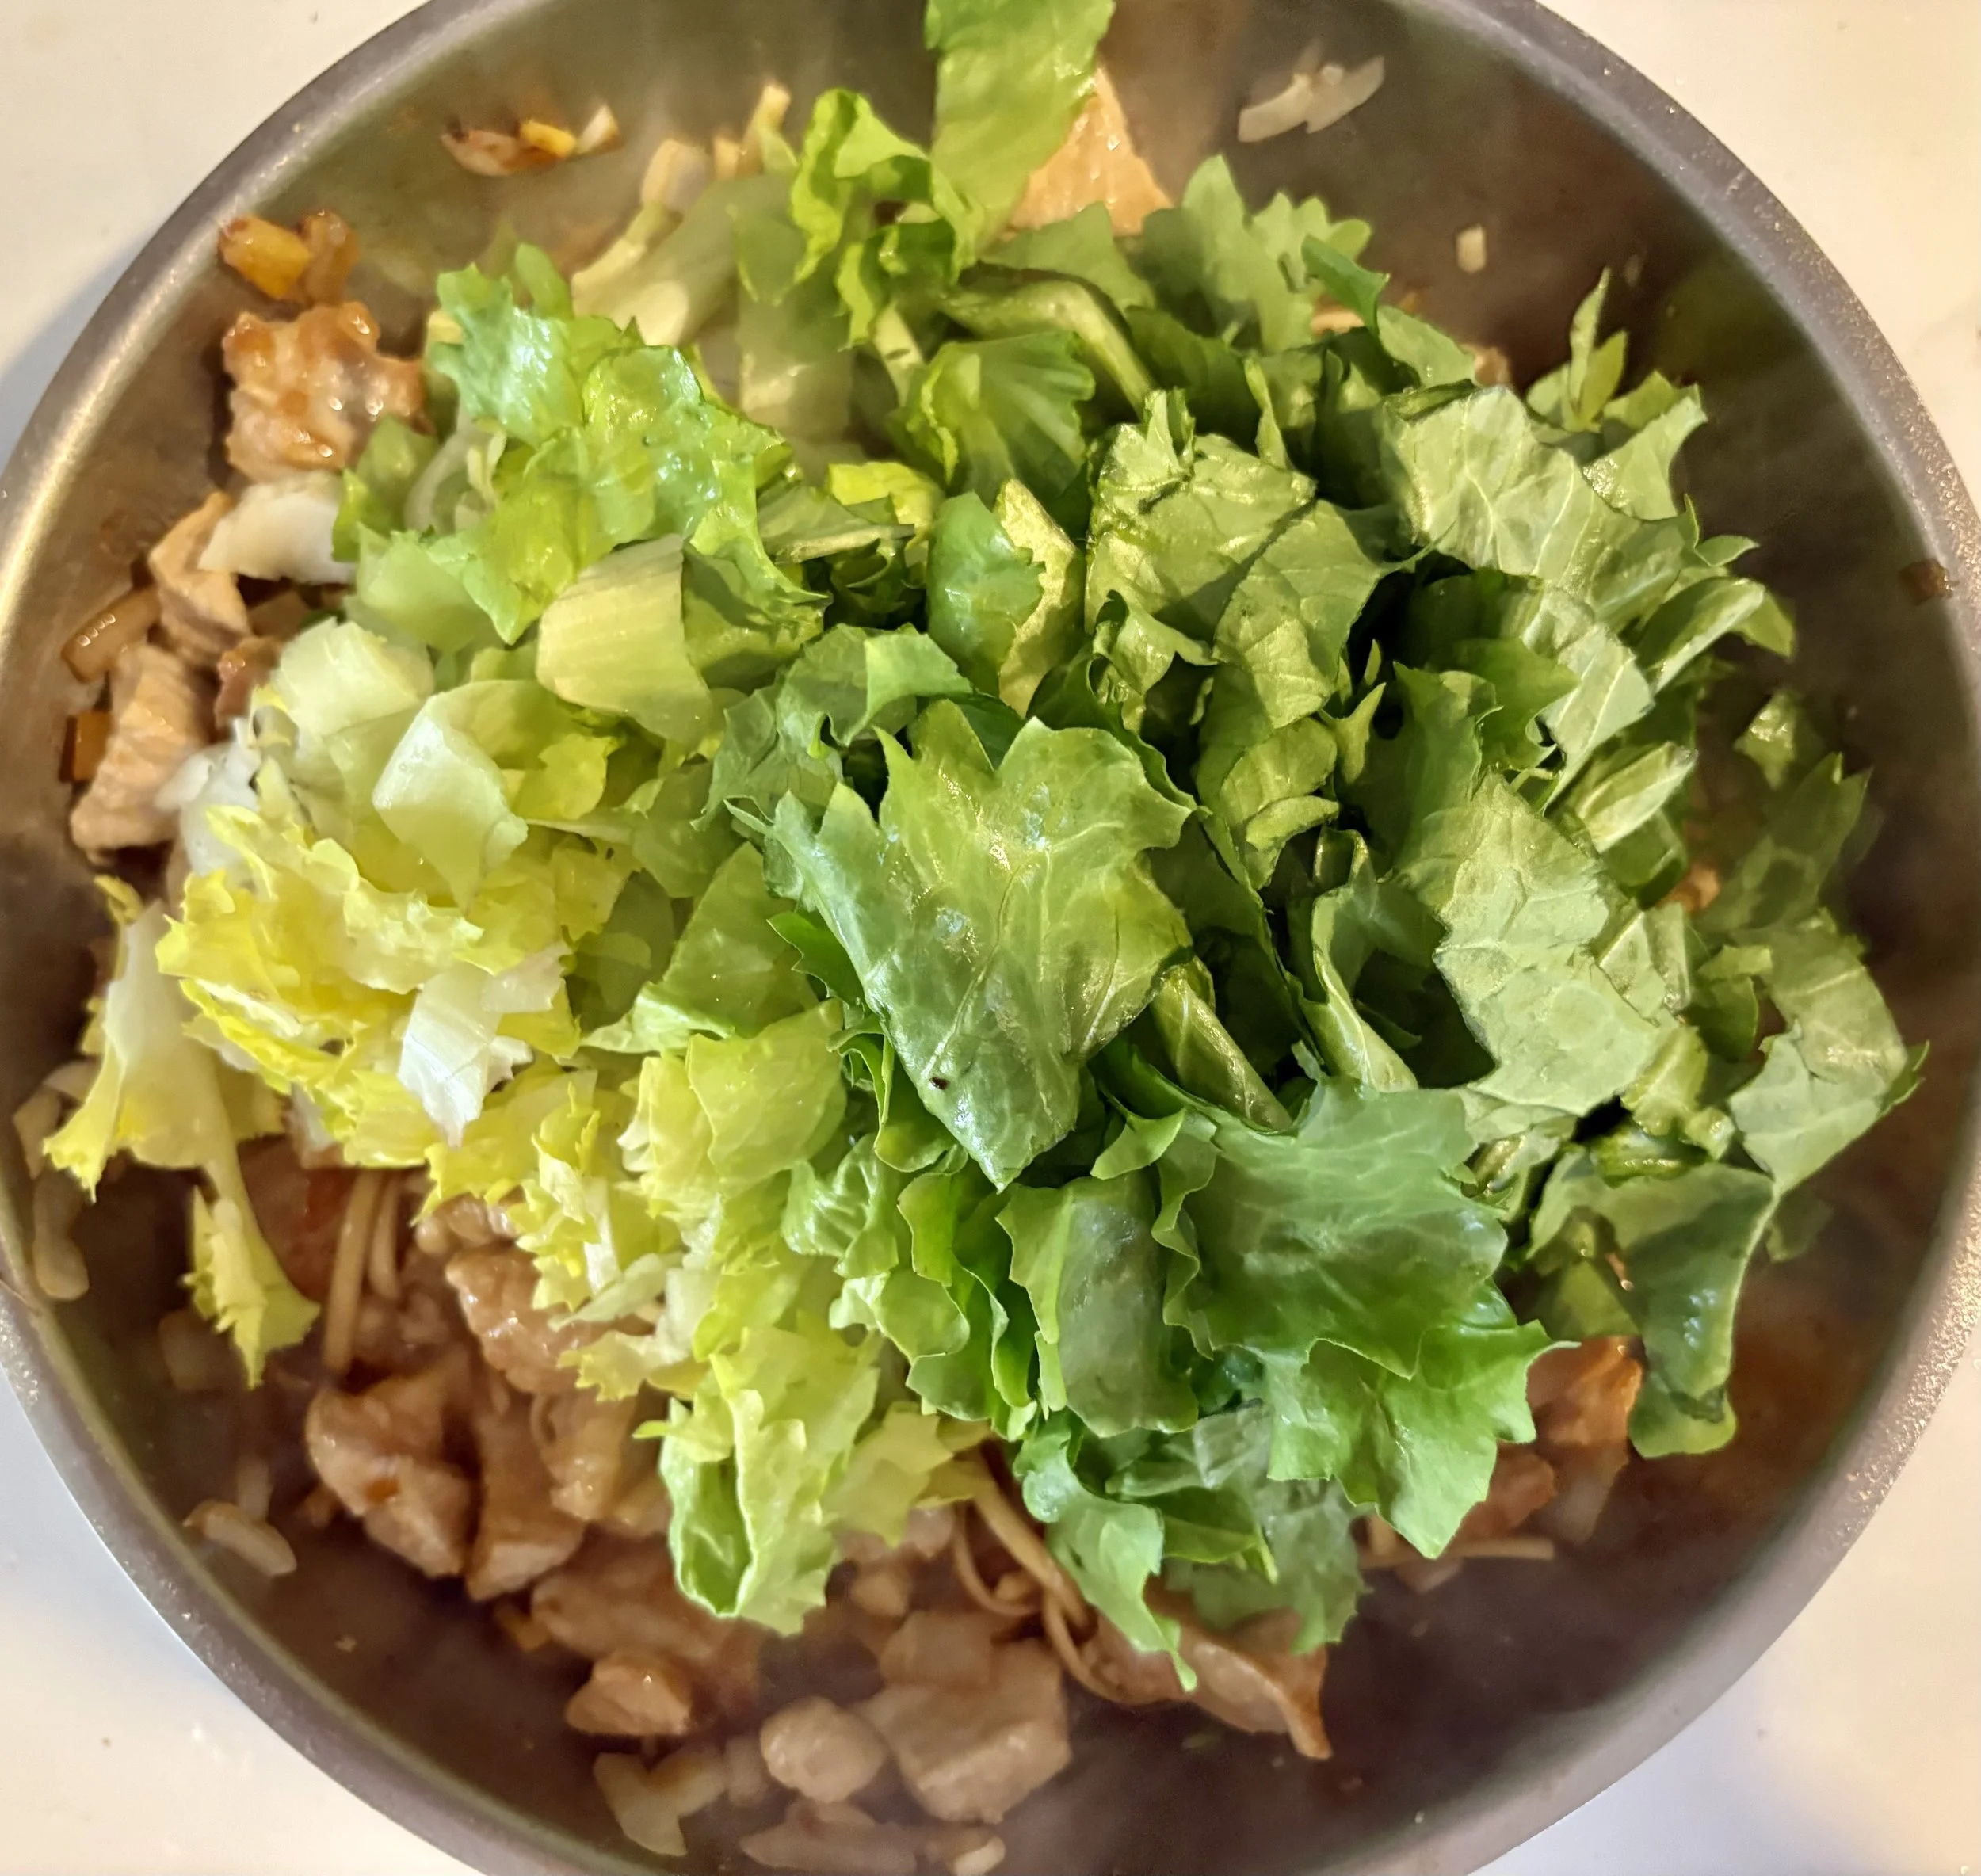
Add chopped escarole and cover to wilt, or add pre-steamed broccoli or similar alternatives at this point.
Remove from heat; add scallion.
This dish is satisfying, easy to prepare, and economical.
Add extra vegetables to the stir-fry, such as minced carrot, red pepper, or celery.
For last-minute vegetables, use frozen peas or steamed cauliflower.
Add fresh cilantro with scallions for a flavor boost.
Use these guidelines as a template and try different variations.

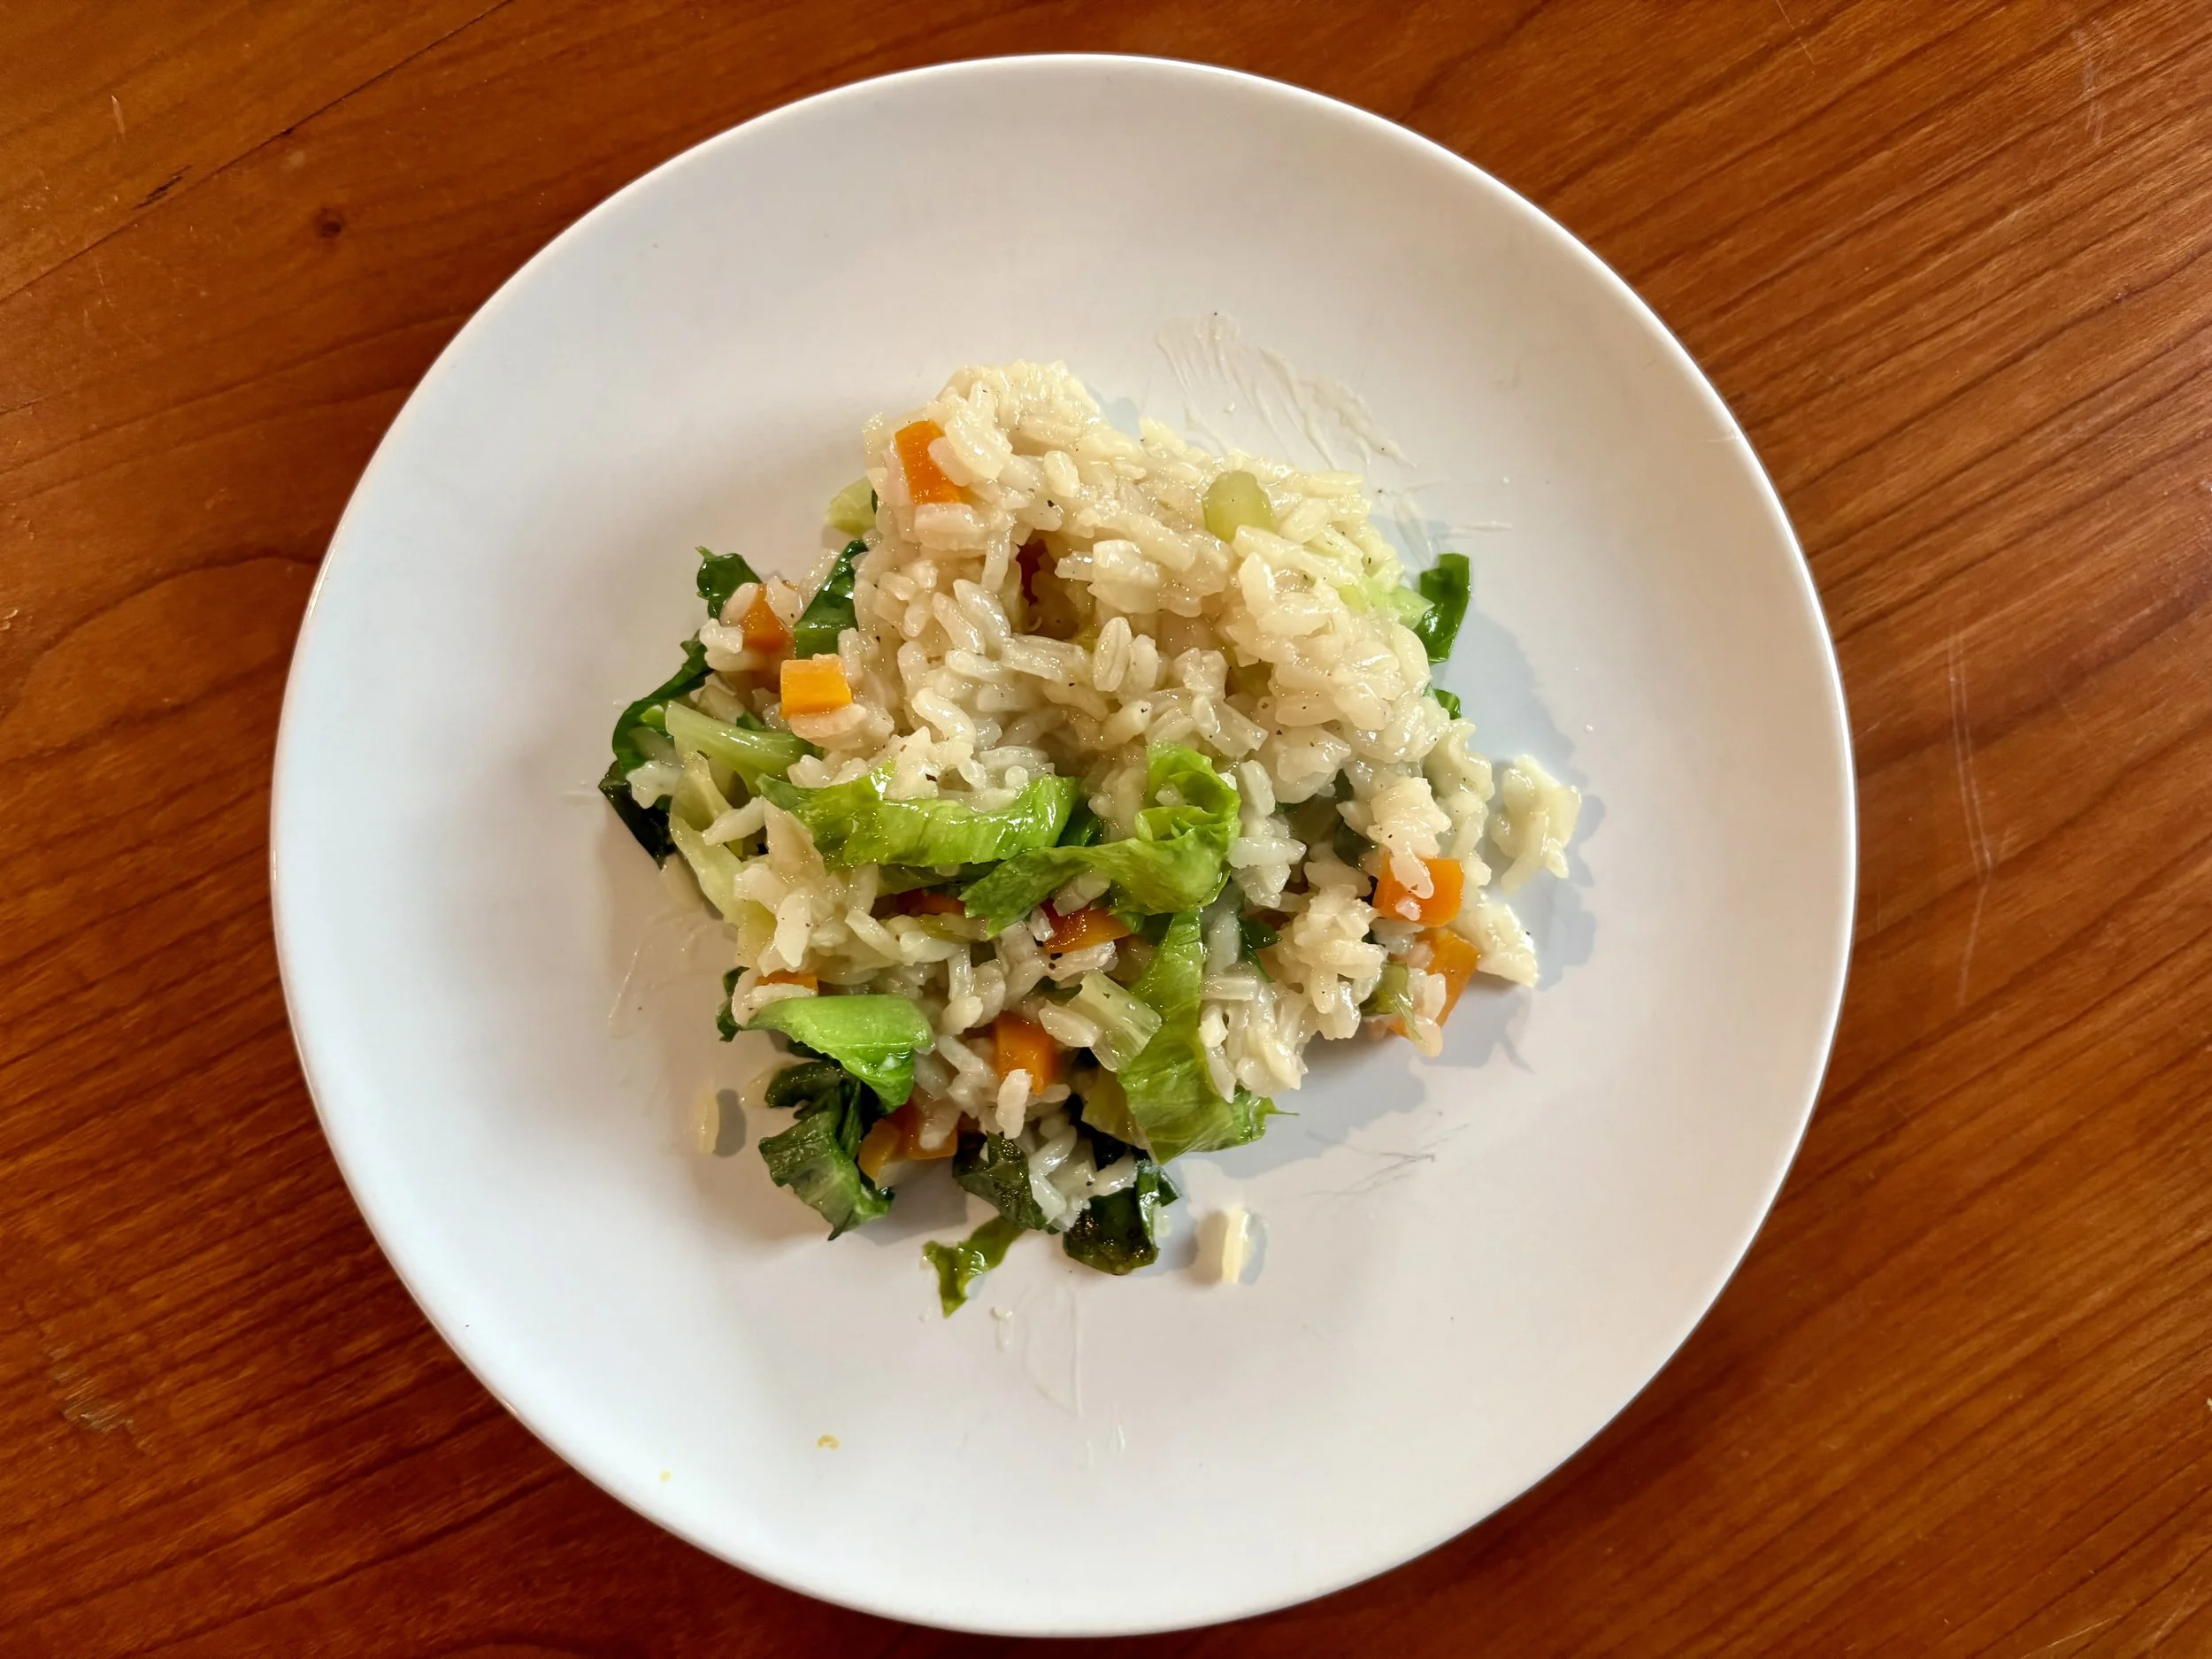
Veggi-Crisp Rice
We created this easy dish to utilize the homemade chicken stock we had in the refrigerator, rather than freezing it. This rice is basic but foundational. By adding extra vegetables, we created a healthier, more vibrant, and crunchier result. The neutral flavor pairs well with a variety of proteins.
Having all of your ingredients prepared and ready to add makes the cooking much more enjoyable.
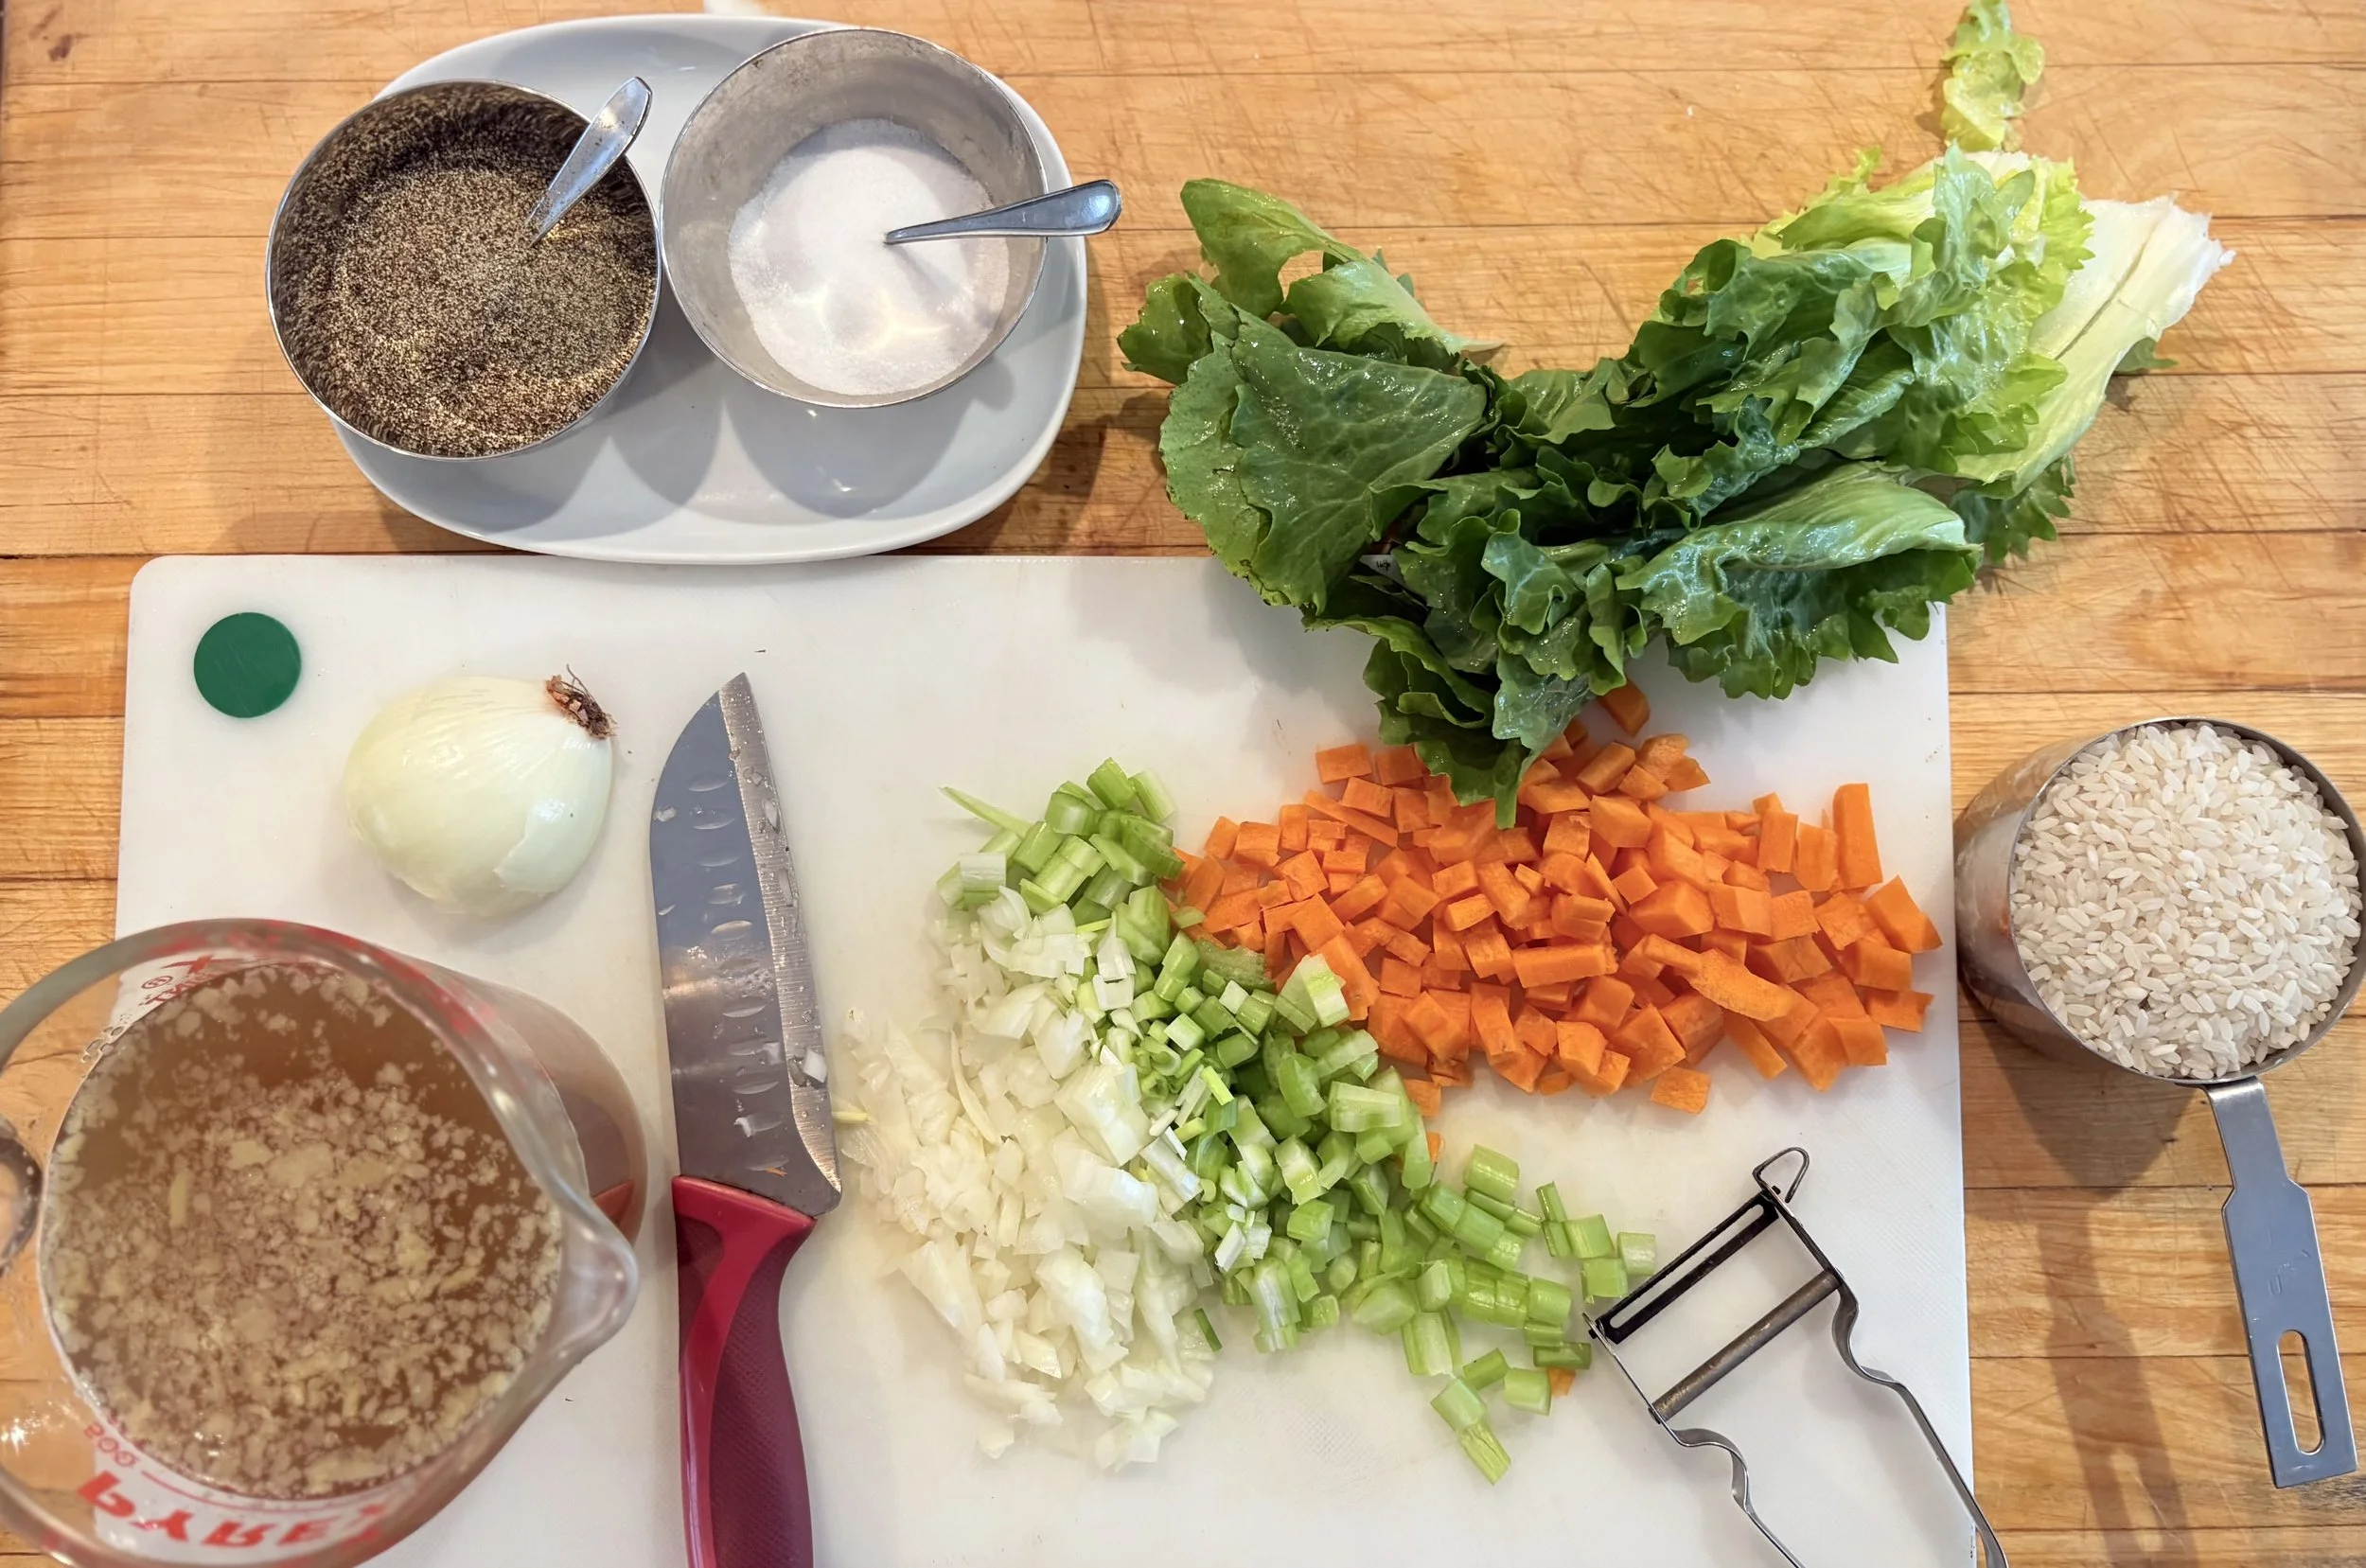
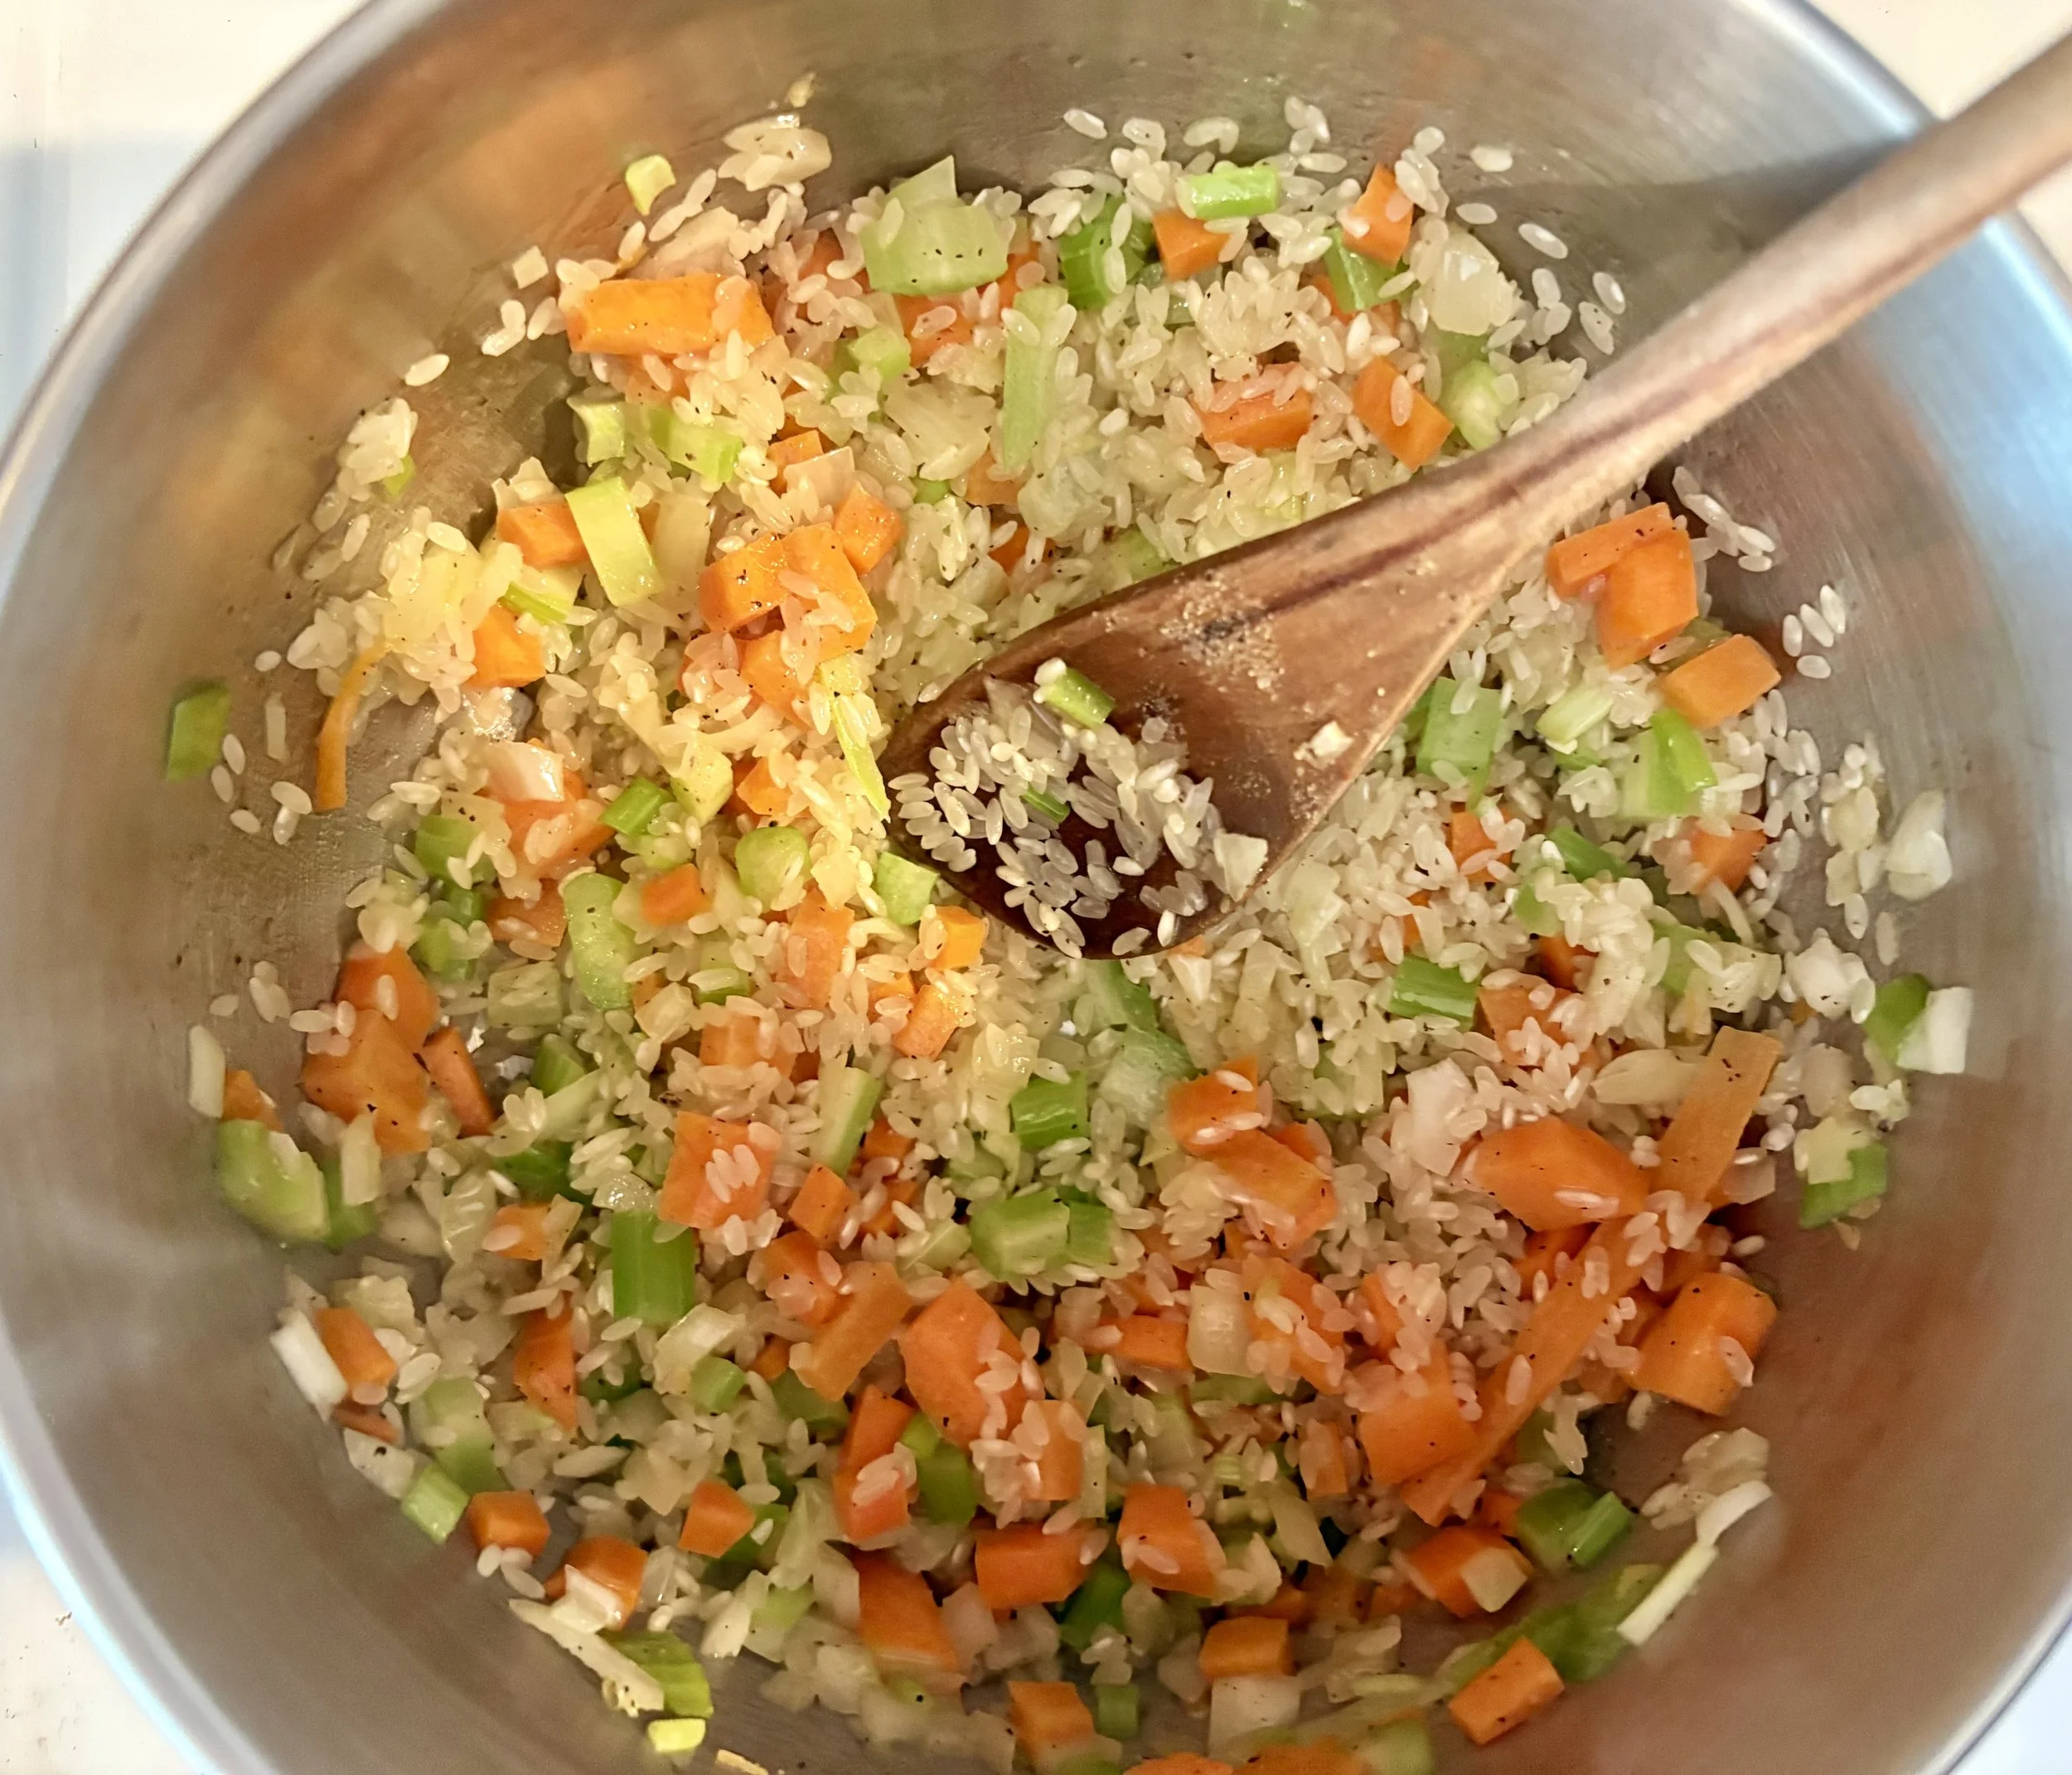
First, create a mirepoix by sautéing onions, carrots, and celery in butter over low heat until the onions are translucent. We also added green onions we had on hand. Once the vegetables are translucent, add the rice. Remember to use a 1:2 ratio of rice to liquid.
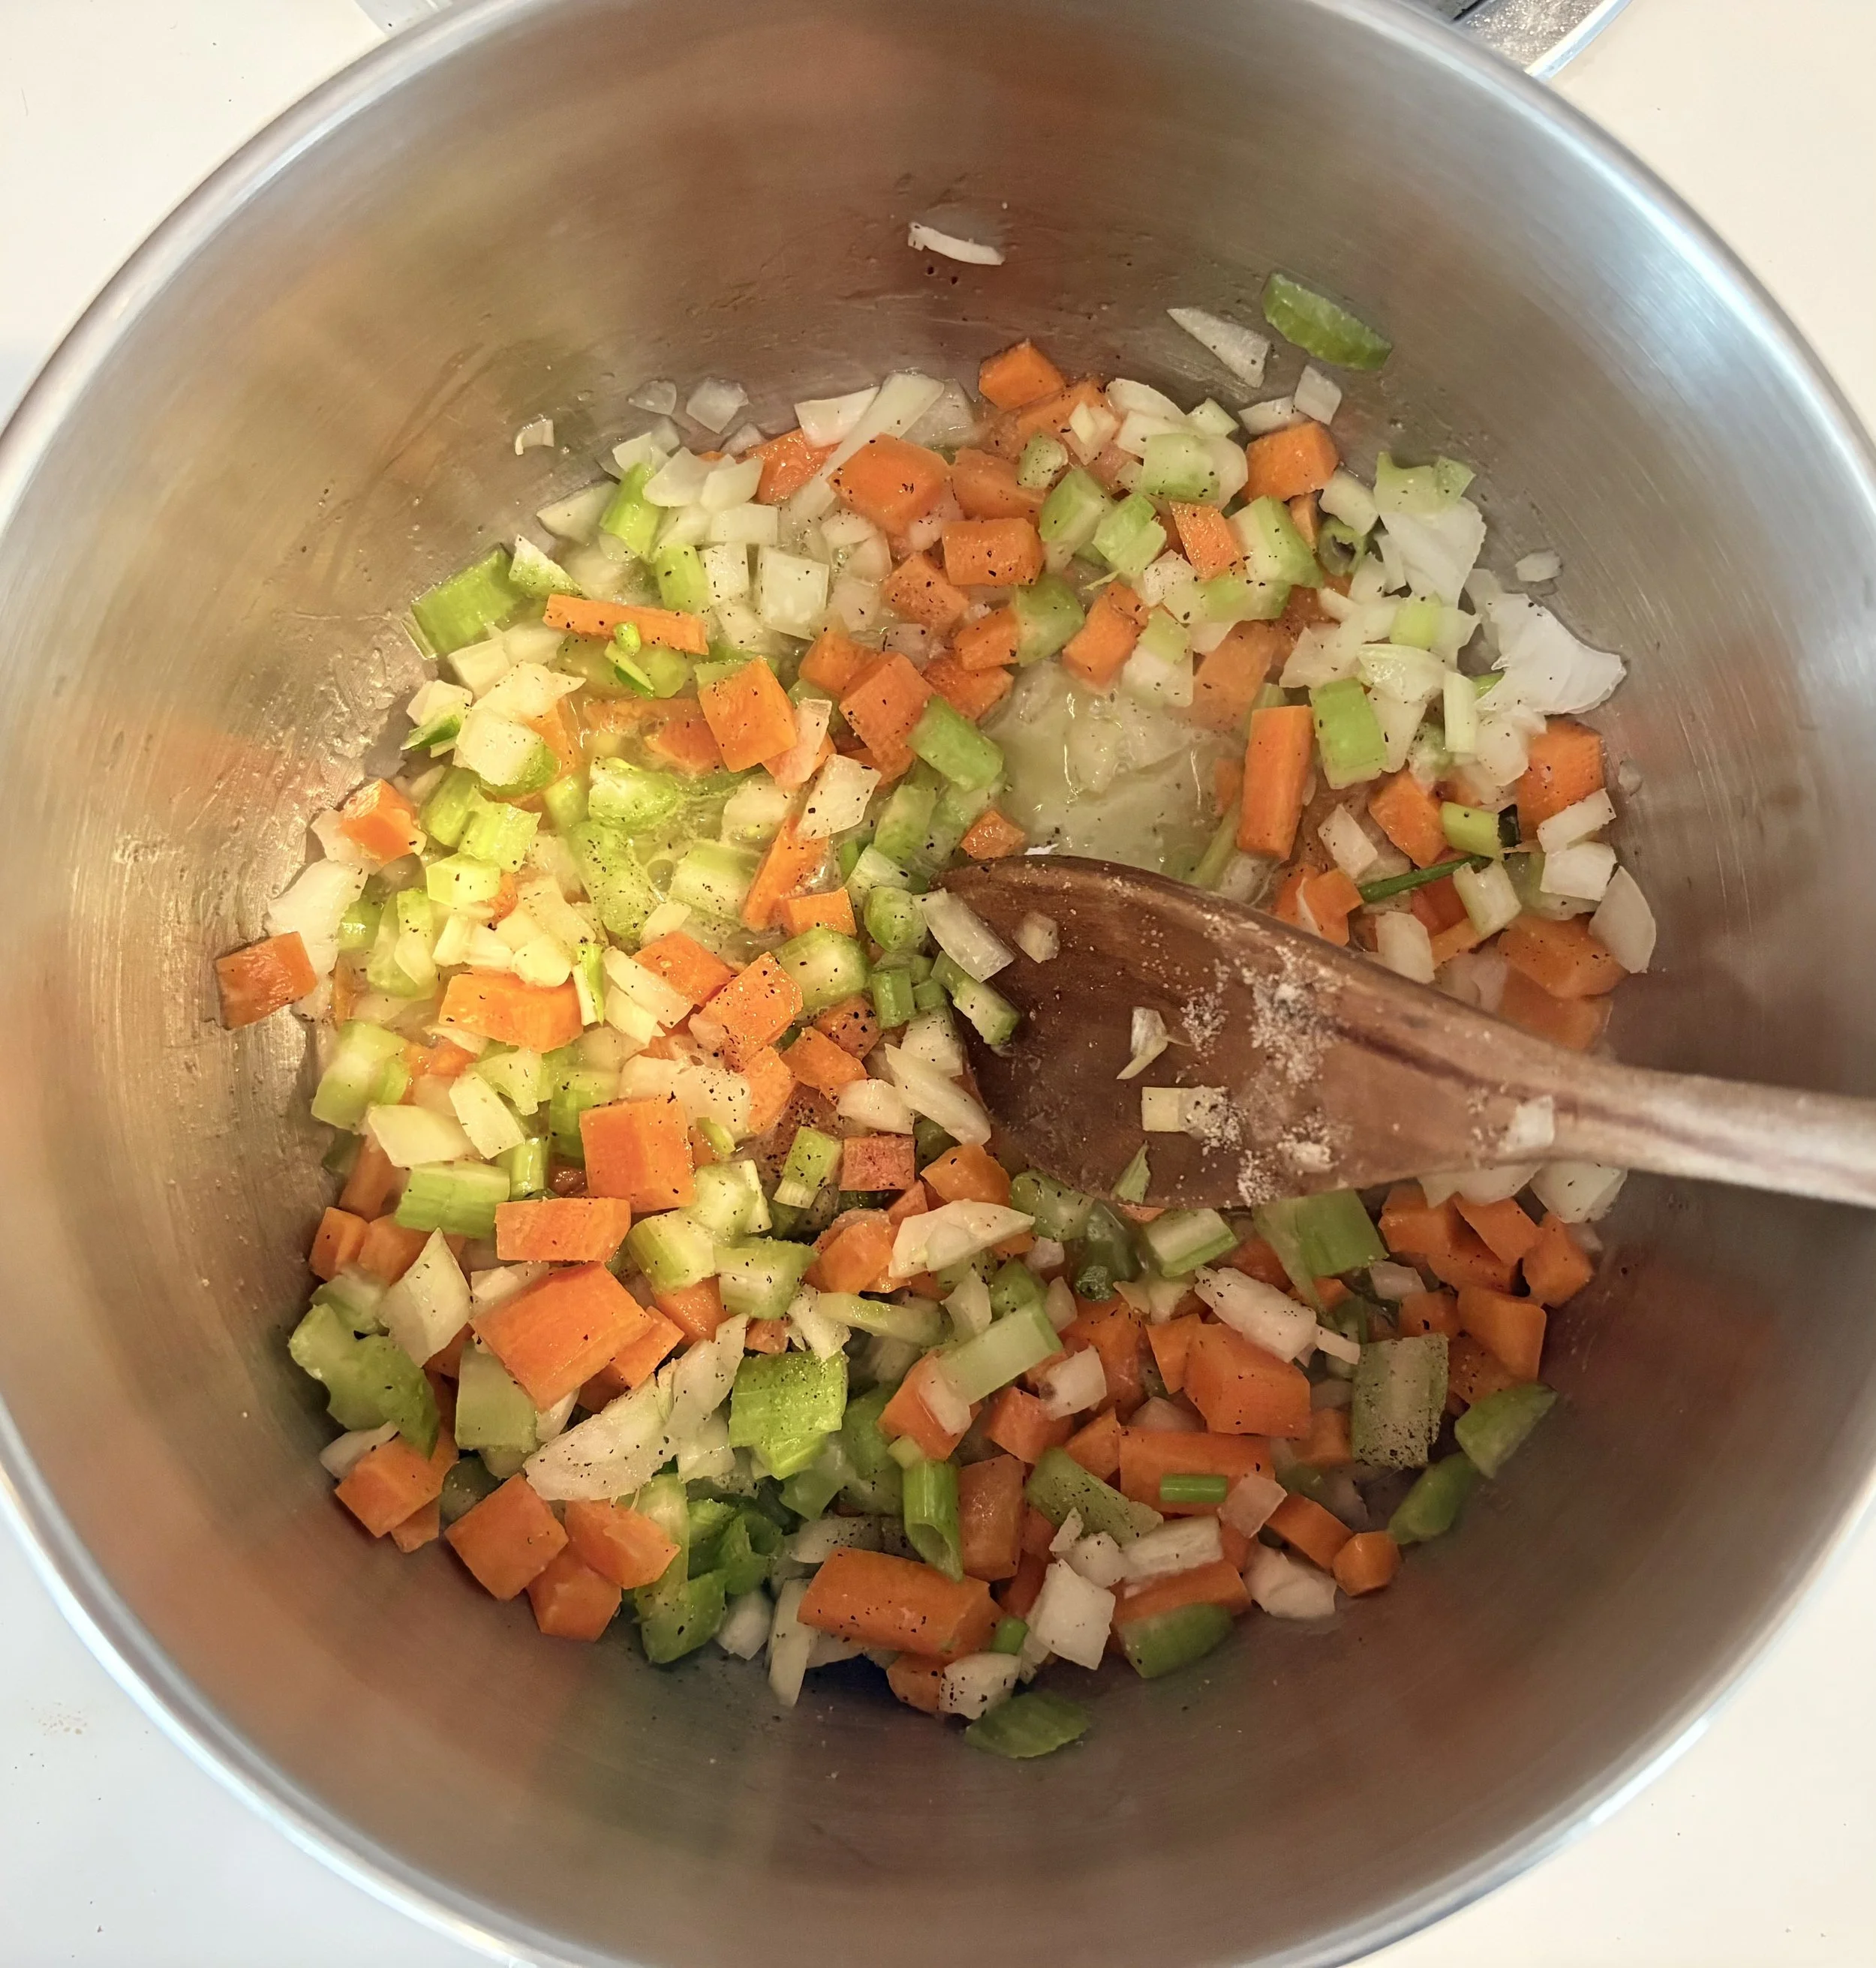
Mirapoix is the starting point of many wonderful dishes. Be sure to always have its components on hand.
We used medium grain rice, but long grain brown rice can also be used. Cooking times may vary depending on the type of rice.
Next, add 1 cup of medium-grain rice along with salt and pepper, and continue cooking on low. Any variation of rice can be used.
After seasoning, stir the rice until nicely coated with butter. Then, increase the heat to medium-high.
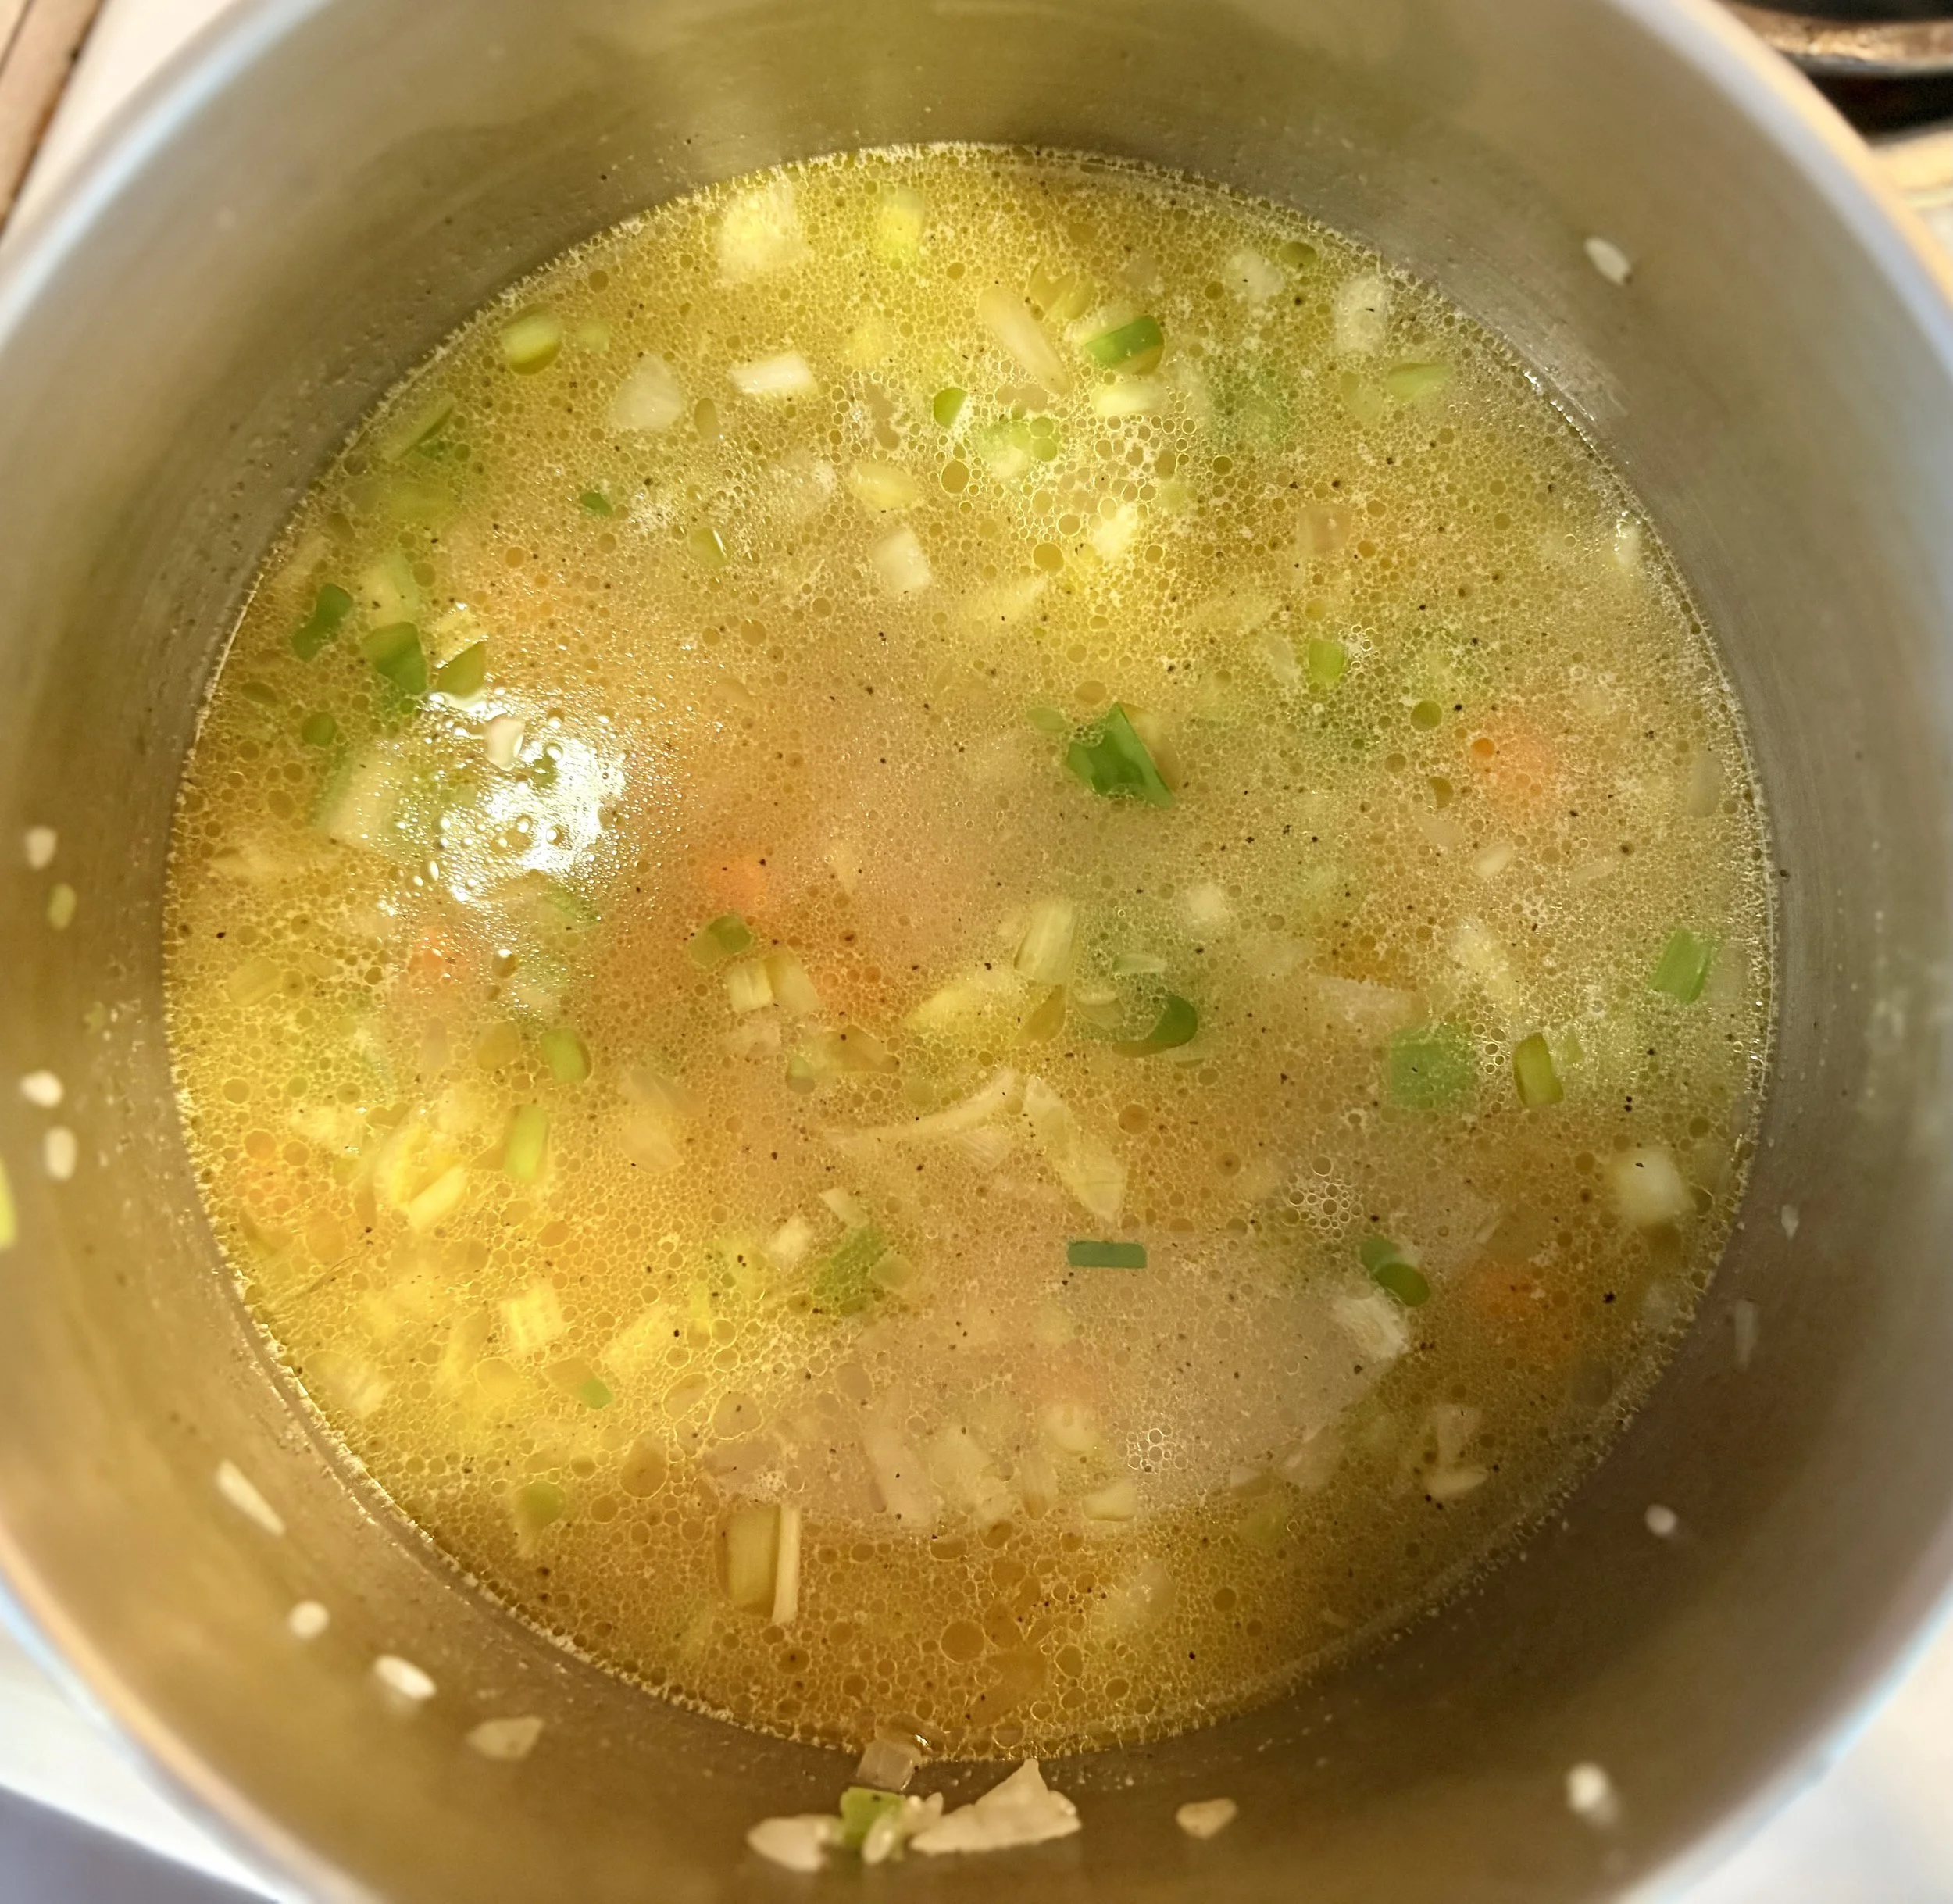
Gradually add two cups of broth in a slow stream, maintaining a slight boil. Once all the liquid is in, reduce the heat to low and cover the pot tightly. Leave it unattended for 20 minutes.
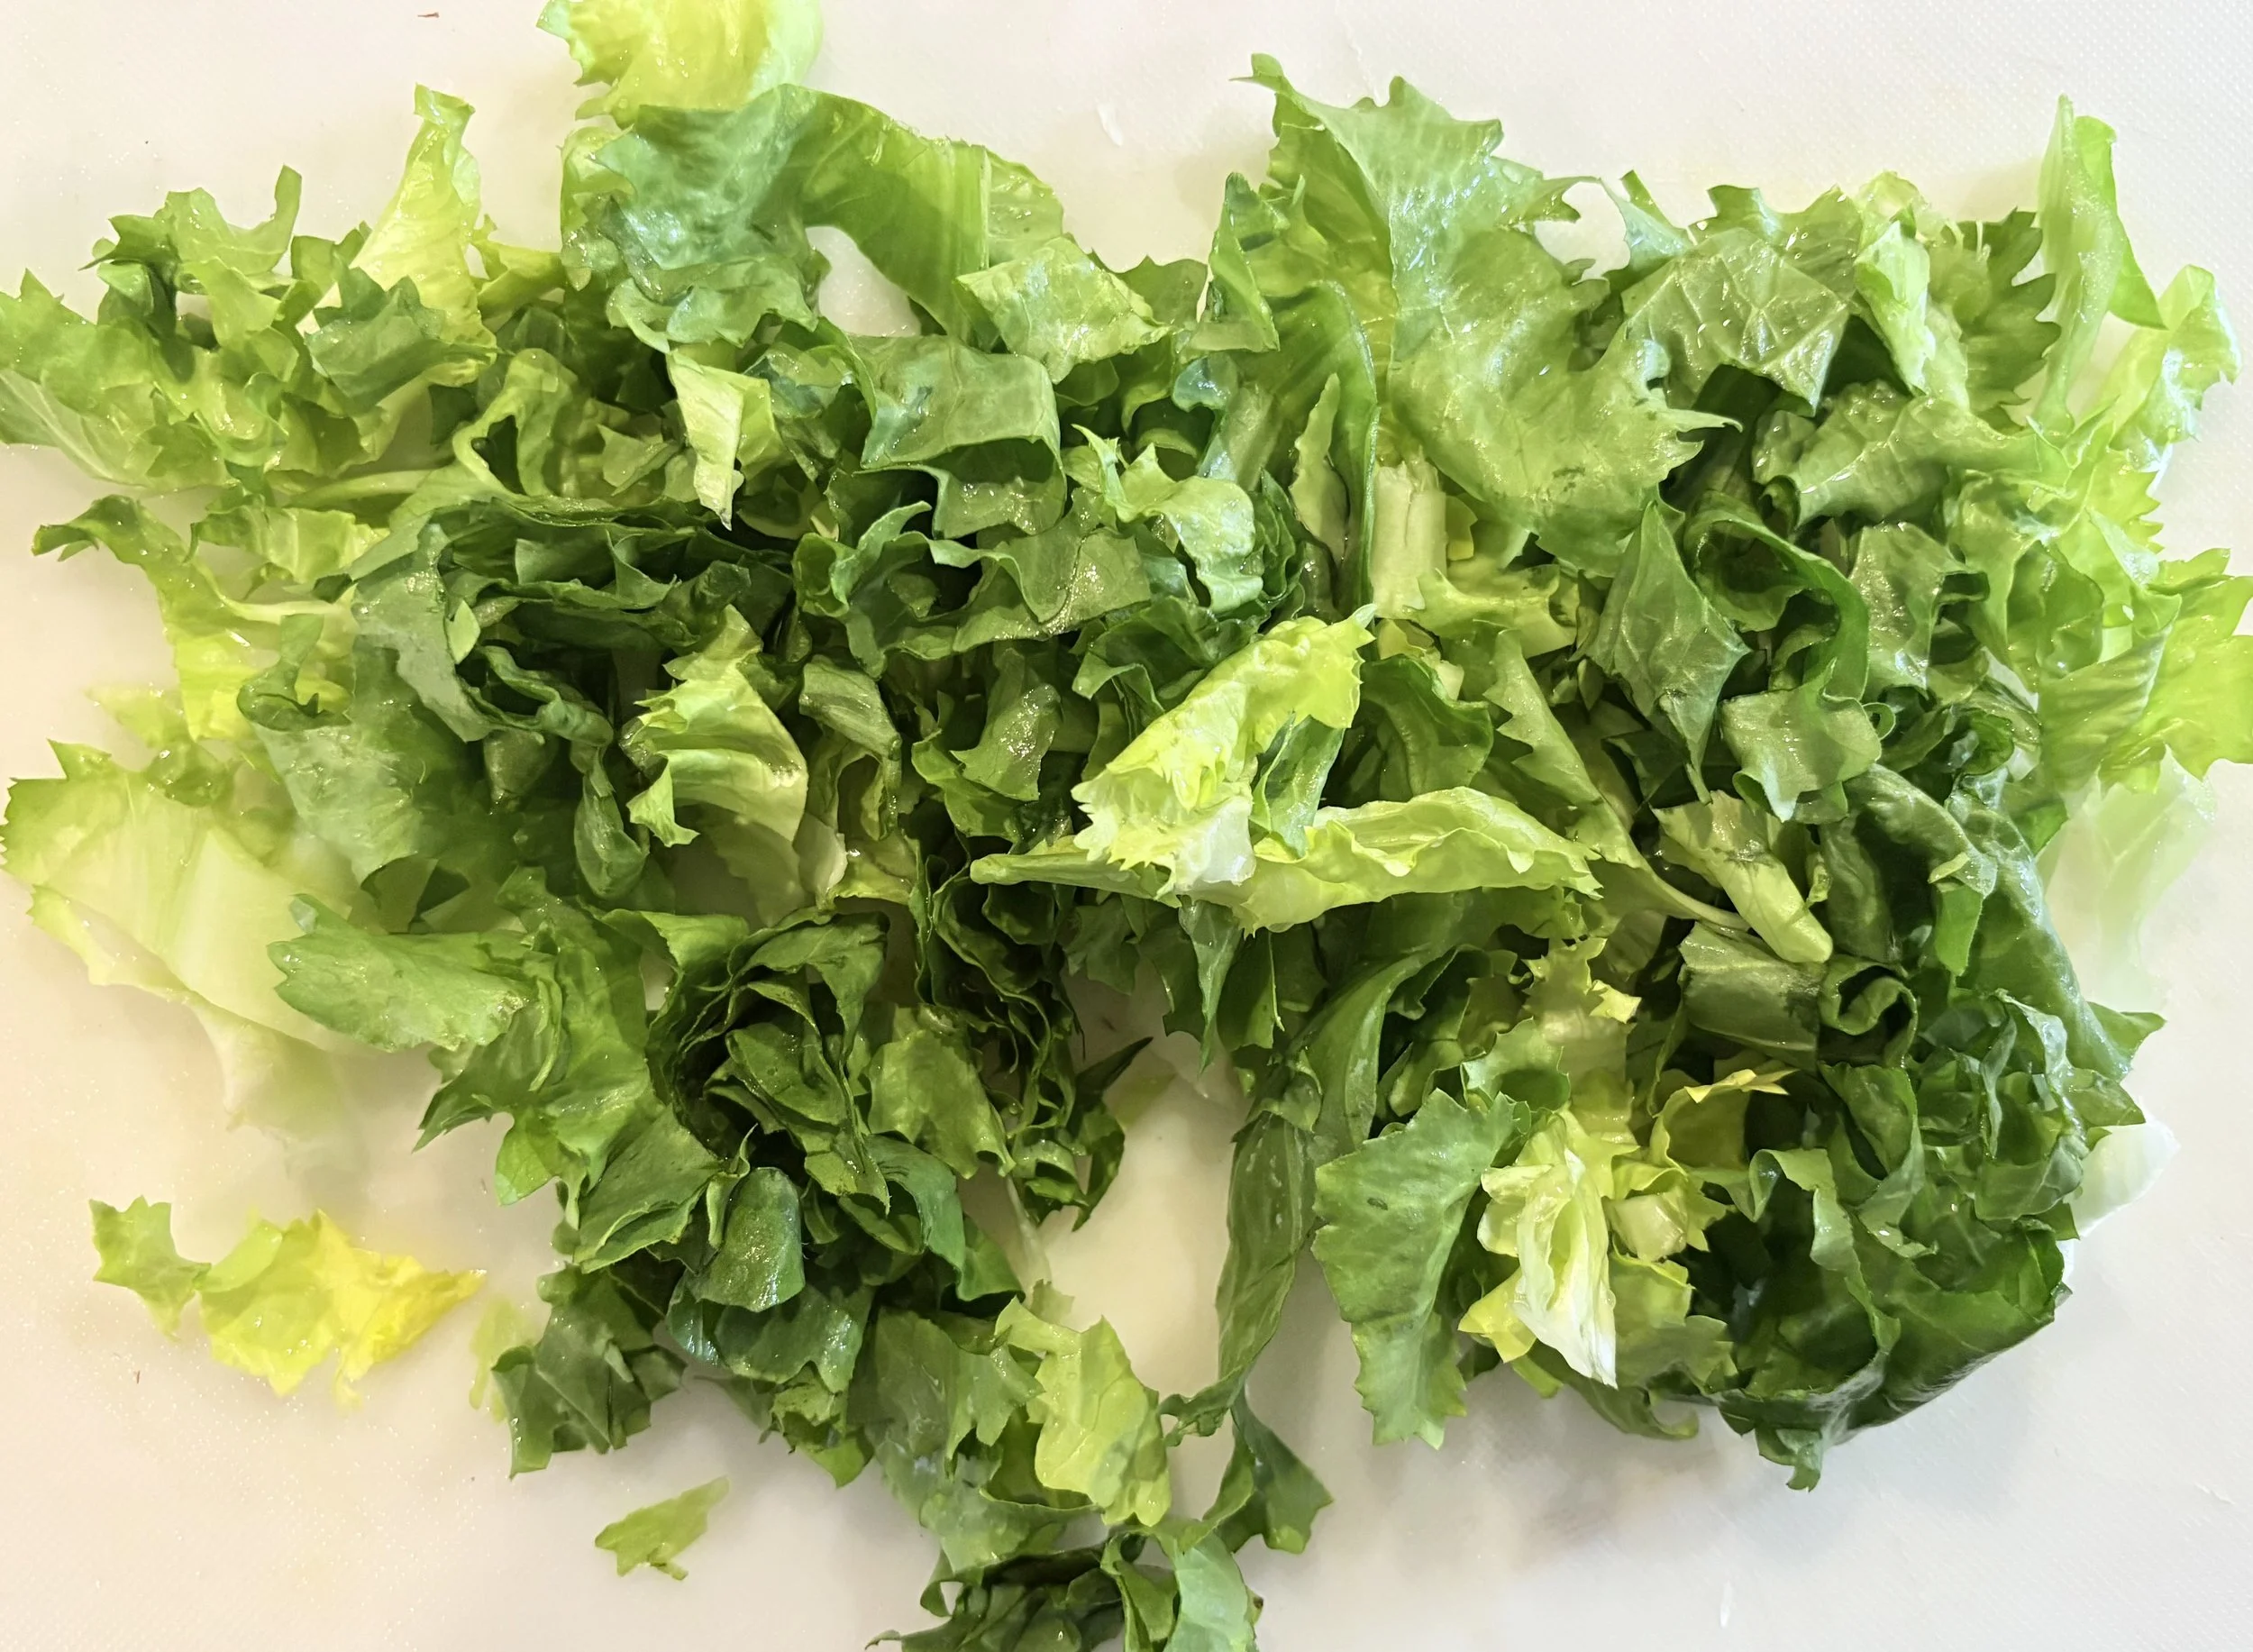
Escarole shows up in many Buckman Street Kitchen recipes as it is one of our favorite ingredients.
While the rice simmers, chop the escarole into coarse pieces. We always use lots of escarole, as it reduces in size during cooking.
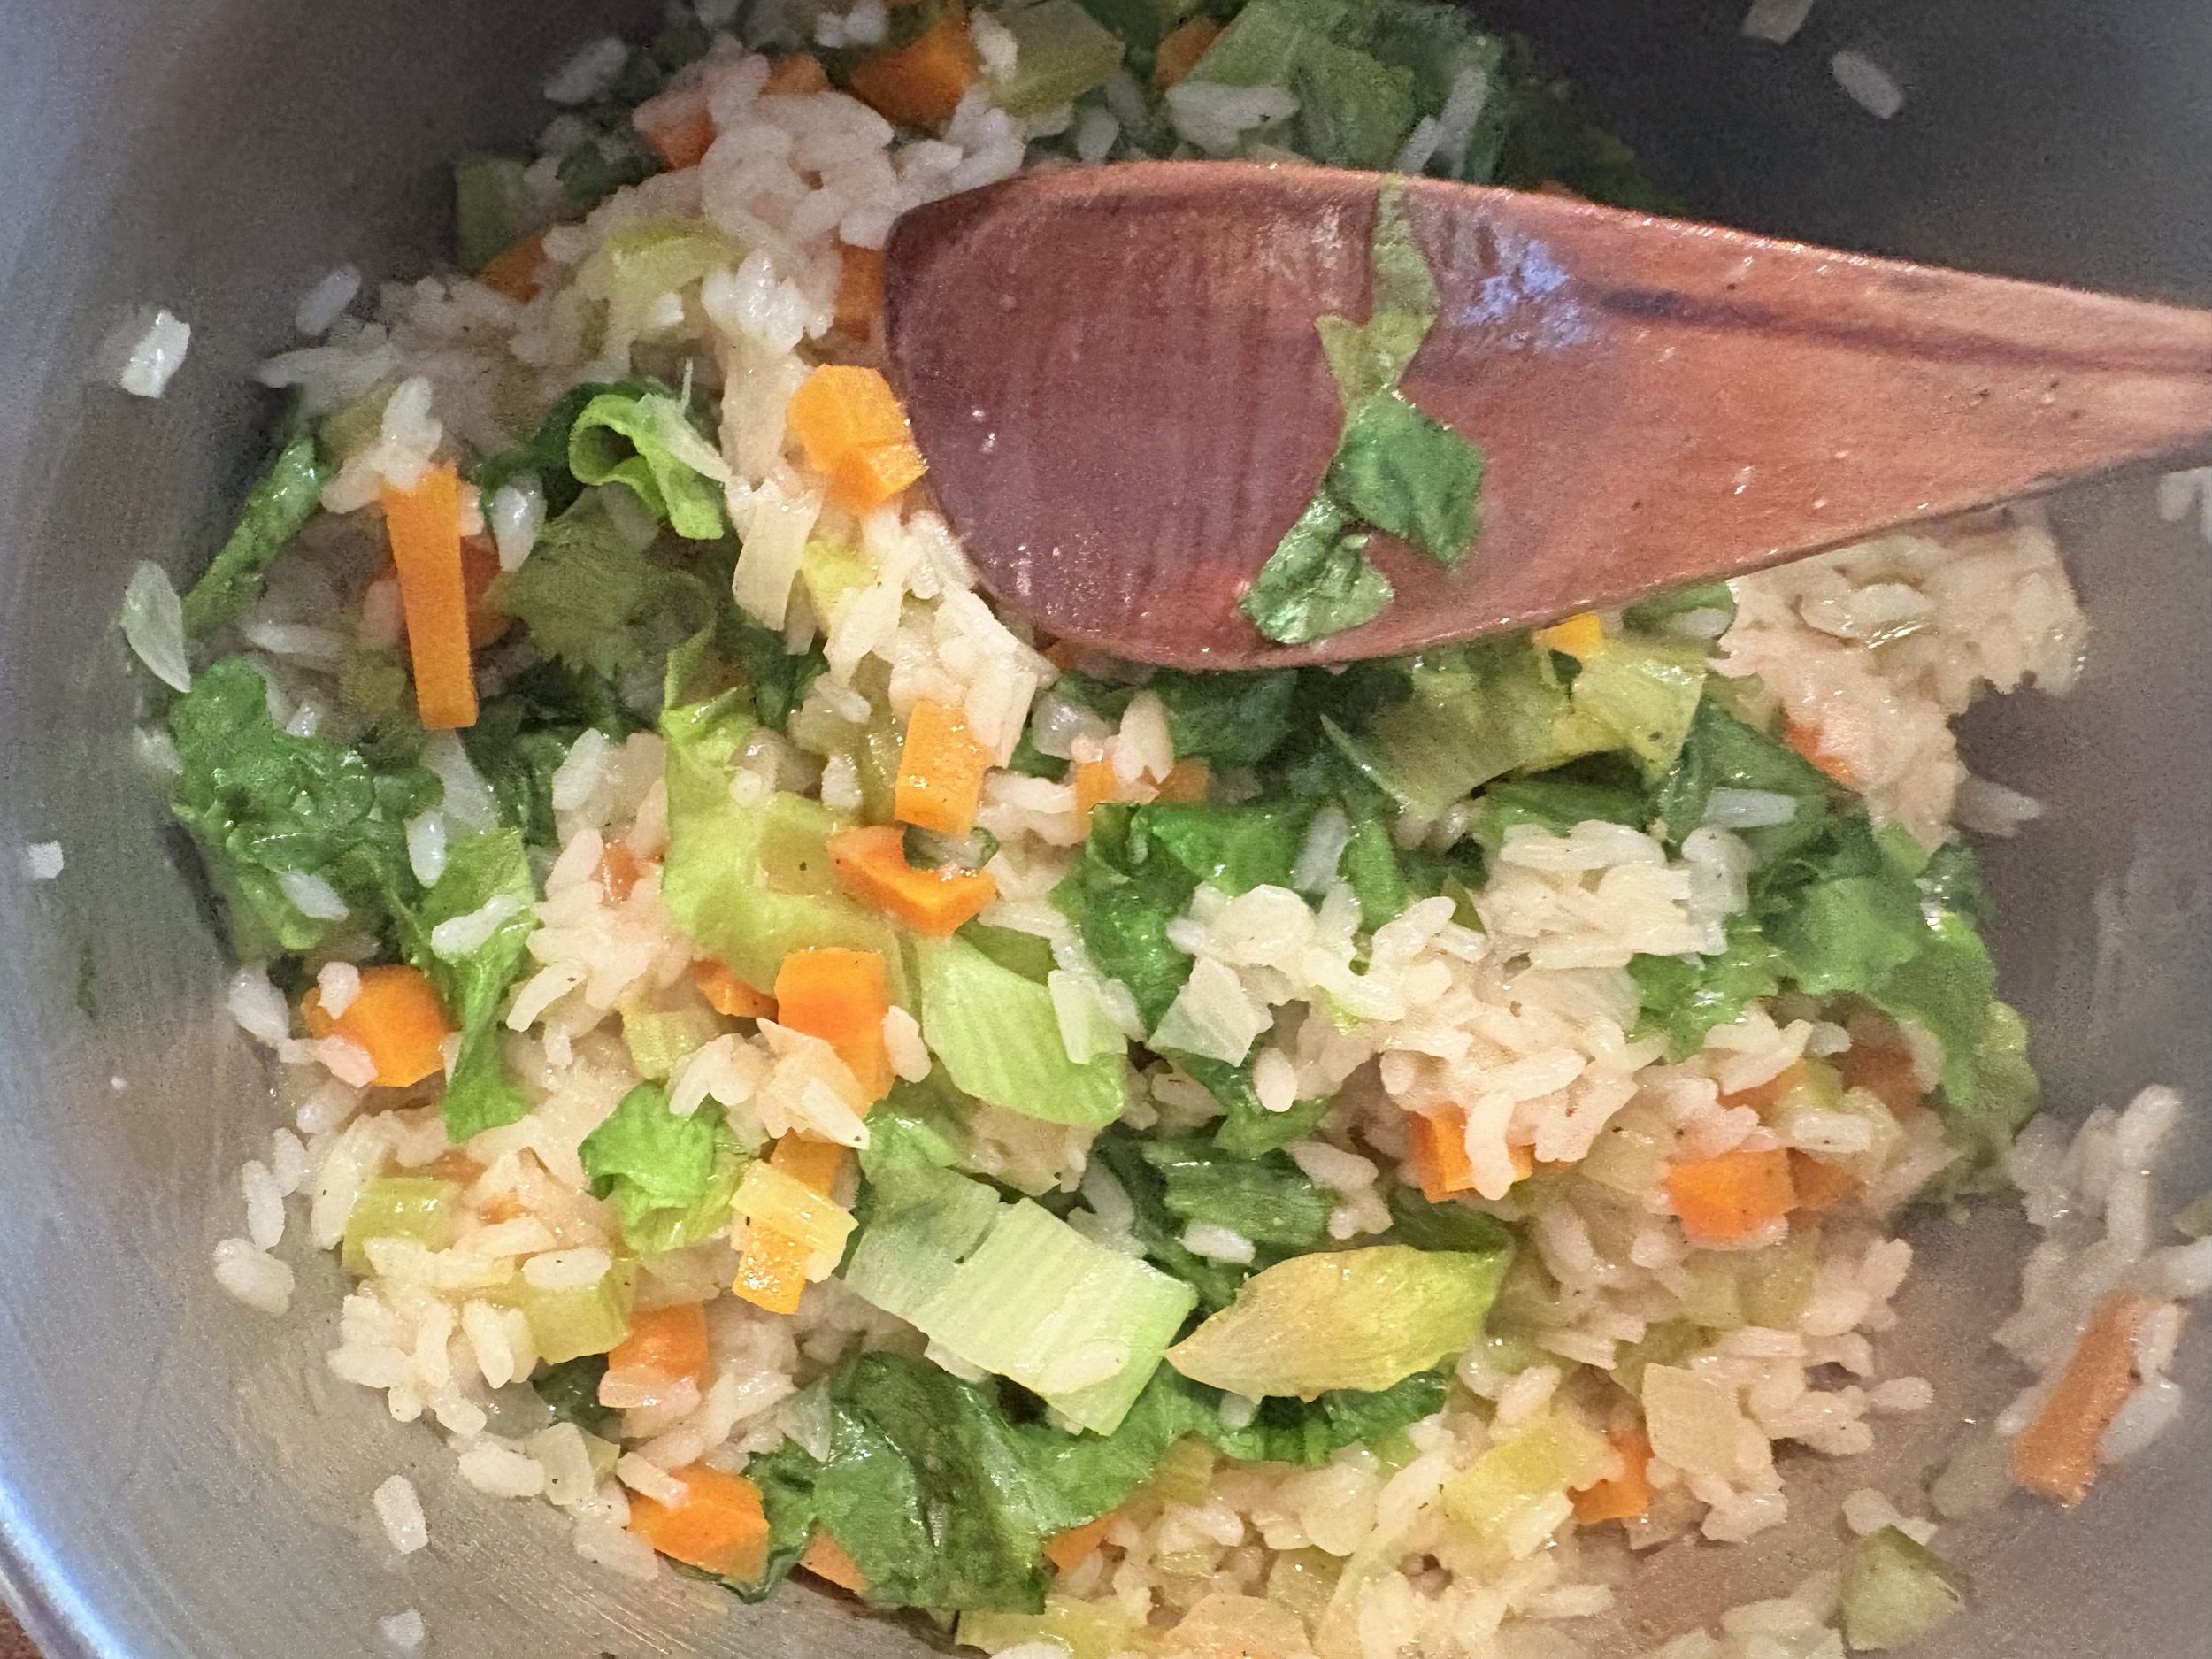
After 20 minutes, check the rice for doneness. If cooked, add the escarole, cover, and remove from the heat. The escarole will wilt in the pot within 3 minutes.
What looks like a lot of escarole will reduce in volume when wilted. It still retains its color and crunch.
Finally, stir the escarole into the rice and serve.
so wonderful and healthy
We stored the finished dish for a future meal. Never refrigerate hot food—let it cool first. On cold days, place it outdoors in a shady spot to cool quickly. This tip is useful for those in northern climates.
This colorful rice can be served on its own or as a side dish.

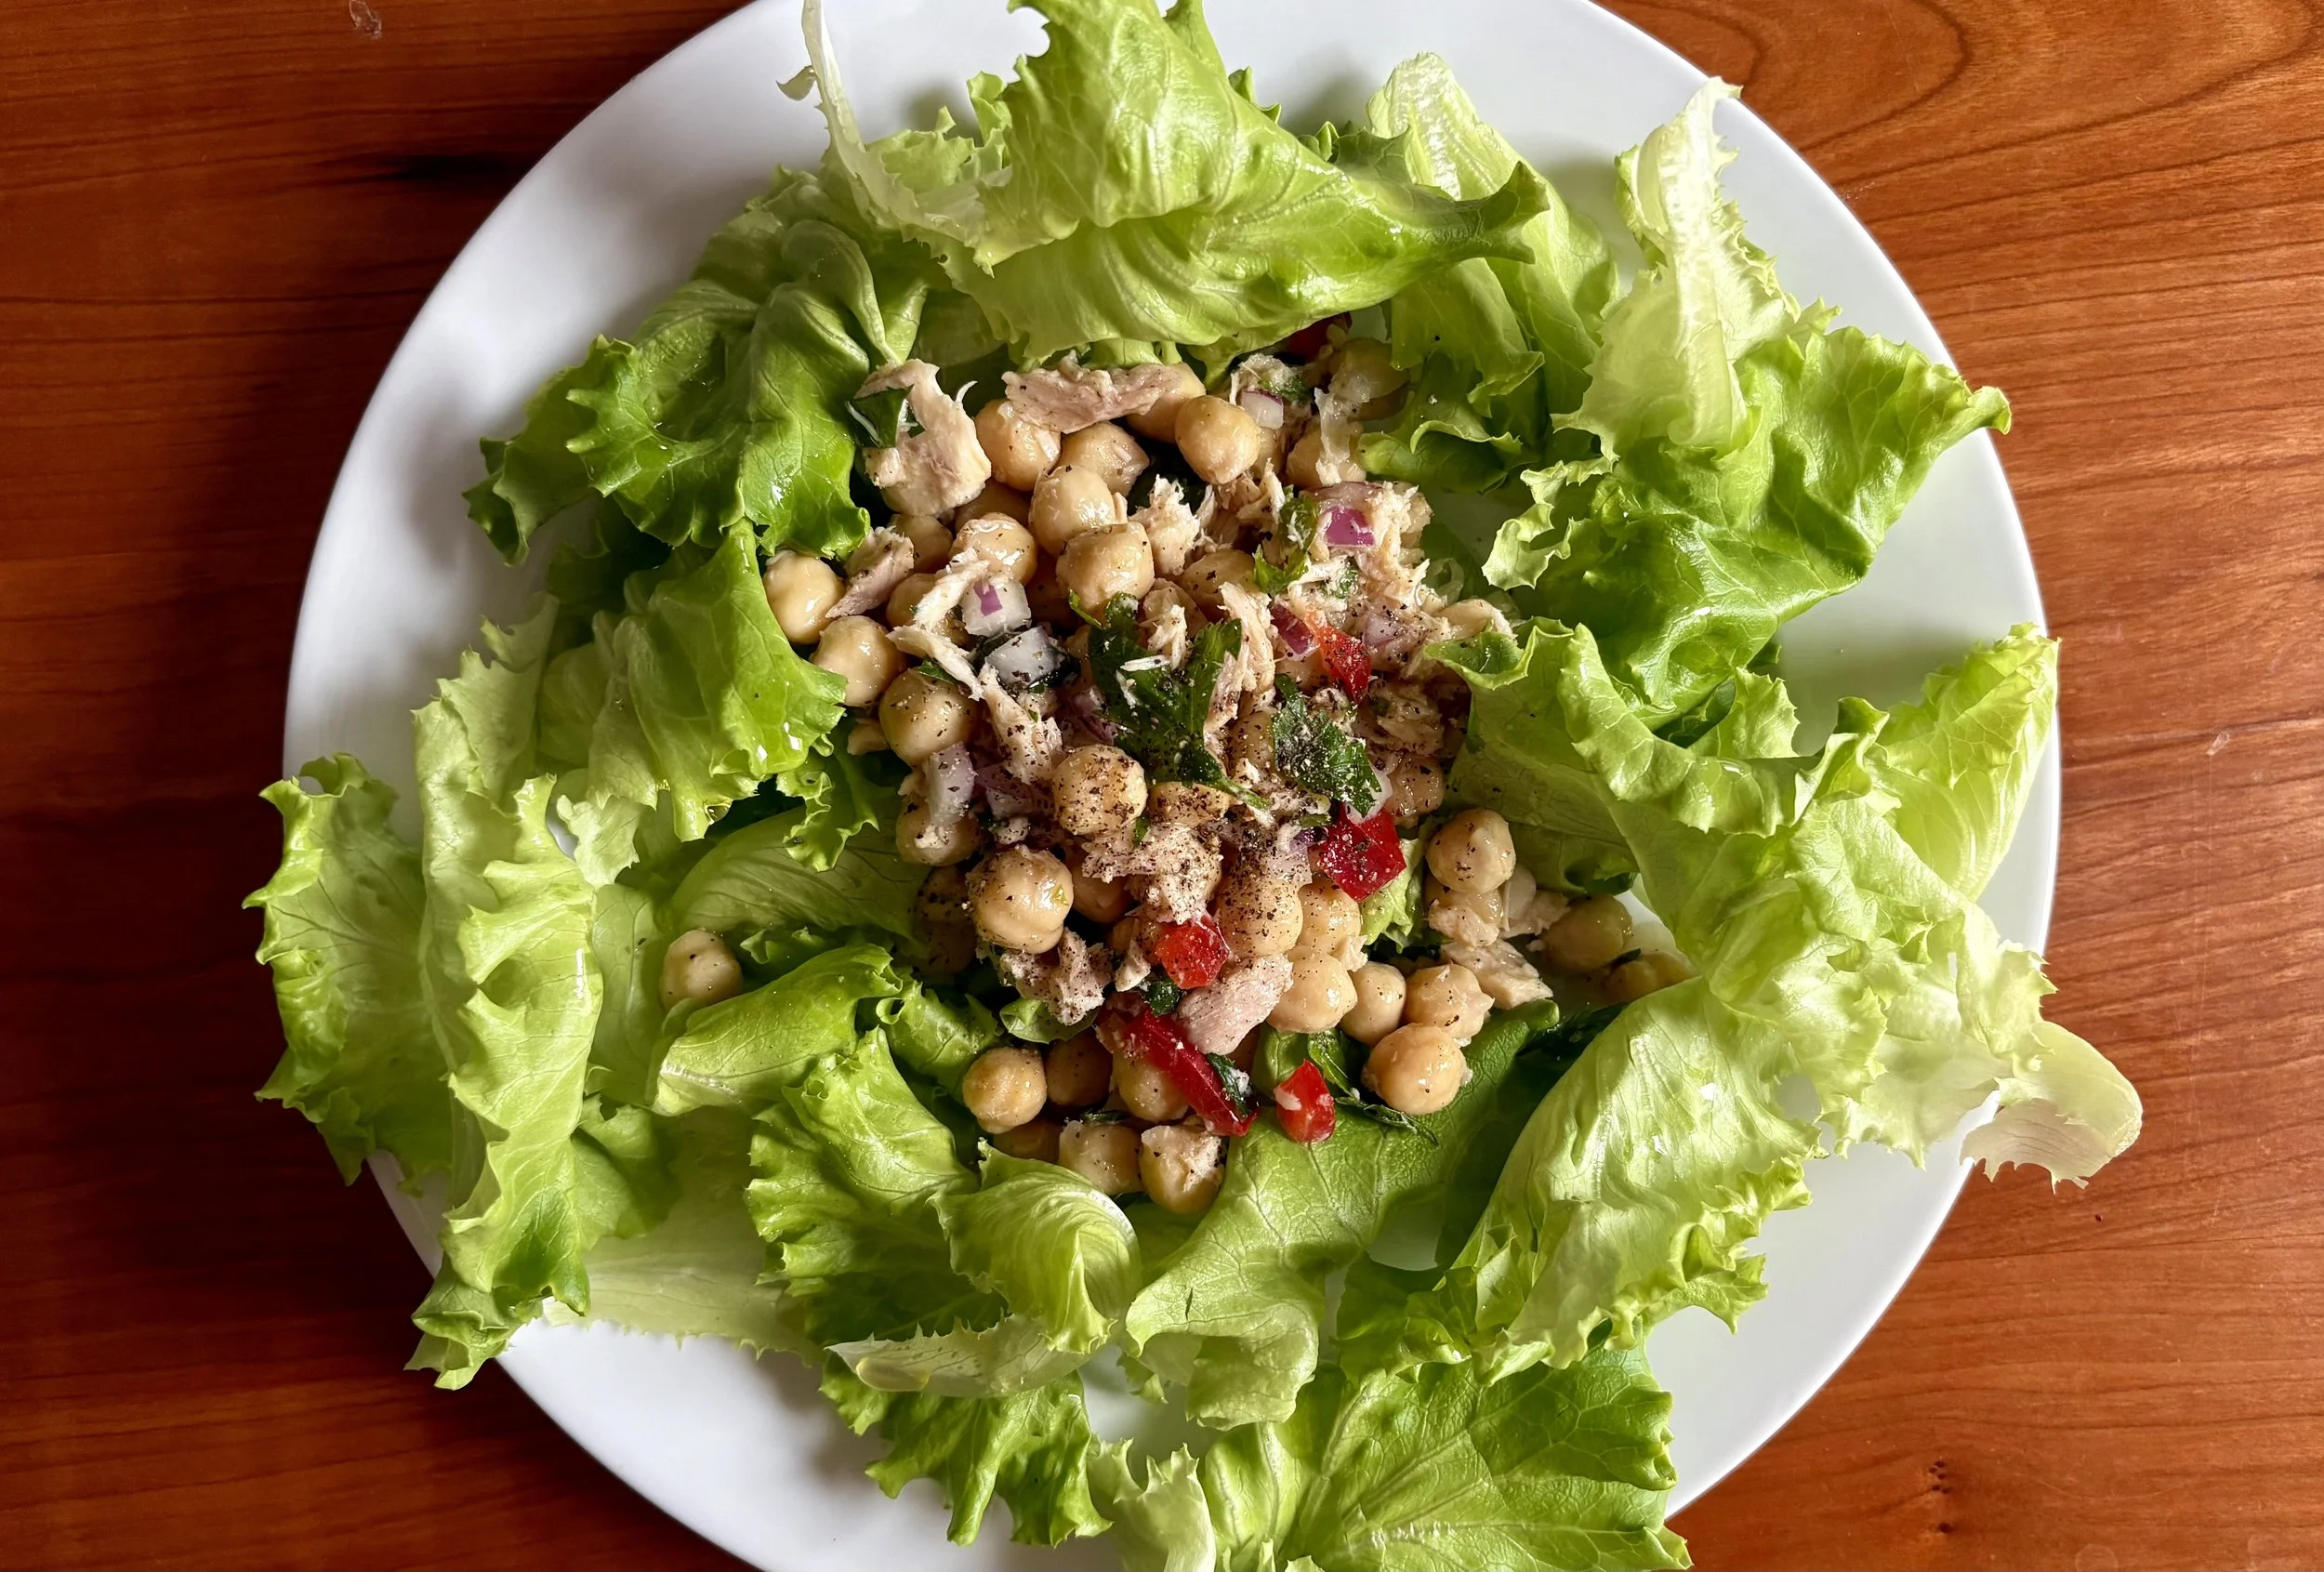
White Bean and Tuna Salad
Use as a topper on greens to create a flavorful and protein-forward salad.
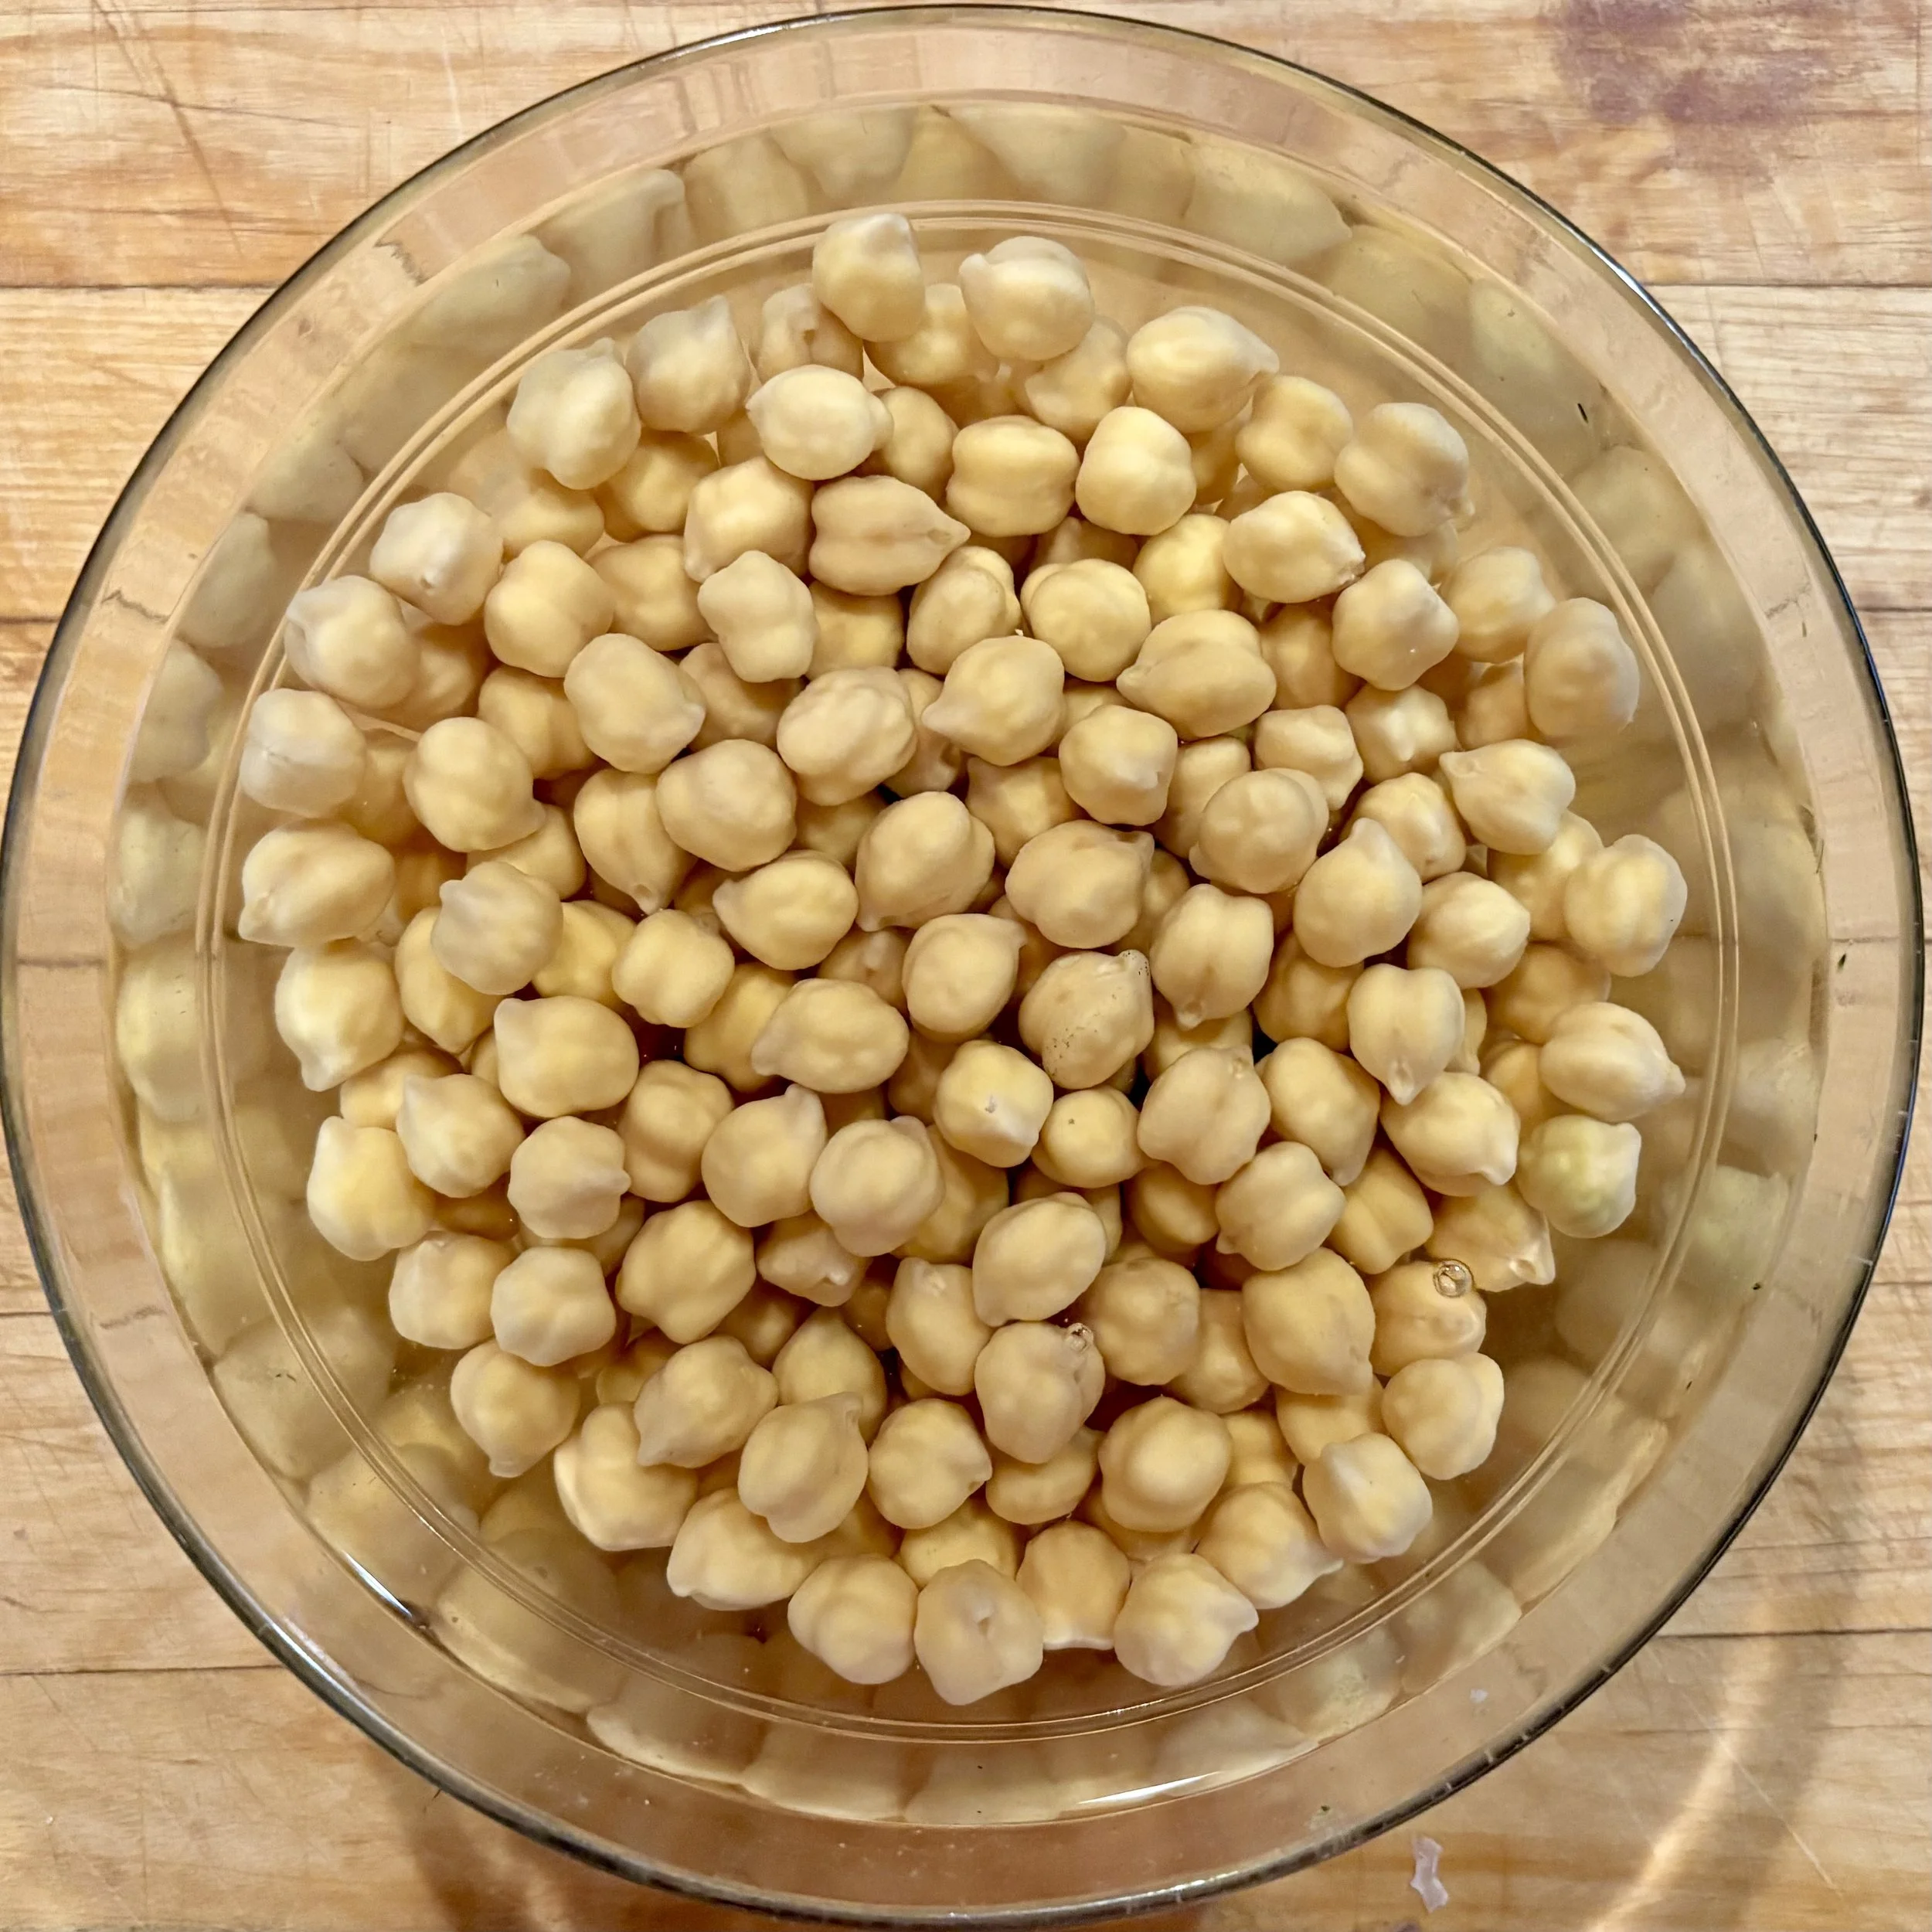
Soak beans overnight. Discard soaking water before adding to the pressure cooker.
Use garbanzo or cannellini beans. Soak overnight, then cook in a pressure cooker with 2 inches of water: 22 minutes for garbanzos or 15 for cannellini. Let cool in the cooker for 1 hour.
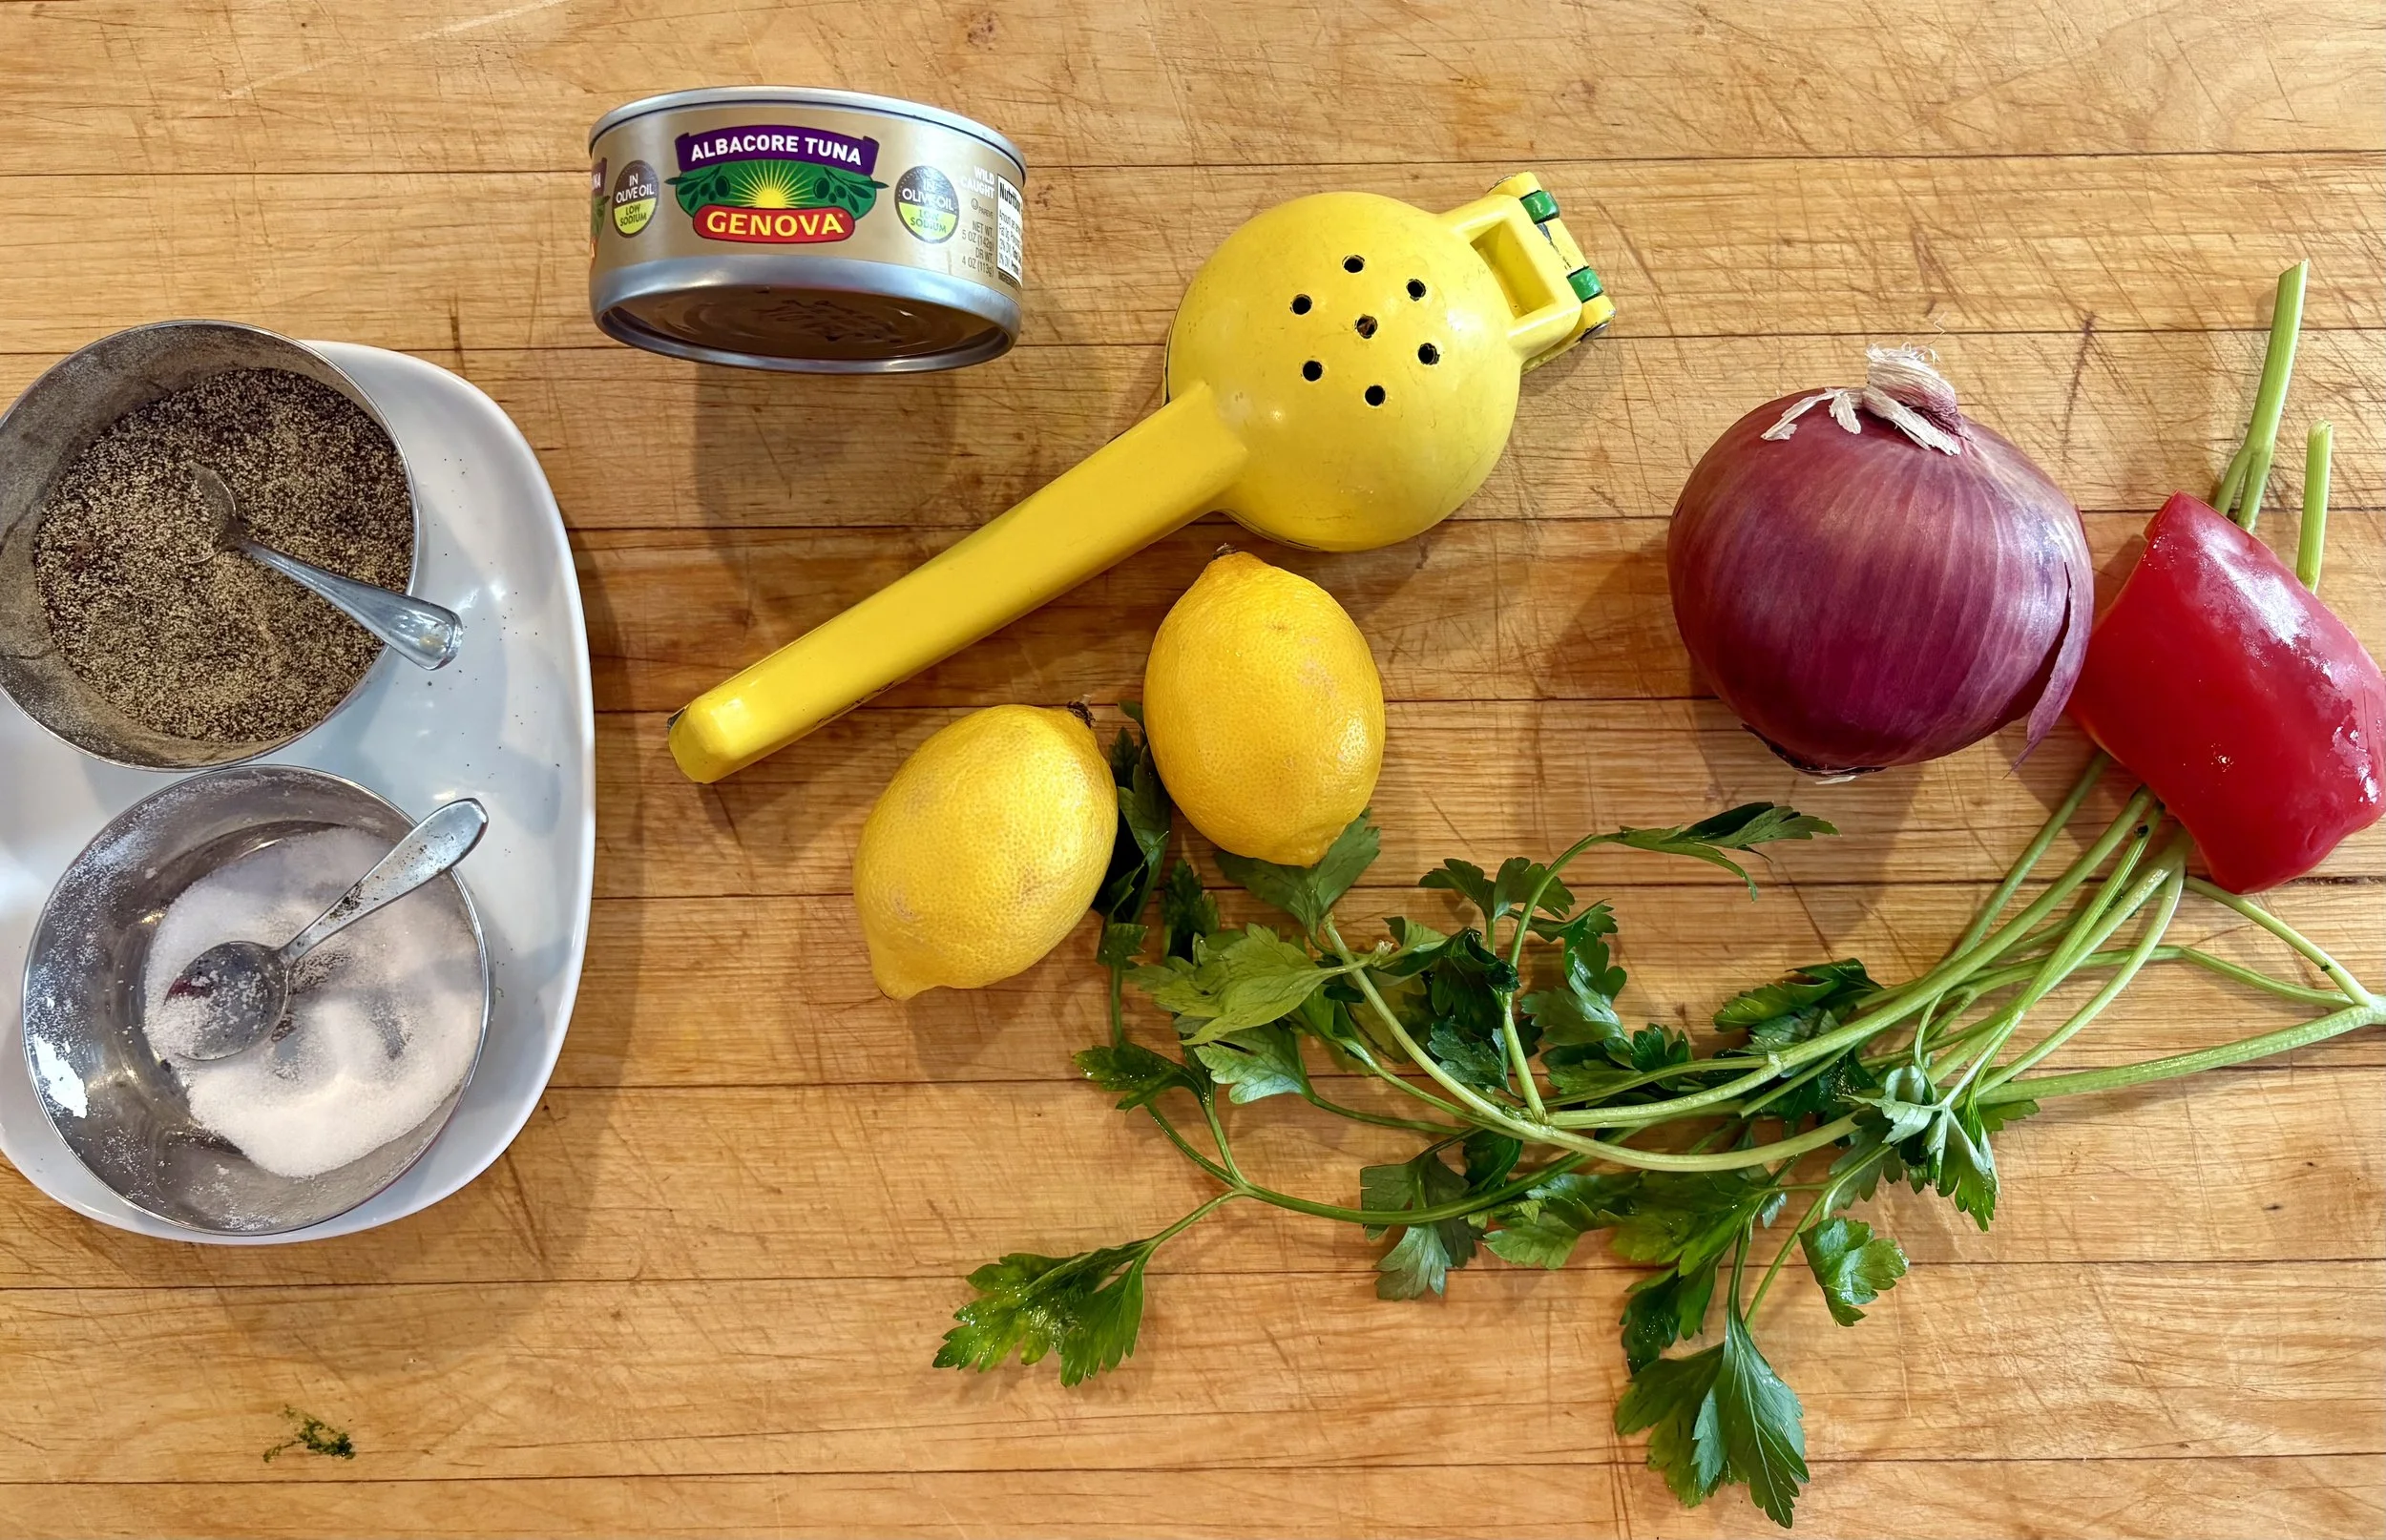
Just a few additions to the beans: tuna packed in olive oil, fresh parsley, minced red onion, fresh-squeezed lemon juice, and a generous amount of olive oil.
Toss all ingredients in a large bowl, then transfer to a smaller airtight container for refrigeration.
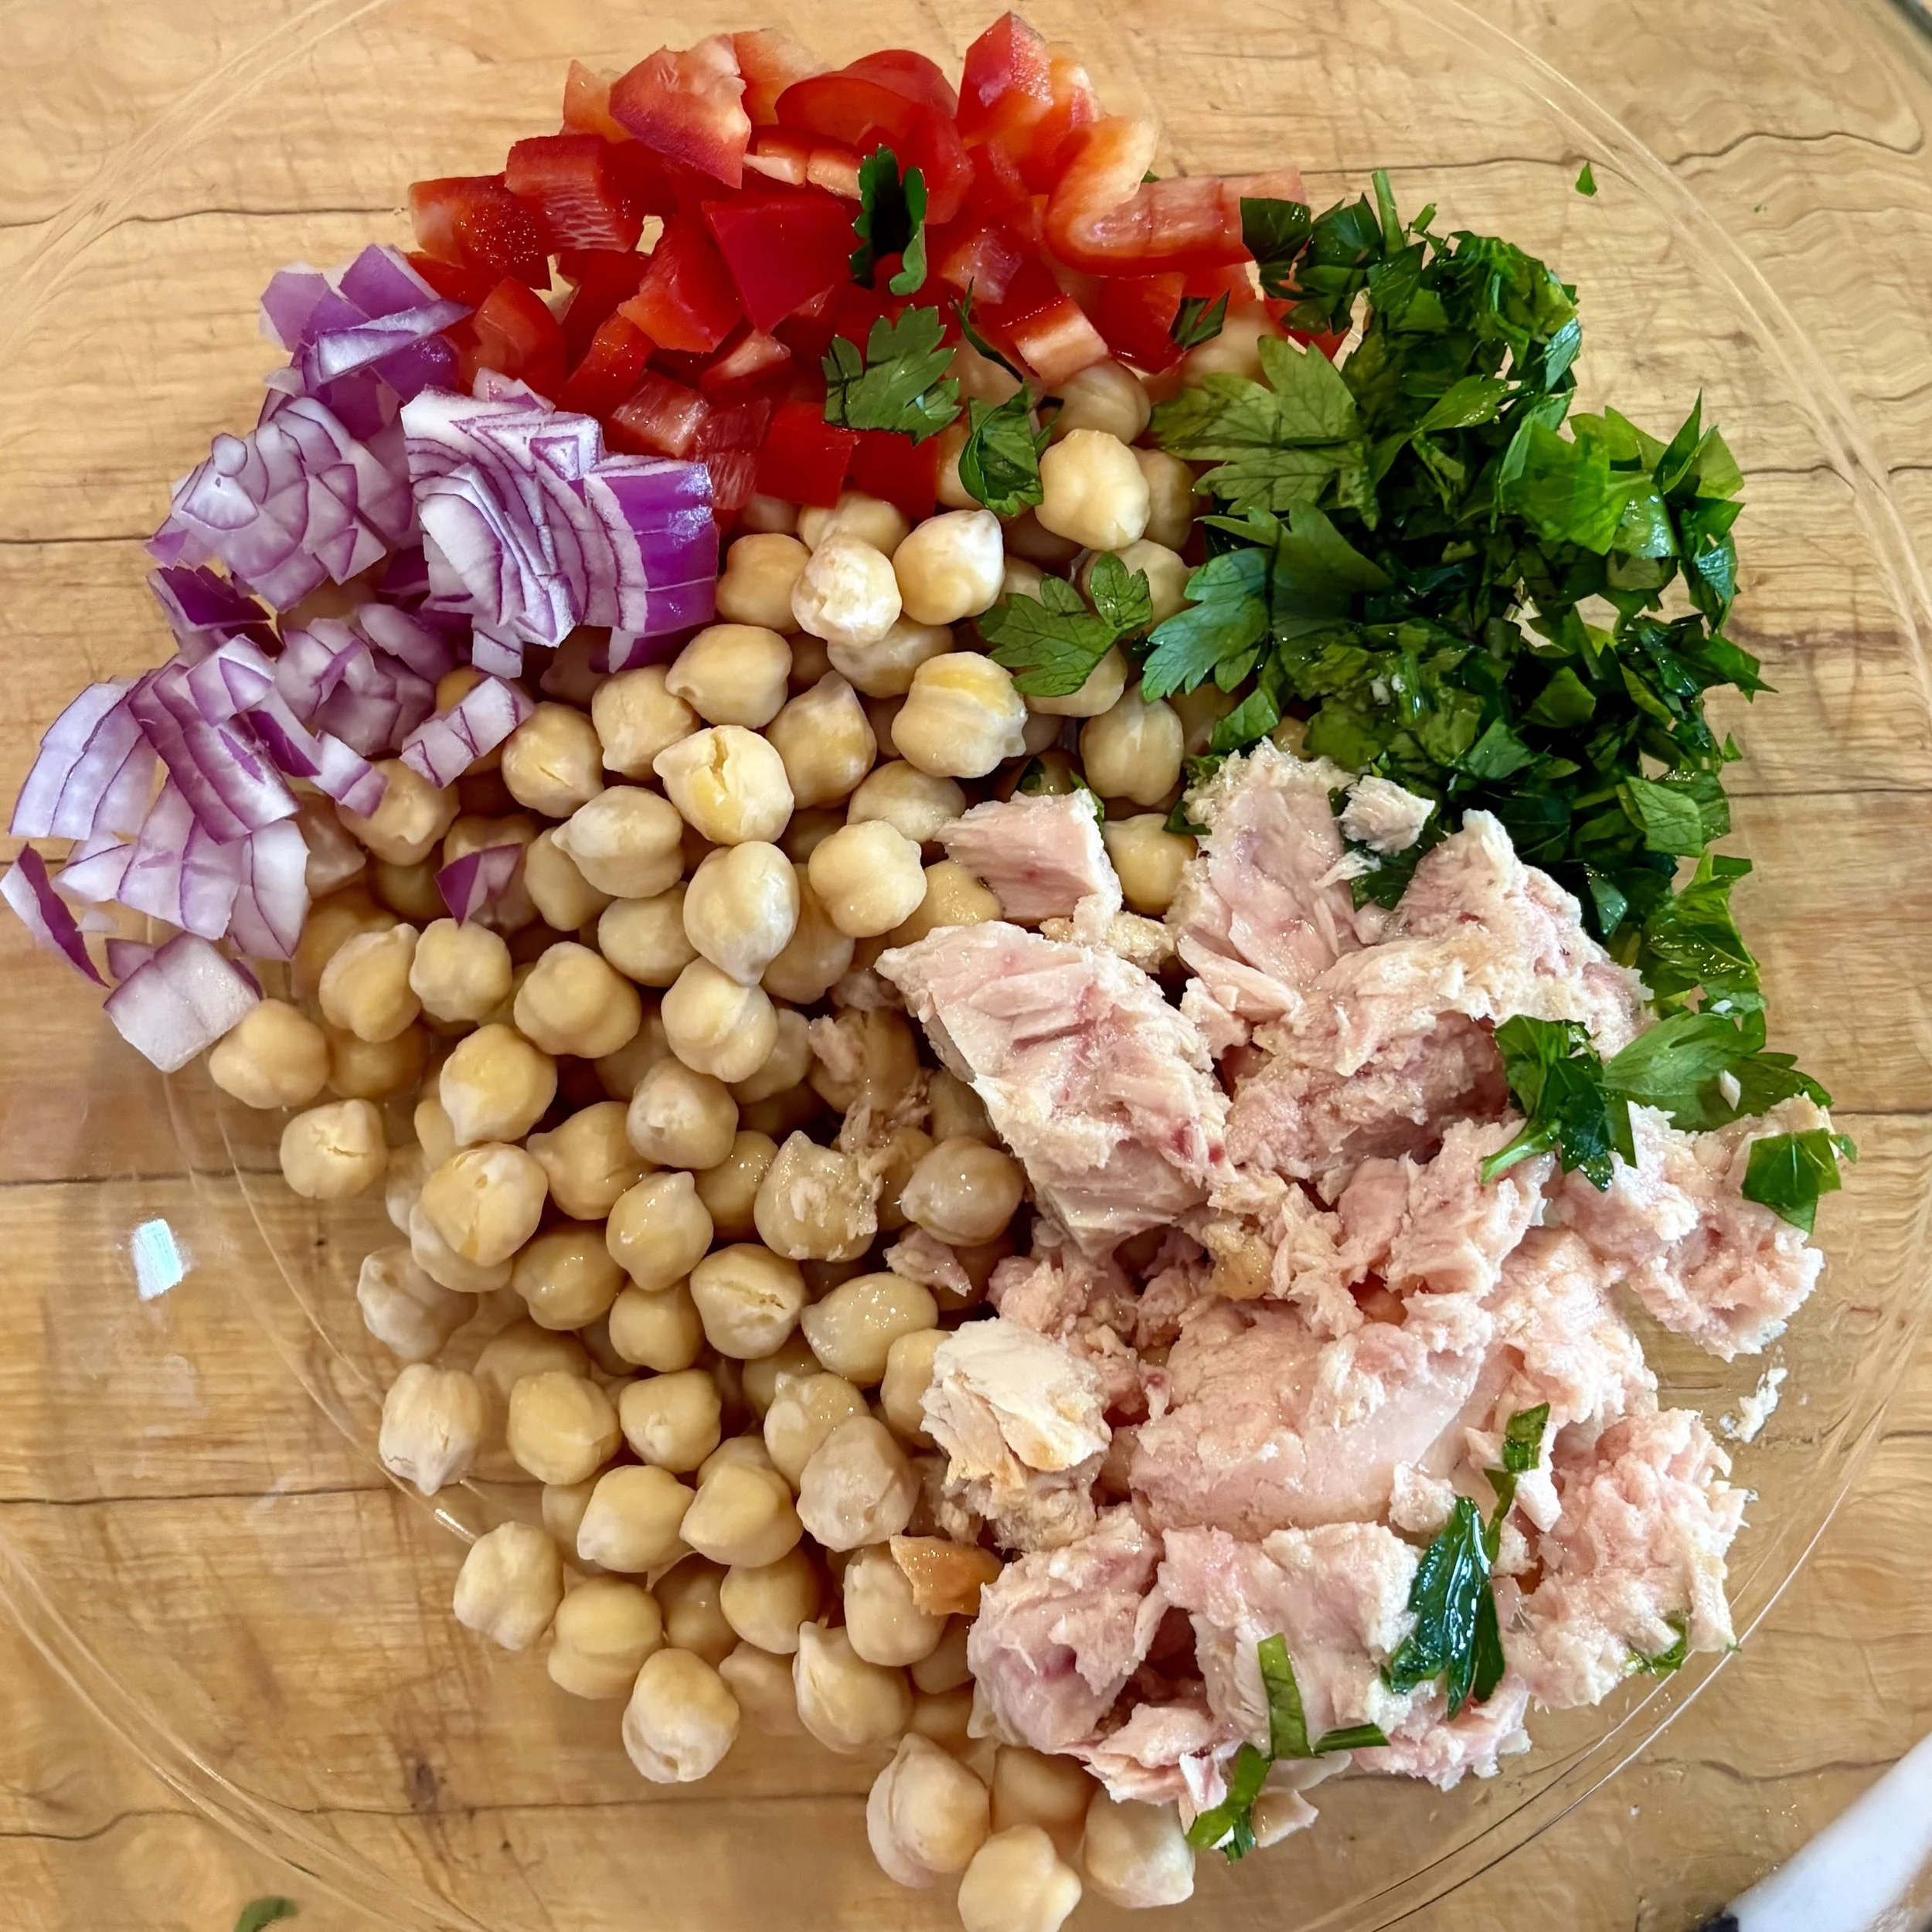
it is best to add ingredients to a large, roomy bowl to toss. The final product should be stored in a tightly sealed container to control the fishy smell in the refrigerator.
Place cooled beans, minced red onion, chopped parsley, juice of one lemon, salt, pepper, a can of oil-packed tuna (undrained), and a generous drizzle of olive oil in a bowl. Toss to mix. Optionally, add red pepper for color.
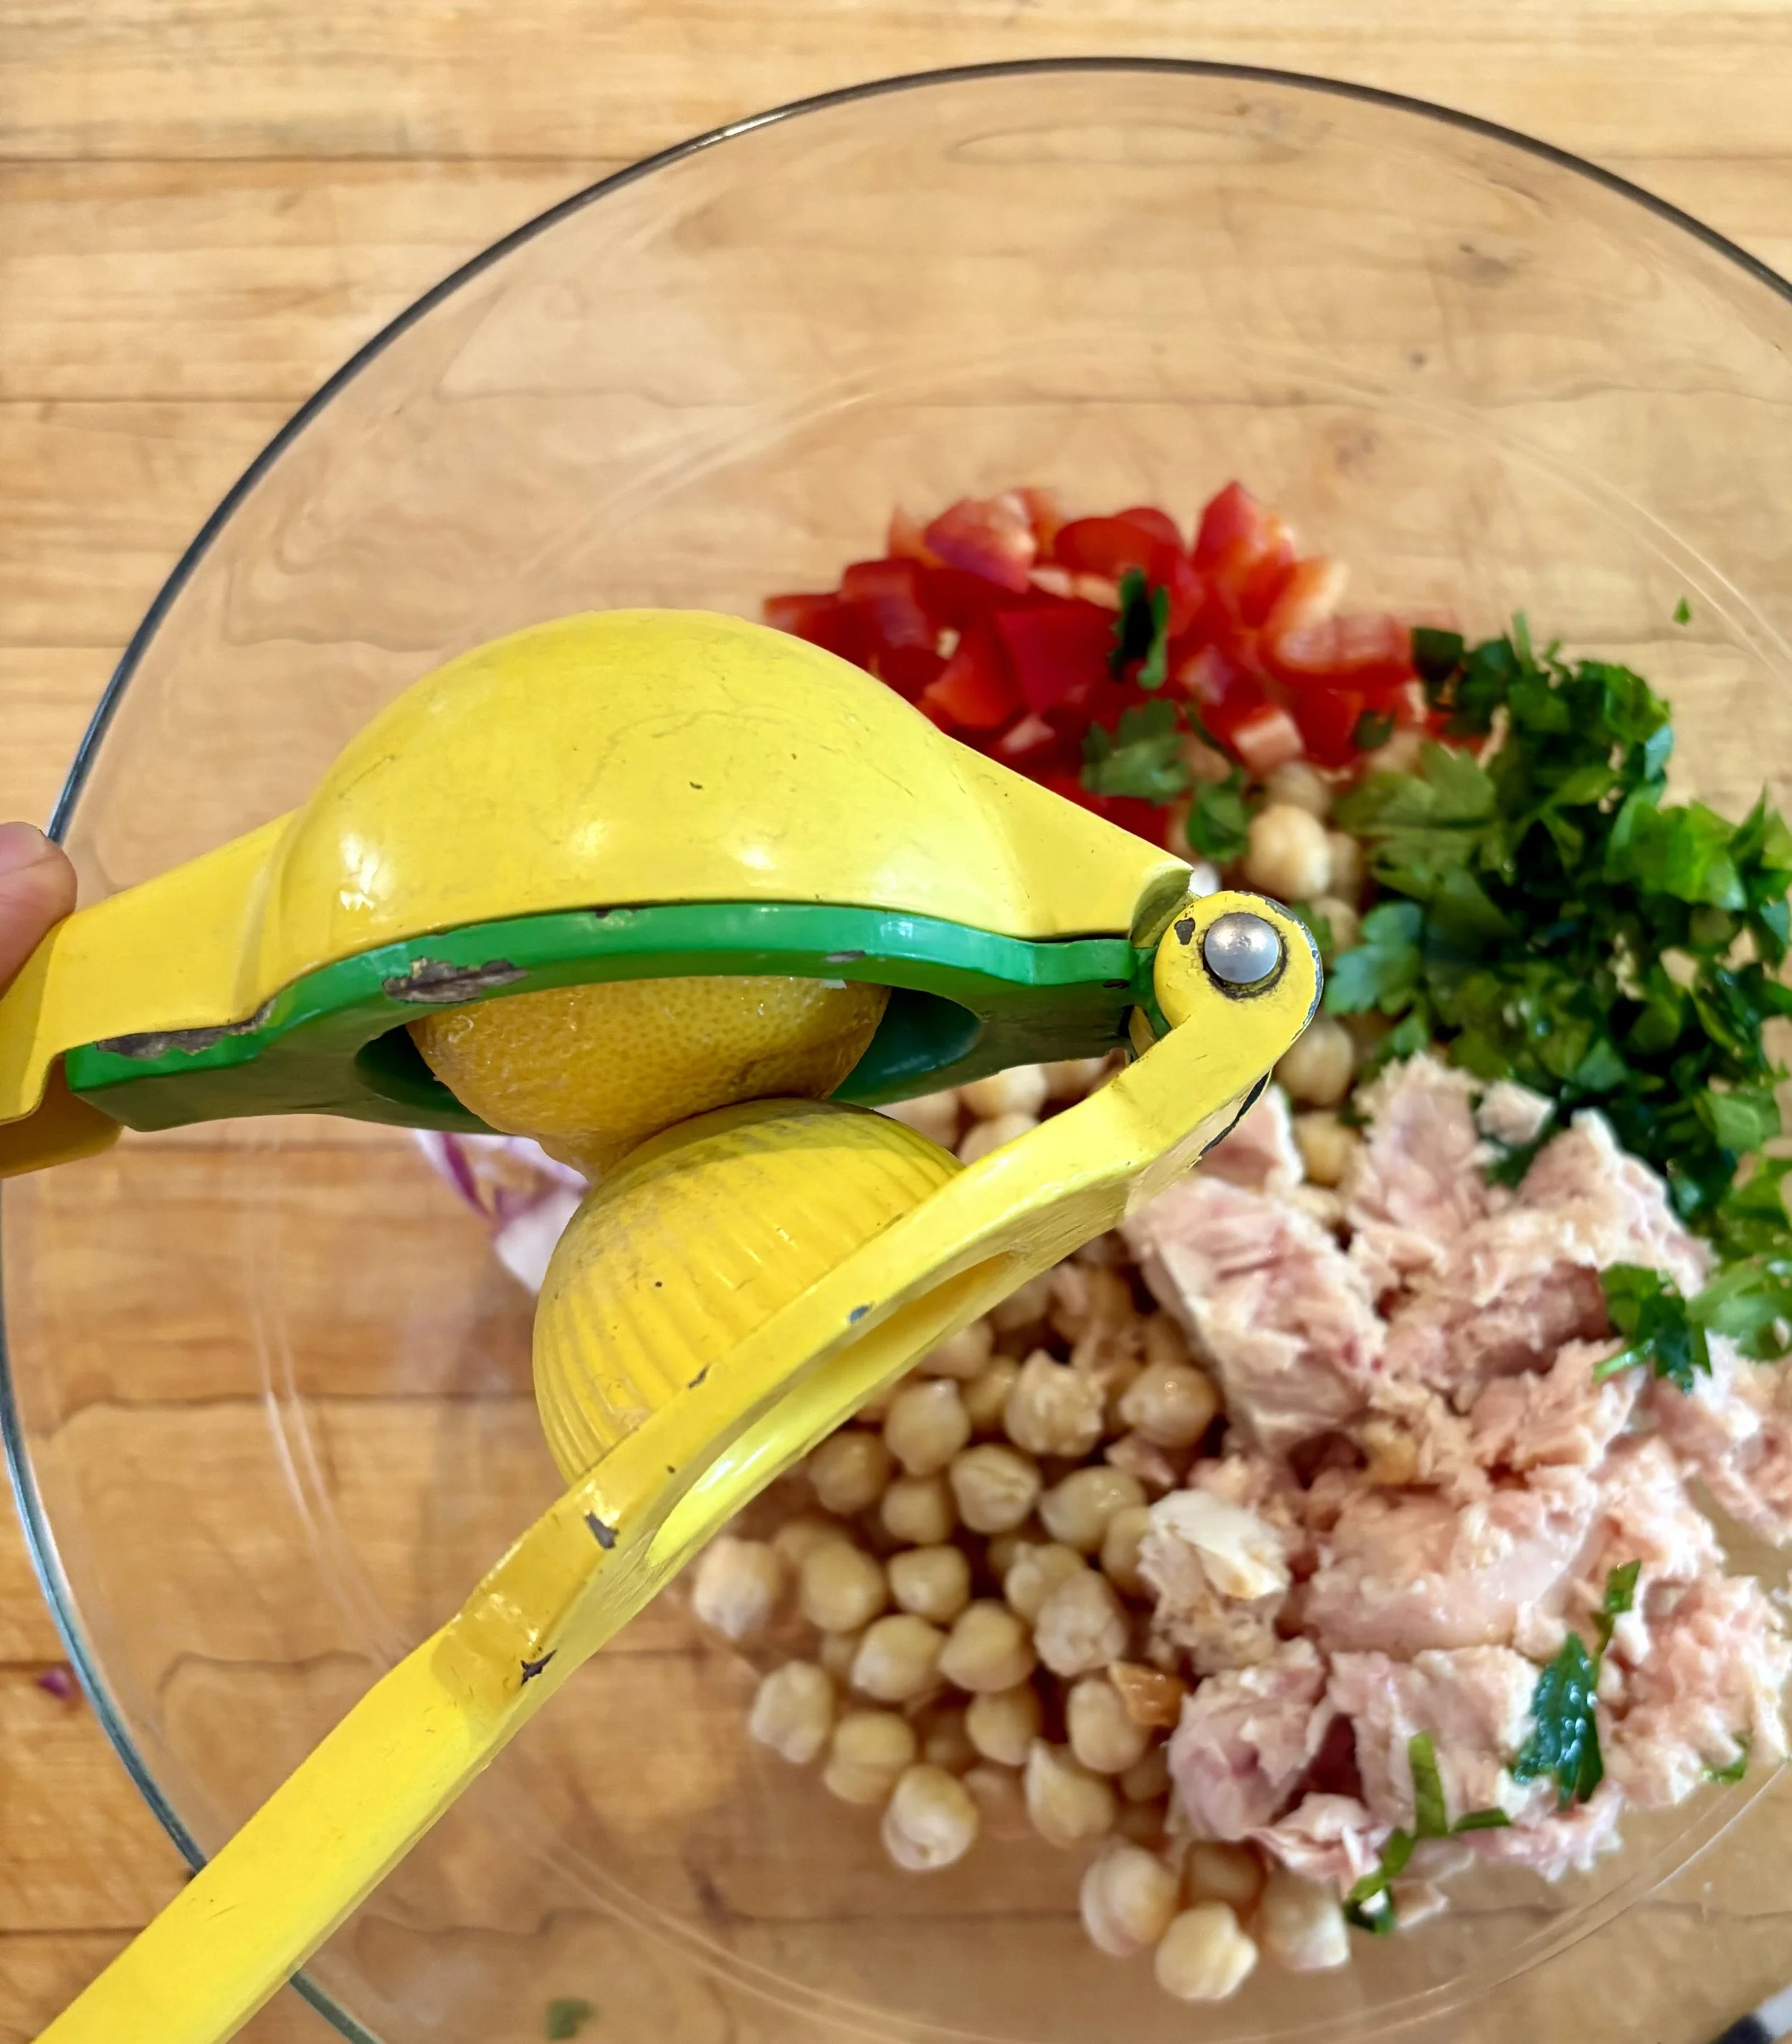
We use lots of lemons in our kitchen, so we buy them in bulk.
Refrigerate for a few hours to chill.
Serve on greens with extra oil and pepper, or add cucumber or tomato.
Alternatively, enjoy alone or on quality bread.
The bean salad keeps in the refrigerator for a few days, offering a few healthy, protein-packed meals.
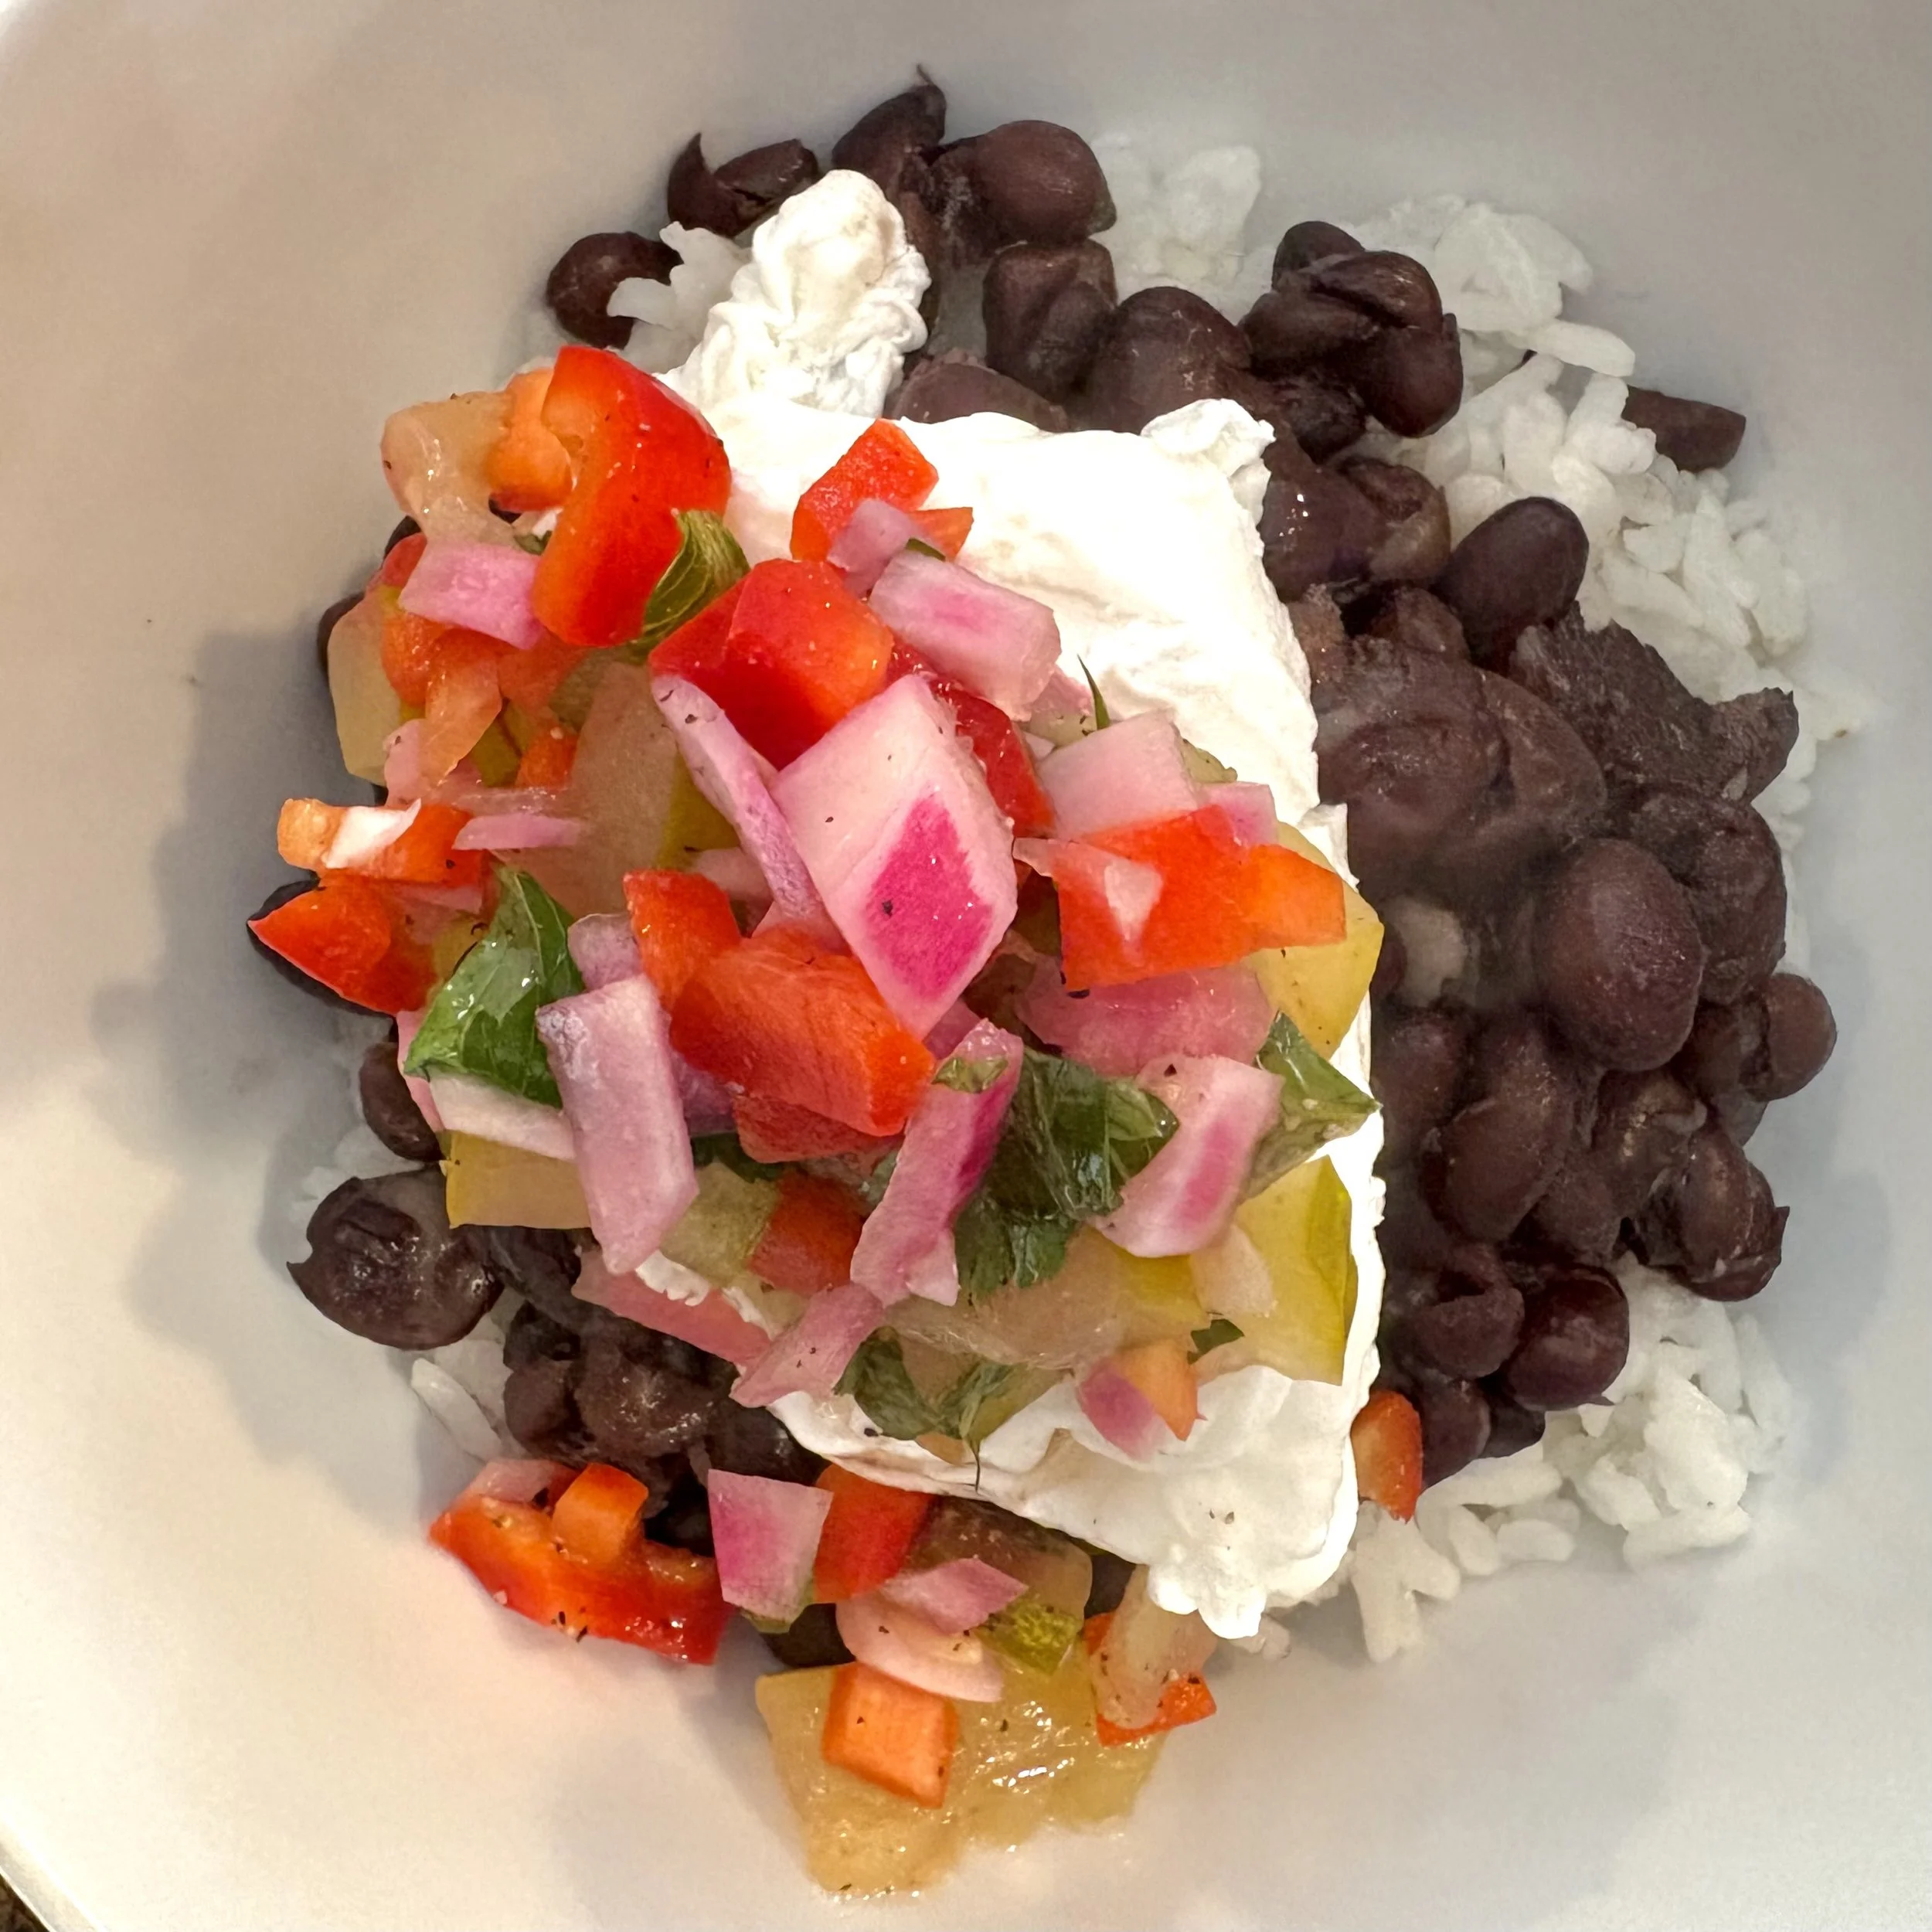
Easy and Tasty Black Beans
Bean recipes are often overcomplicated. This simplified version combines rich bean texture with bold flavor.

The fresh salsa or relish gives this dish a punch of flavor and color.
We keep frozen pork chunks on hand. We purchase the most affordable cuts, portion them into 1/3-pound pieces, wrap them, and log them in our freezer inventory.
We buy dried black beans in bulk. The day before cooking, soak about 1 cup of beans in water.
Add beans, a whole peeled onion, and frozen pork to a pressure cooker. Cover with water about 2 inches above the beans. Add a whole garlic clove if desired.
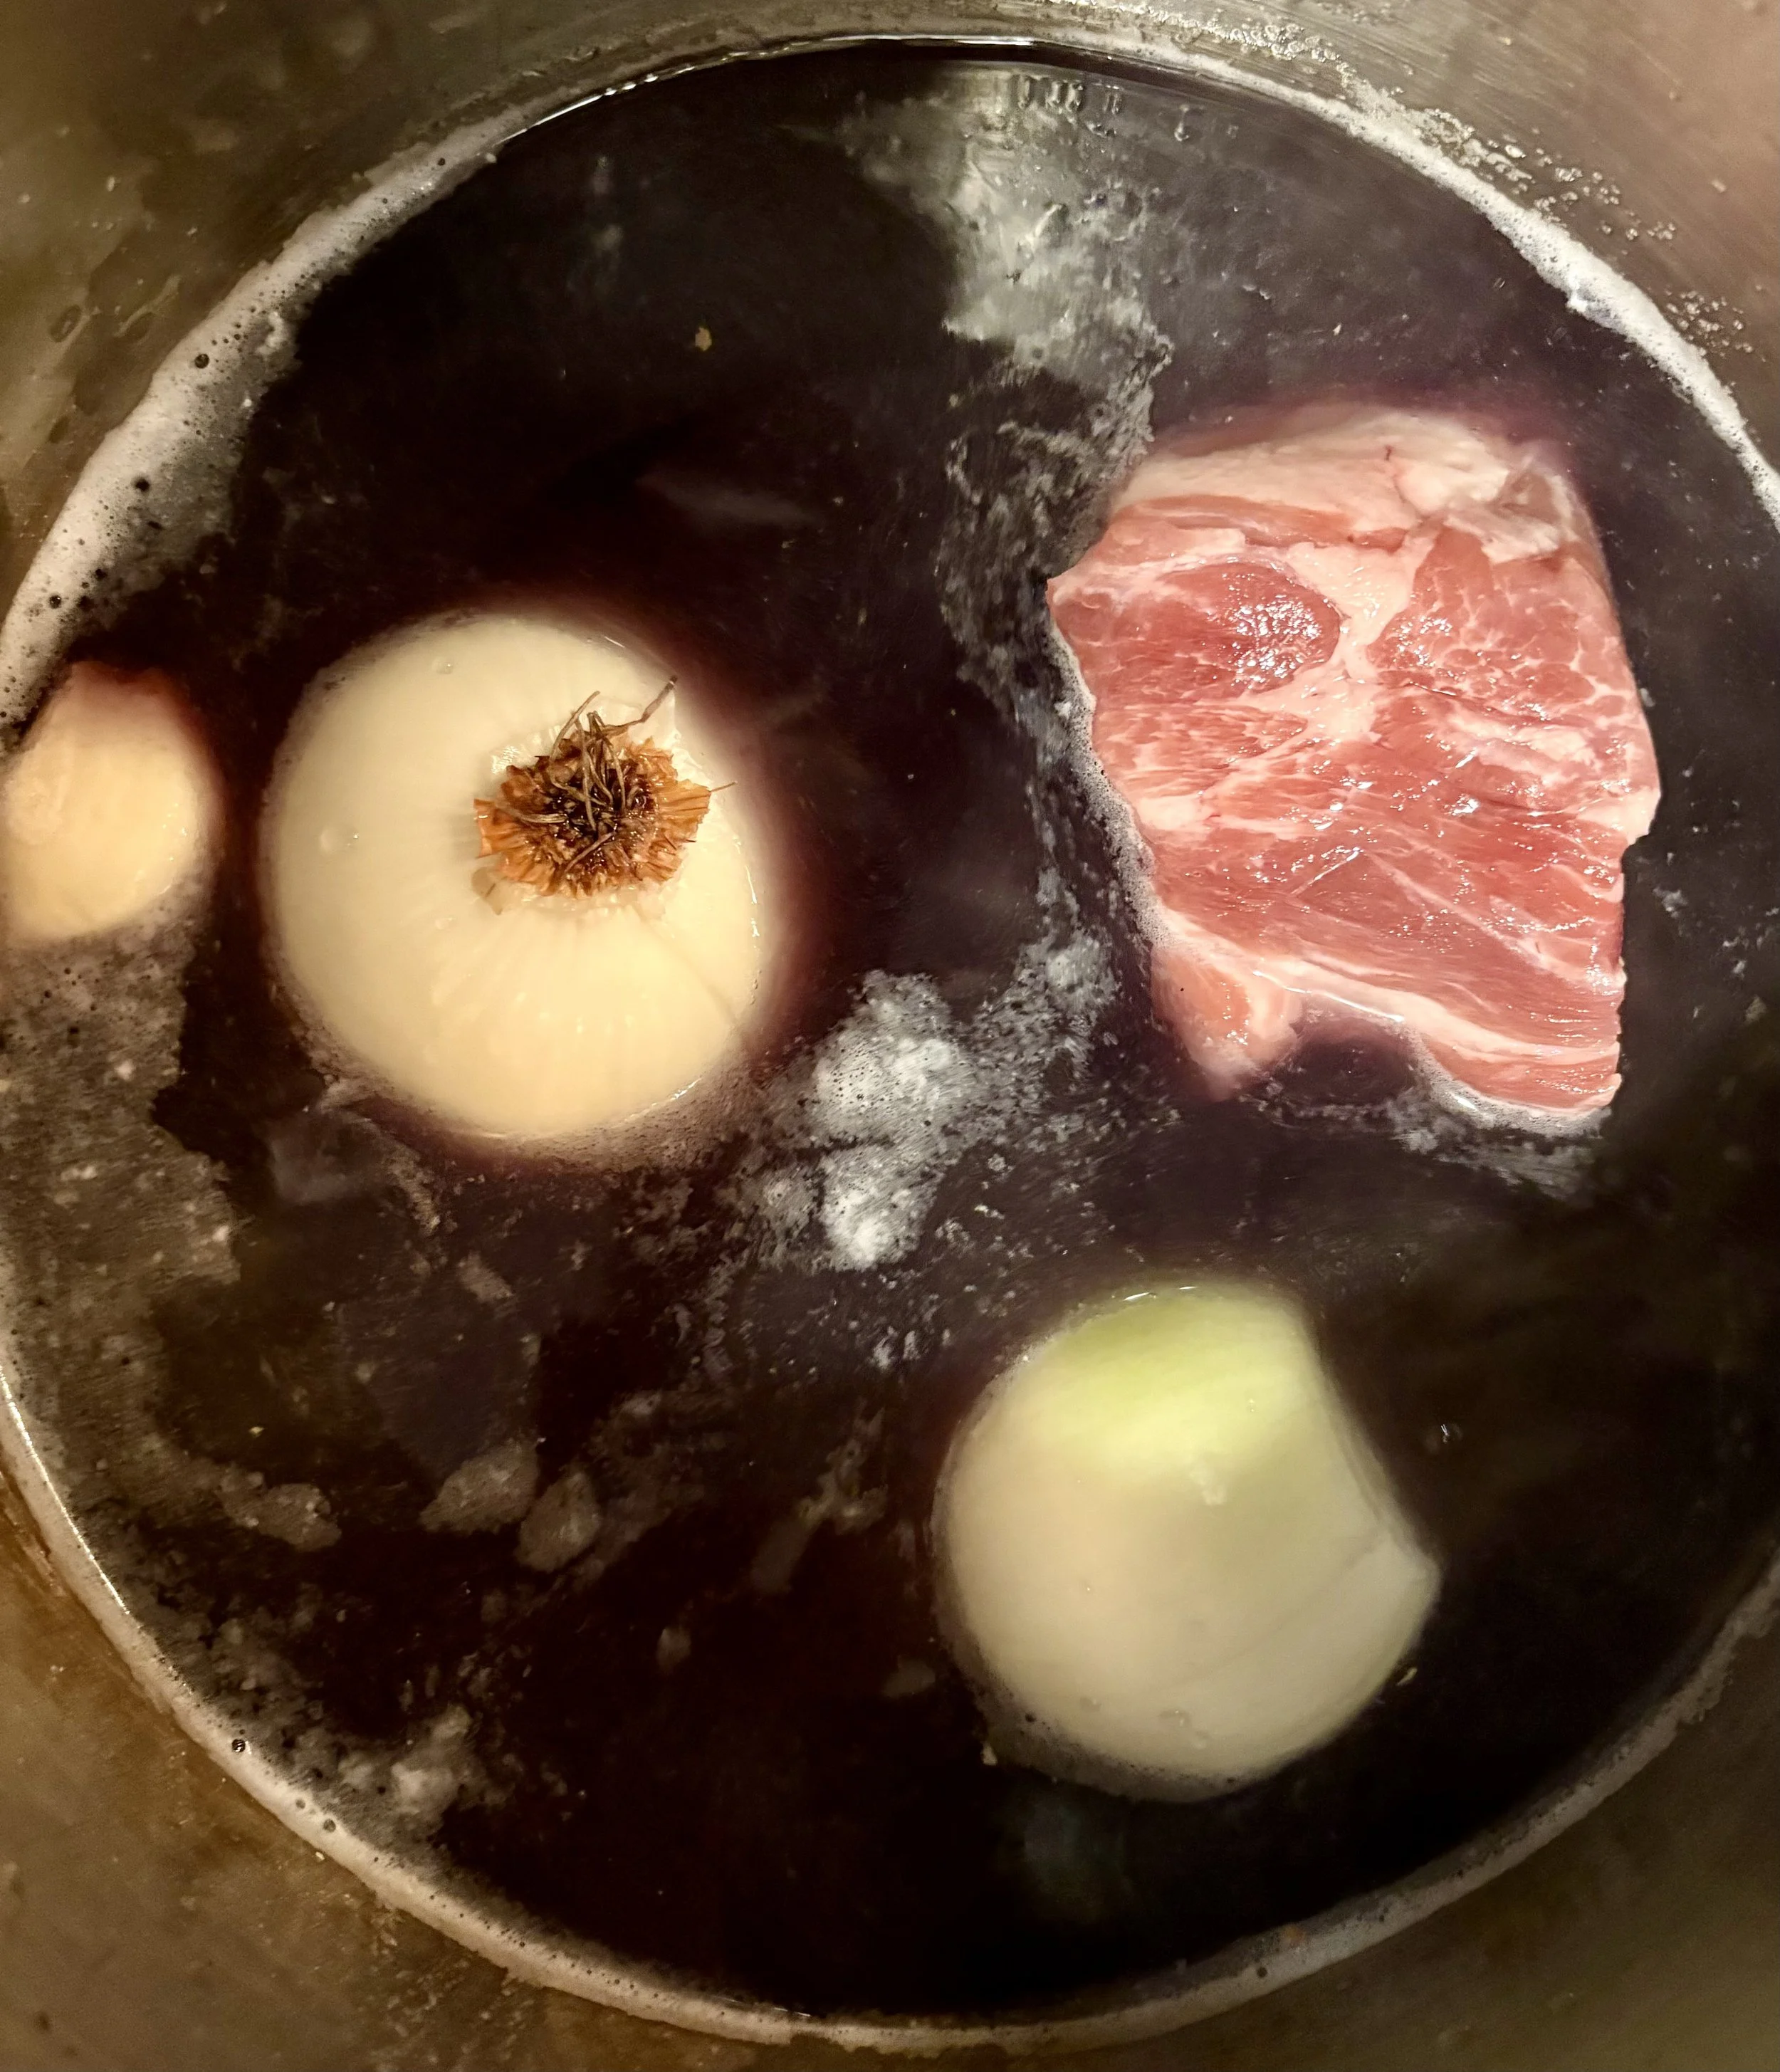
the pork chunks go from the freezer to the pressure cooker
Bring the pressure cooker to pressure and cook for 20 minutes. Turn off the heat and let it sit, locked, for 45 minutes. Remove the lid. Discard the onion and garlic. Add salt and pepper. Remove, chop, and return the pork if you like. If the beans are too liquid, simmer them uncovered to reduce the liquid. Beans will thicken as they cool.
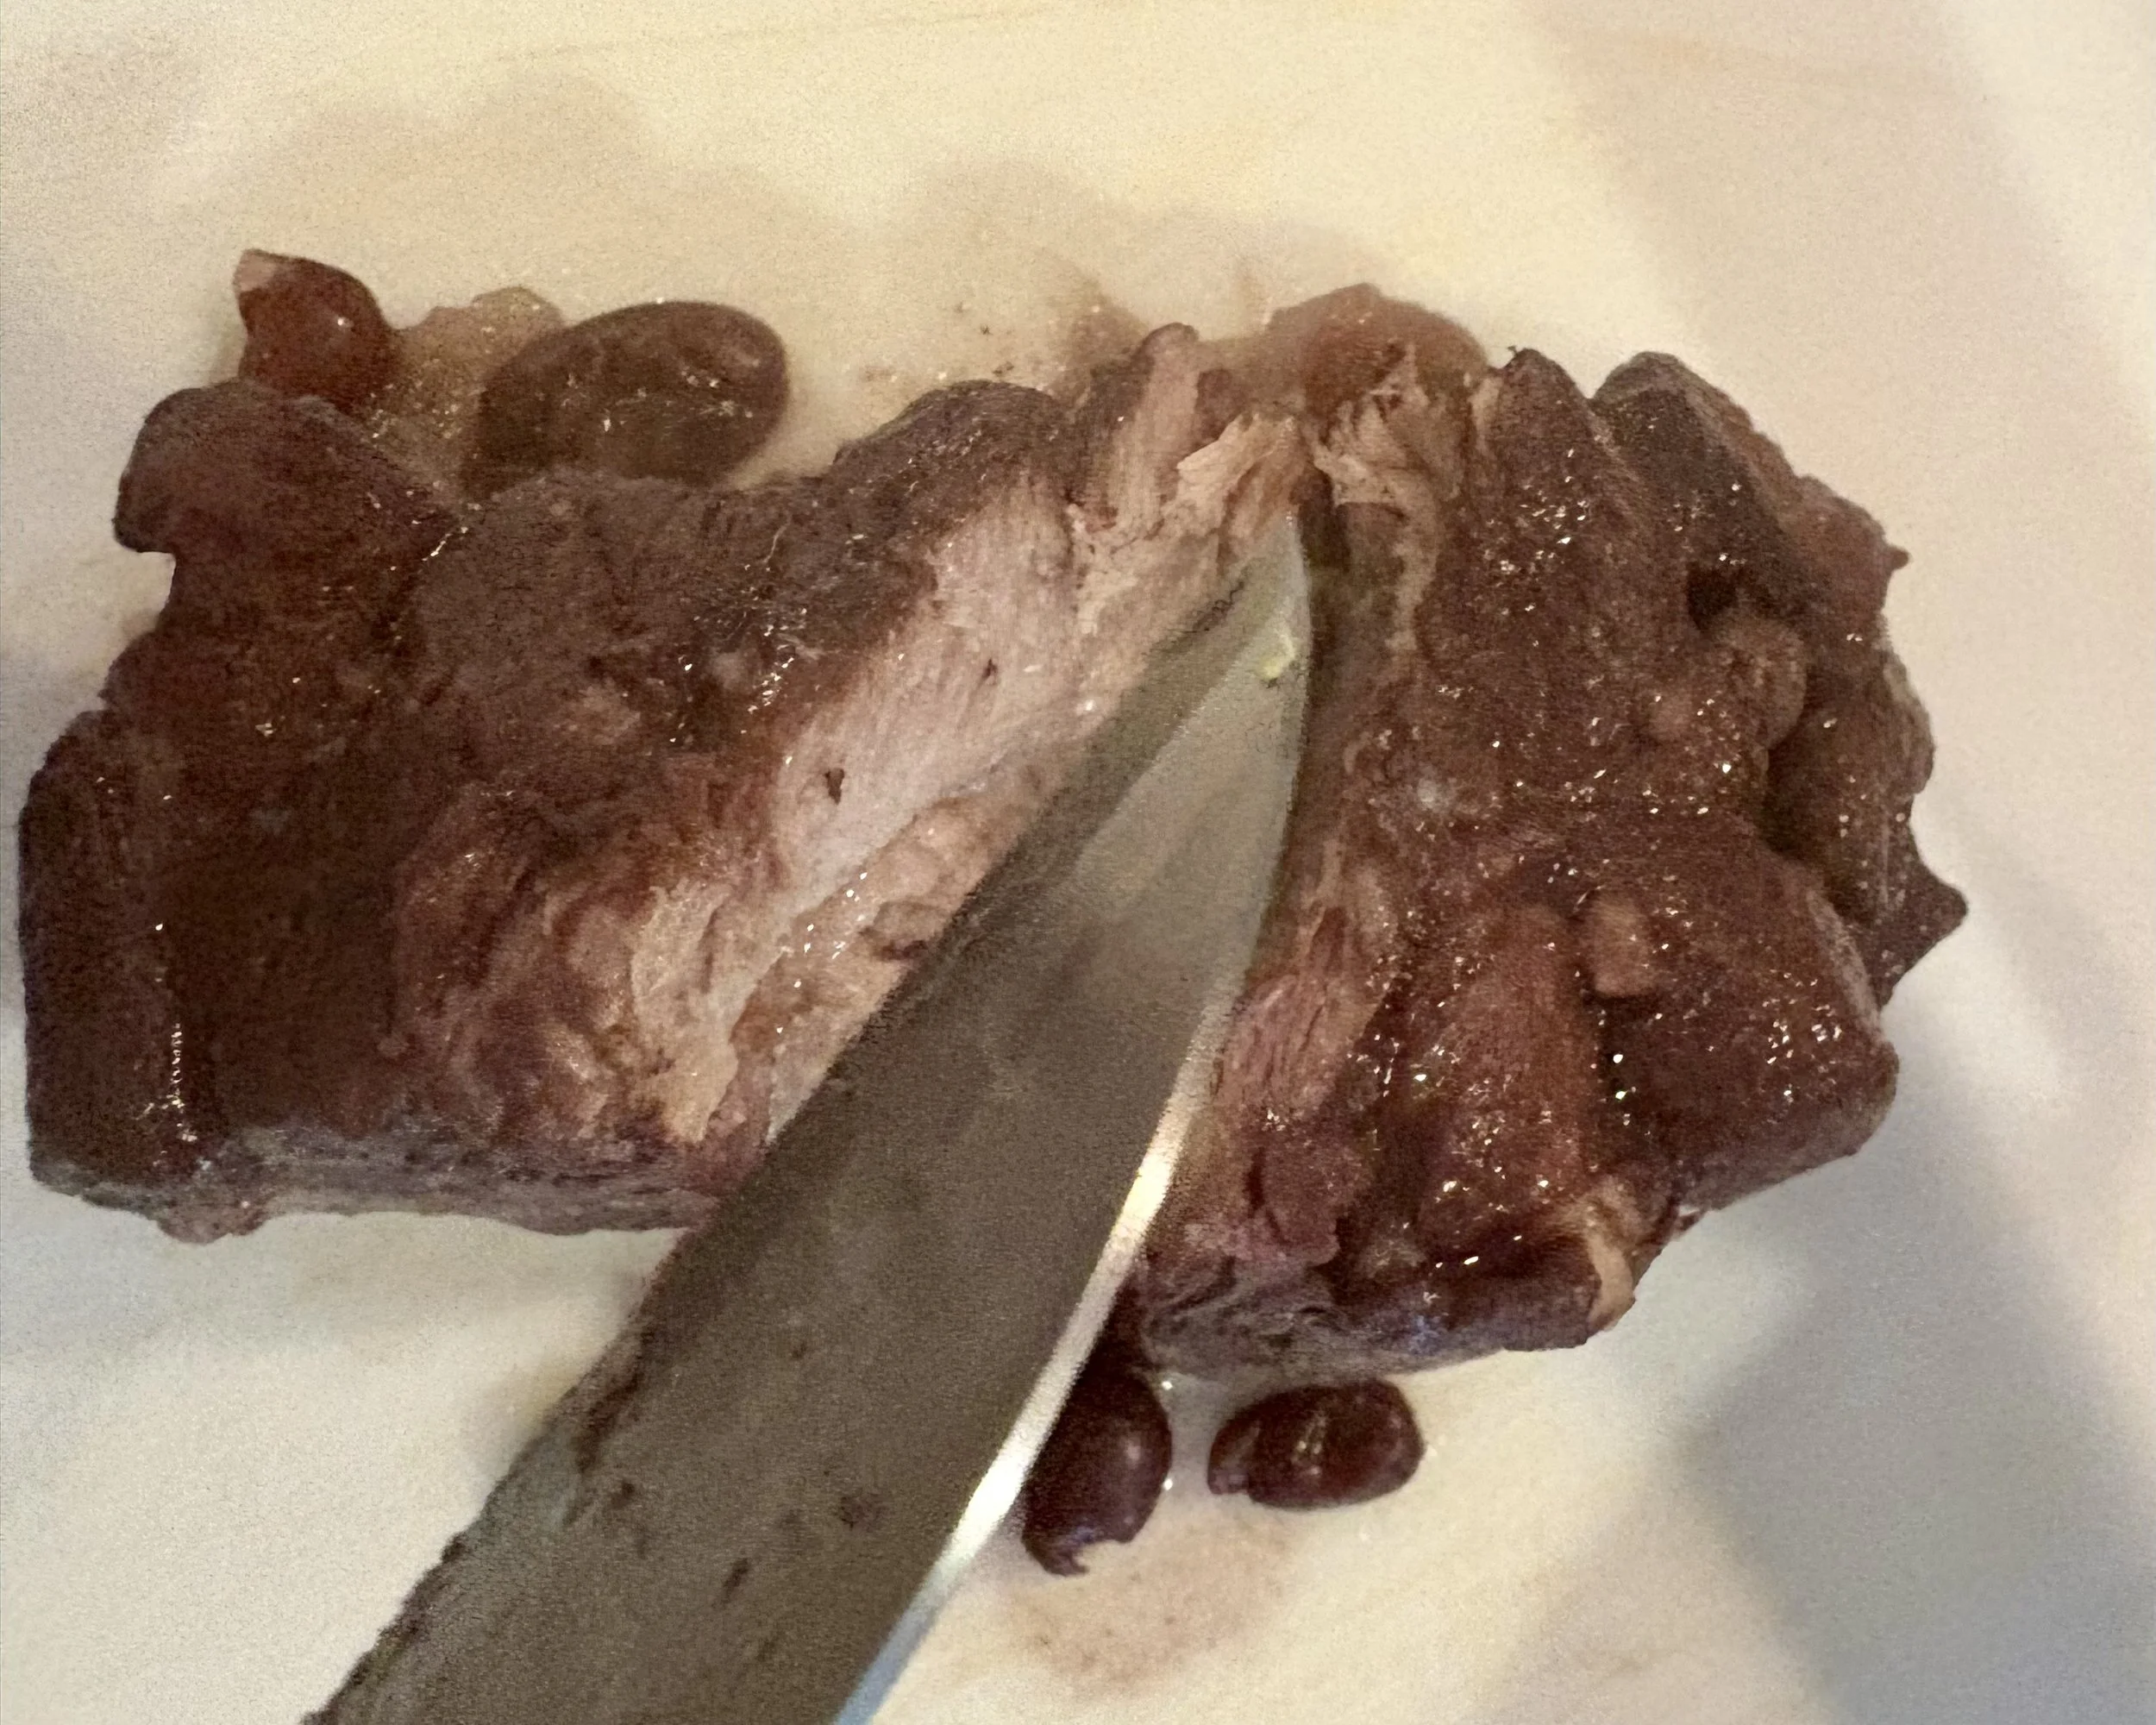
the cooked pork can be chopped or shredded
While the beans are cooking, prepare a simple salsa or relish to add flavor to the beans when serving. This salsa is where most of the finished dish’s flavor will come from, so assemble it while the beans cook and set it aside until serving.
The salsa or relish depends on what you have. Include salt, pepper, minced allium, vinegar, and a fresh herb. You might add citrus juice, cilantro, or jalapeno. Pickles and tomatoes are good too. Keep the salsa simple and balanced; avoid too many ingredients.
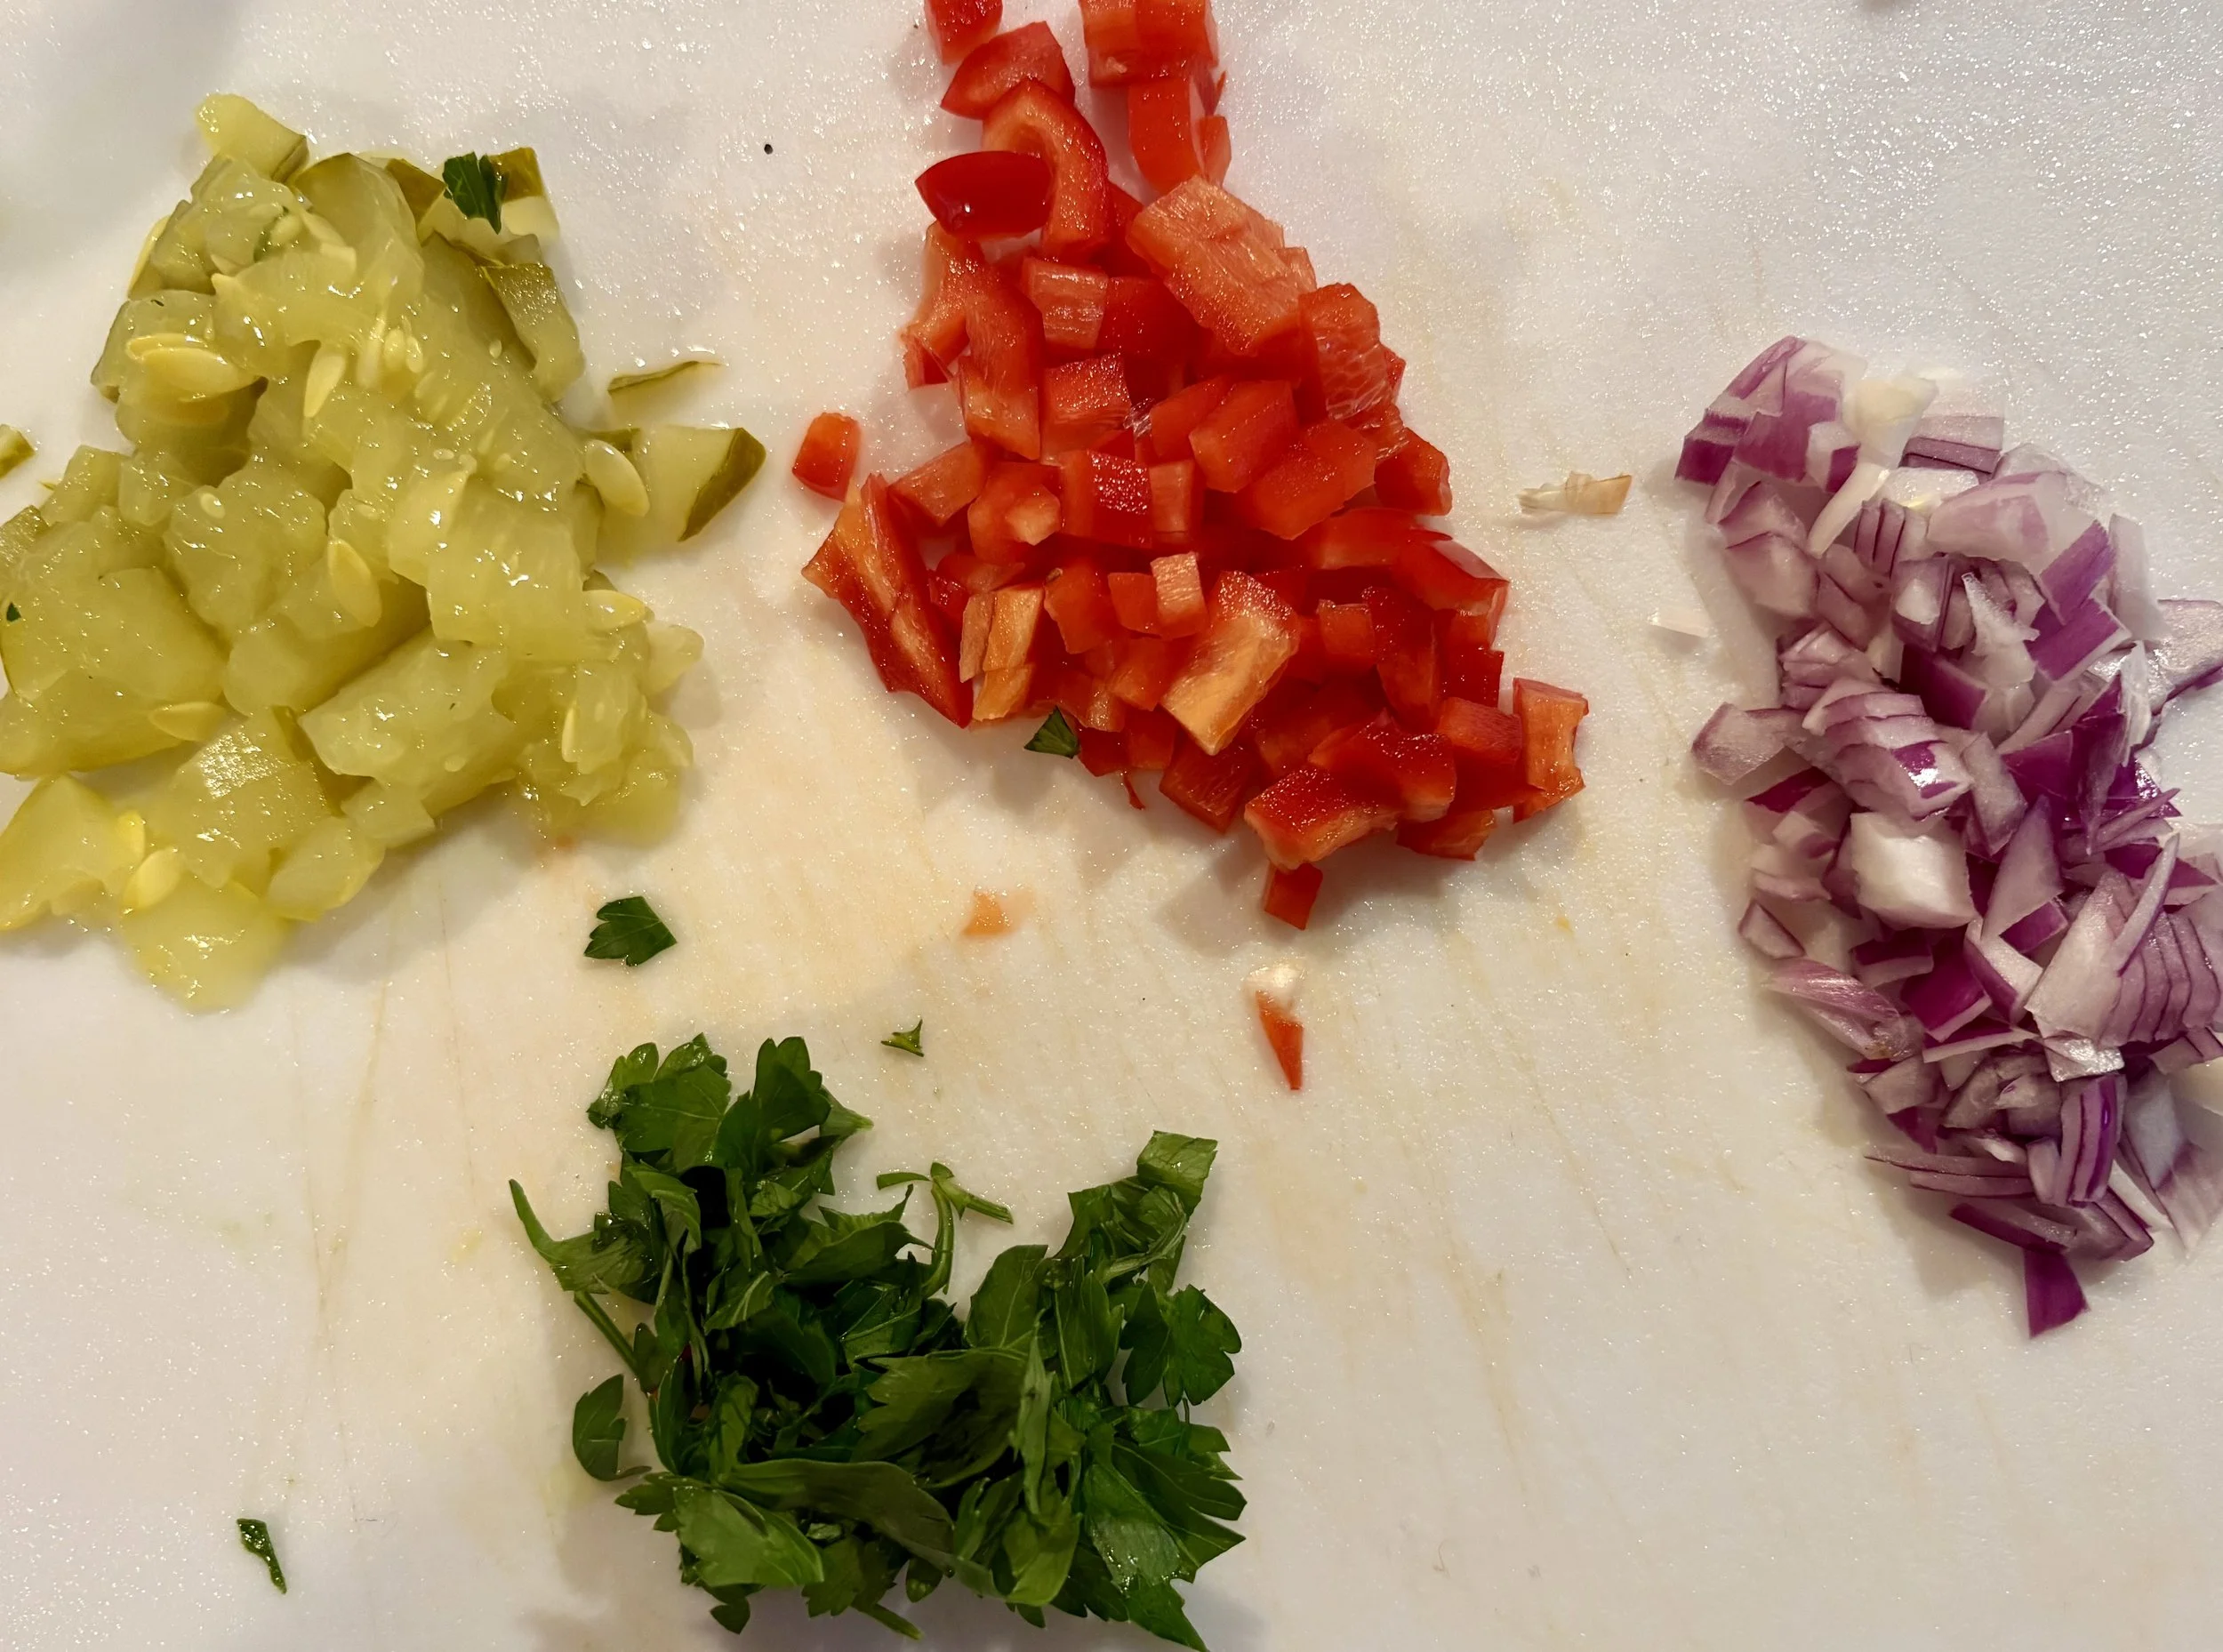
color and flavor, be creative
This time, we chose red onion, red pepper, pickles, salt, pepper, fresh parsley, and vinegar. We stored it in a glass jar.
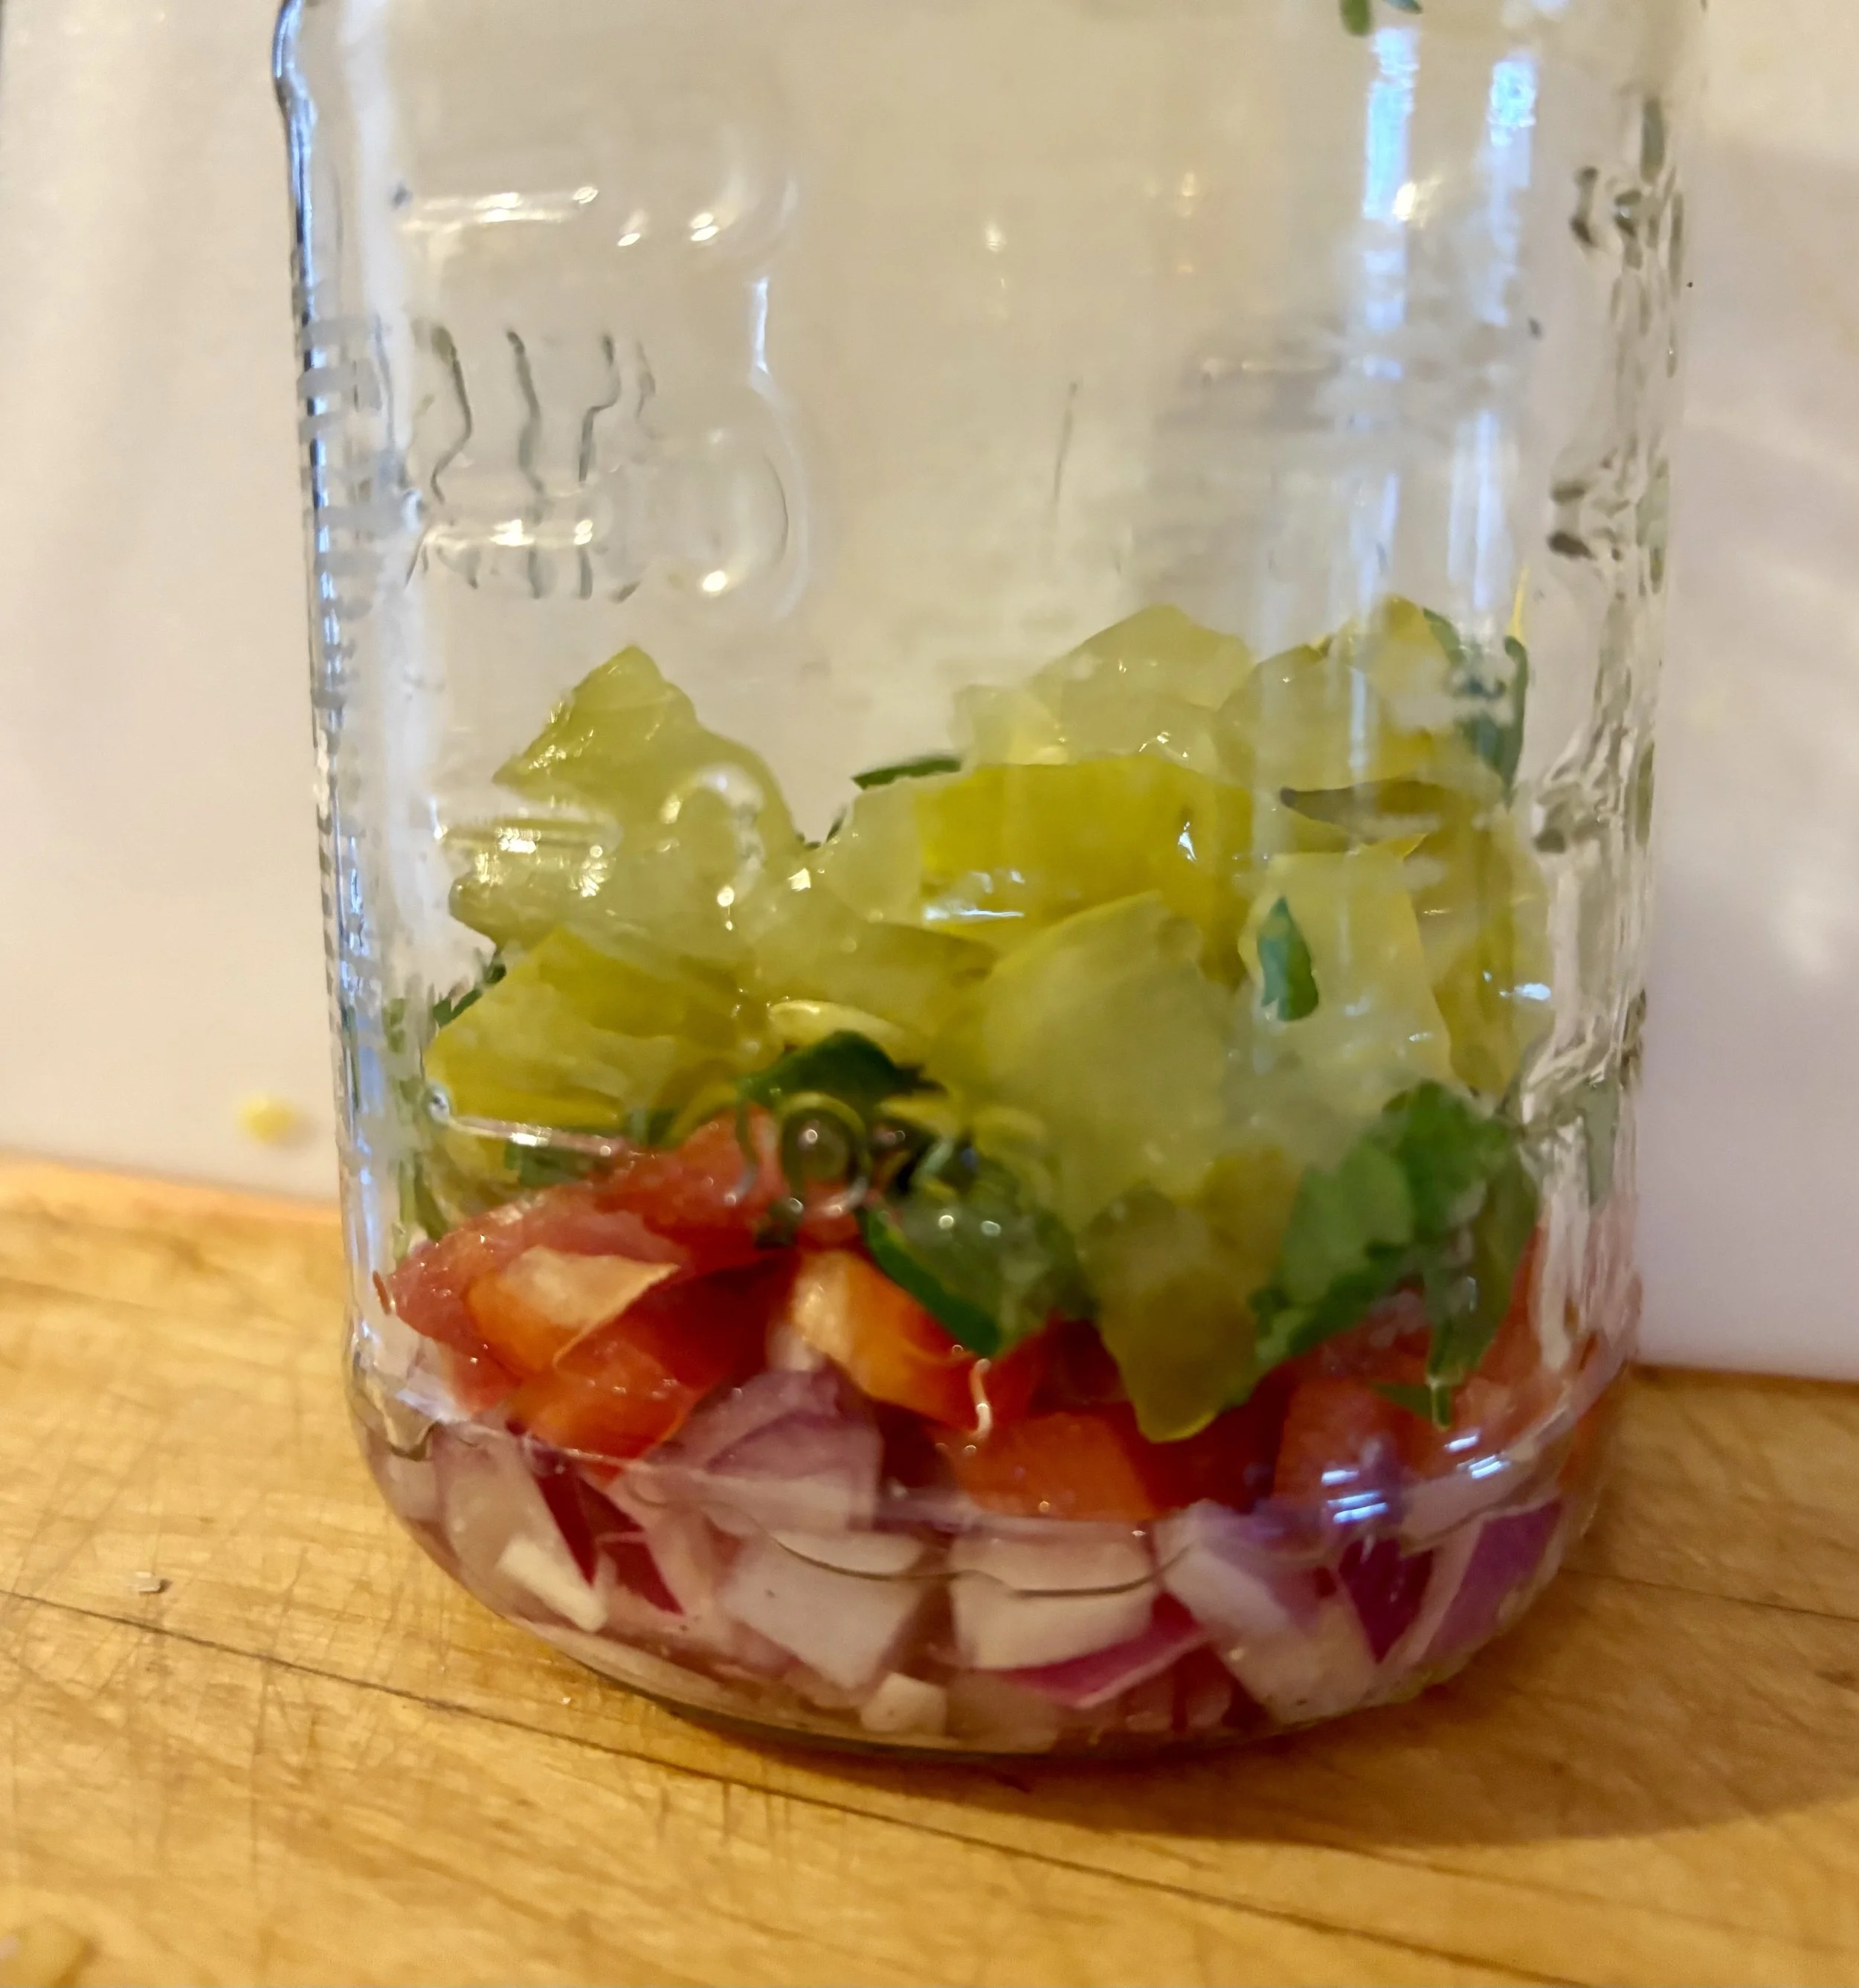
be sure to add a generous bit of vinegar to keep the salsa fresh.
We typically let the beans sit overnight in the fridge for optimal flavor, but you can serve them immediately if needed.
Serve the beans over rice or enjoy them on their own. Top with a generous scoop of salsa. Add a poached egg for a special touch.
These beans are clean-tasting, easy to prepare, delicious, and affordable.

Simple Chicken with Escarole
A delectable and clean meal inspired by the beautiful, crisp escarole we had in the fridge.
Escarole is a favorite in soups and stews. Added last, it preserves color, flavor, and texture.
A delectable and clean meal inspired by the beautiful, crisp escarole we had in the fridge. Escarole is a favorite in soups and stews. Added last, it preserves color, flavor, and texture.

a perfect lunch on a cold, damp day
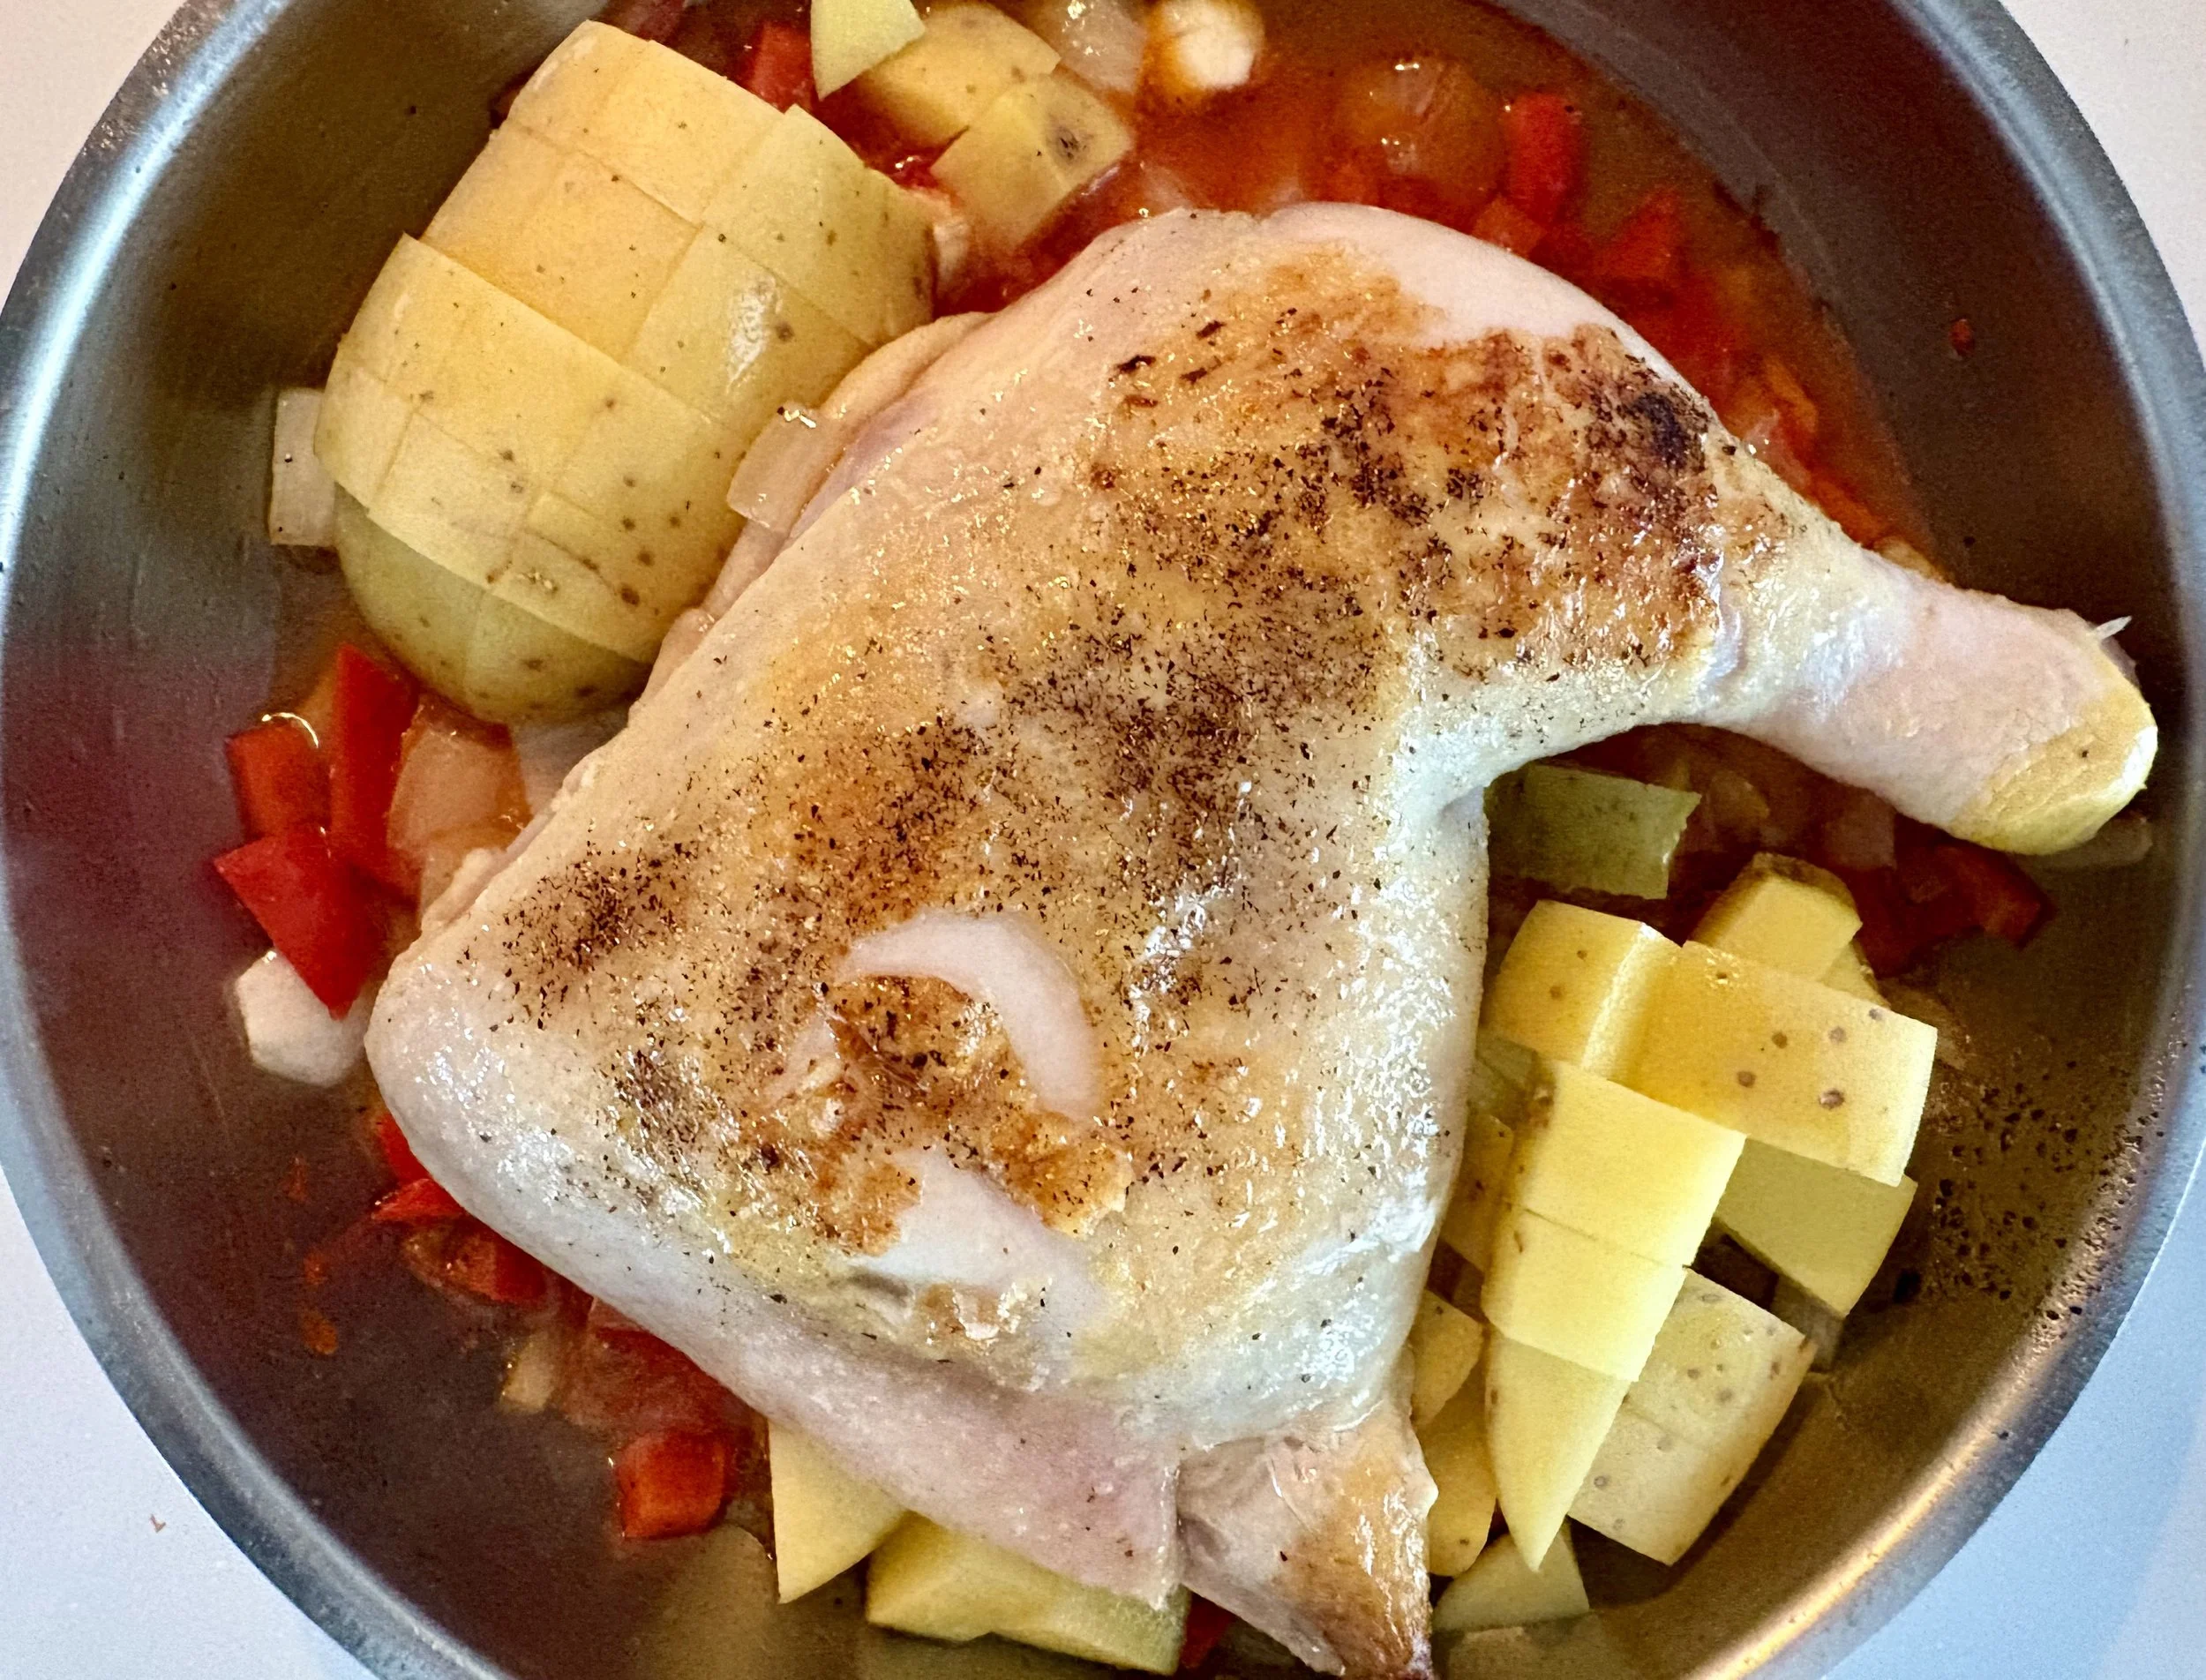
We had chicken and escarole. Because of the damp, cold weather, a stew was in order. The kitchen inventory was reviewed for possible additions. We wanted a focused flavor profile, so we didn't get too crazy. Onions, garlic, and red pepper were chosen. We also added a diced potato to provide carbs and make it heartier. Alternatively, this could have been served over rice or pasta.
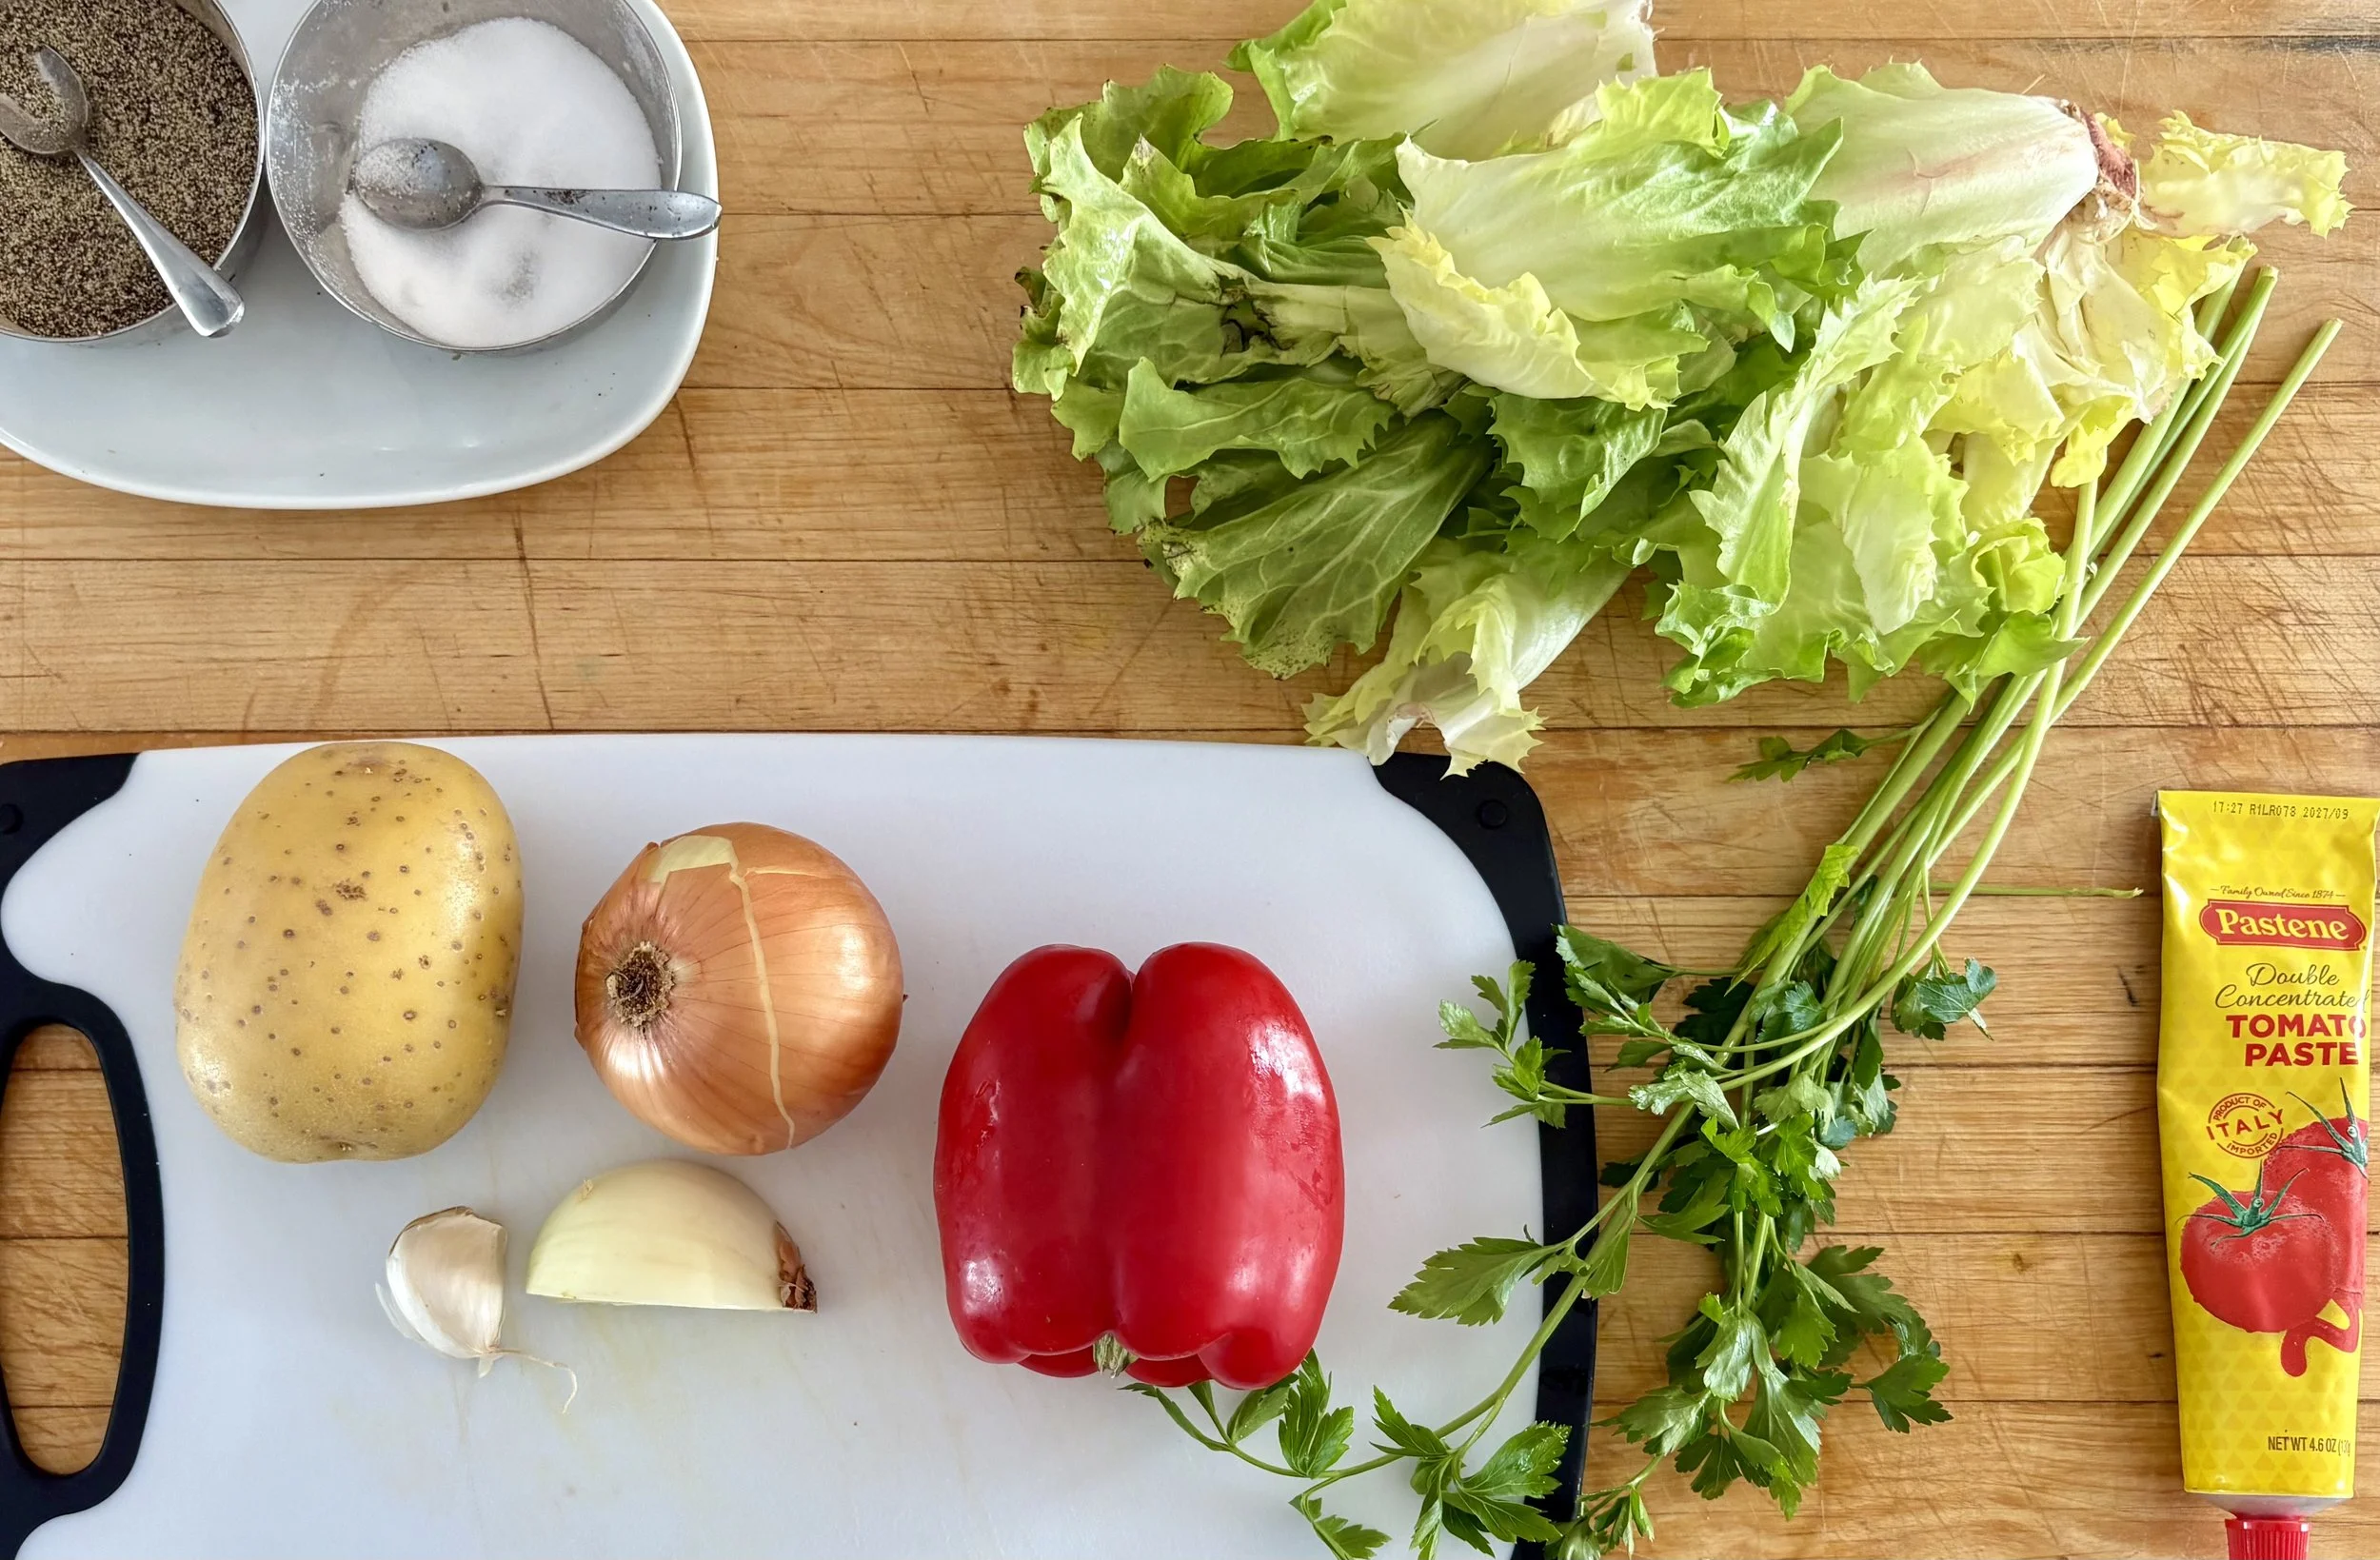
just a few ingredients, all items we keep on hand
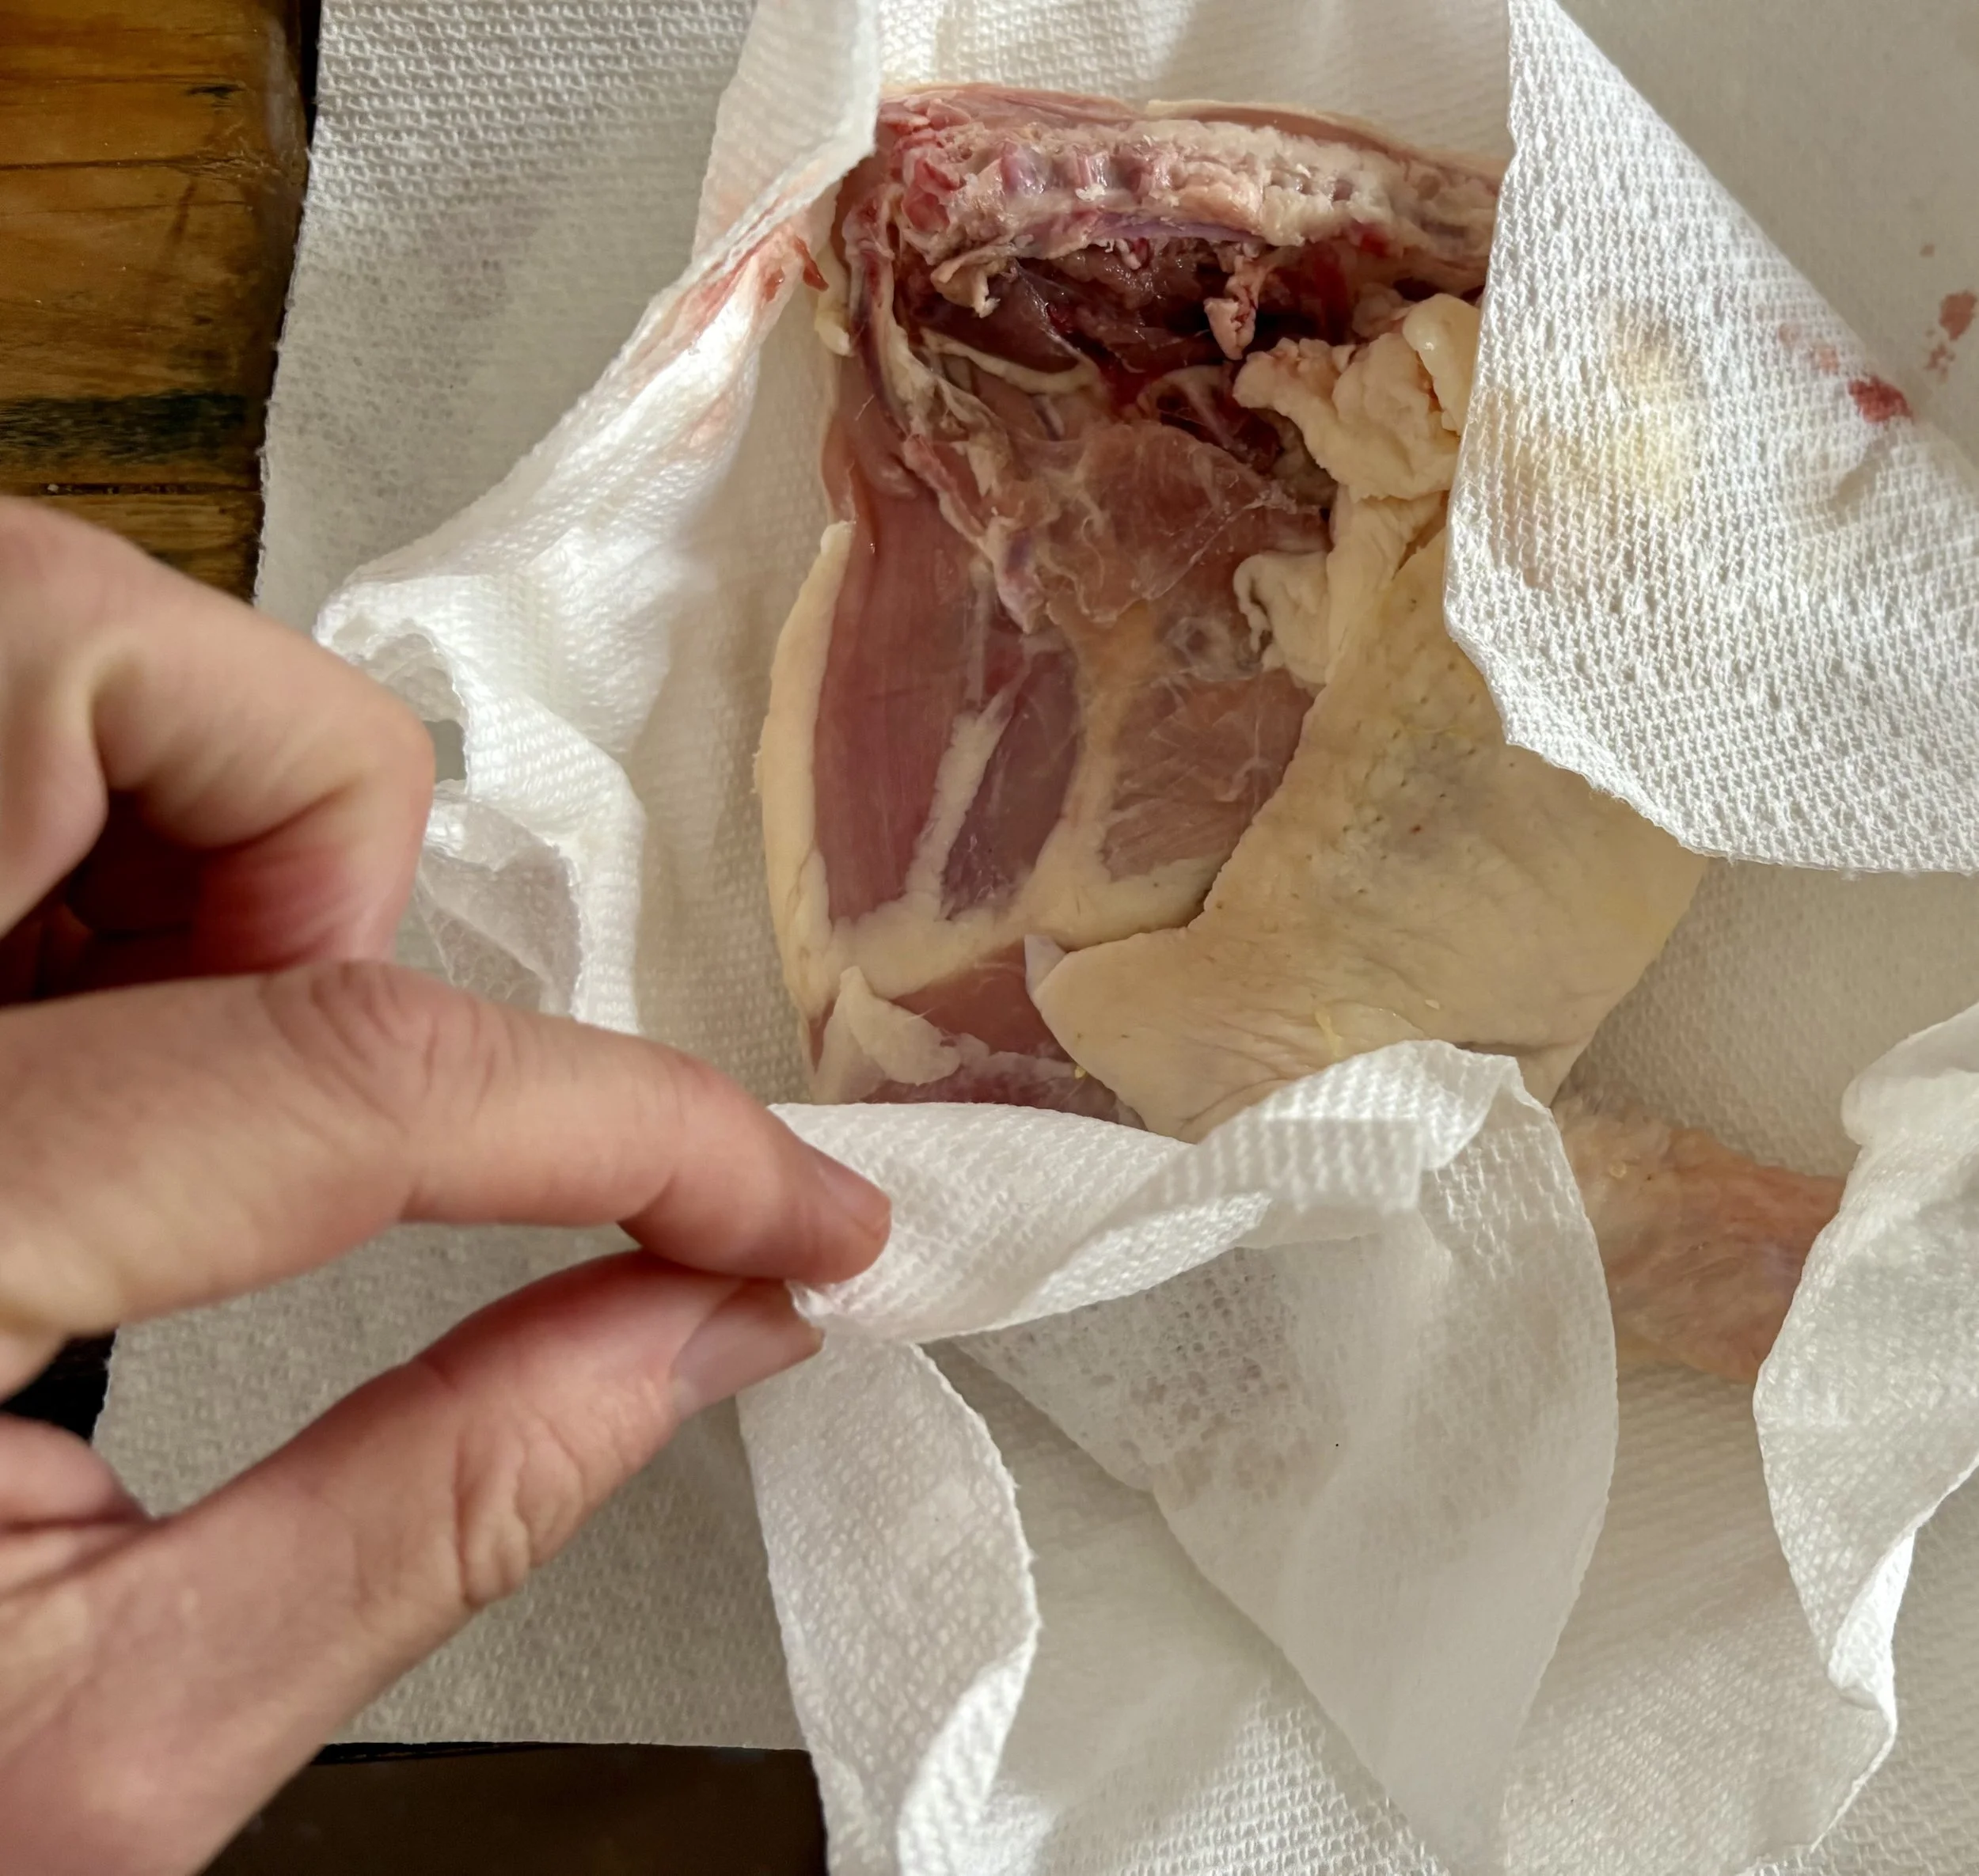
We always keep chicken leg sections in the freezer. We buy them in bulk, then package and label each one. Naturally, they go straight into our inventory—we’re kitchen nerds. Chicken leg sections are great: lots of skin, bones, and dark meat. They're a bit messy but deliver flavor and plenty of bones for broth.
Defrost chicken legs in cold water for a few hours. If not fully thawed, allow extra cooking time.
Pat the chicken dry with paper towels before browning. This ensures proper browning and prevents splattering. Surface moisture must be removed because it can cause splattering and reduce the effectiveness of browning by absorbing heat.
Always dry chicken fully before browning in hot fat
Heat a regular (not non-stick) pan over high heat, then add ghee or oil. Place chicken pieces in the pan and leave mostly undisturbed until the first side is browned. Turn each piece once to brown the other side. When both sides are browned, set the chicken aside. Remove the pan from the heat, drain, and discard the fats.
Olive oil is added to the pan, and onion, garlic, and pepper are sautéed over low heat until soft and slightly translucent. A generous amount of high-quality tomato paste is added and mixed thoroughly.
Add the browned chicken, diced potatoes, and enough water to cover the contents. Bring everything to a boil, then reduce the heat, cover the pan, and simmer for about 45 minutes. Flip the chicken once during this time.
This is left mostly unattended - so easy
Once the chicken seemed cooked, we removed all the meat from the bones, a somewhat unpleasant task, and added it back to the pan. The bones could be used to make broth.
If the chicken was not fully cooked, continue cooking on low until it is fully cooked.
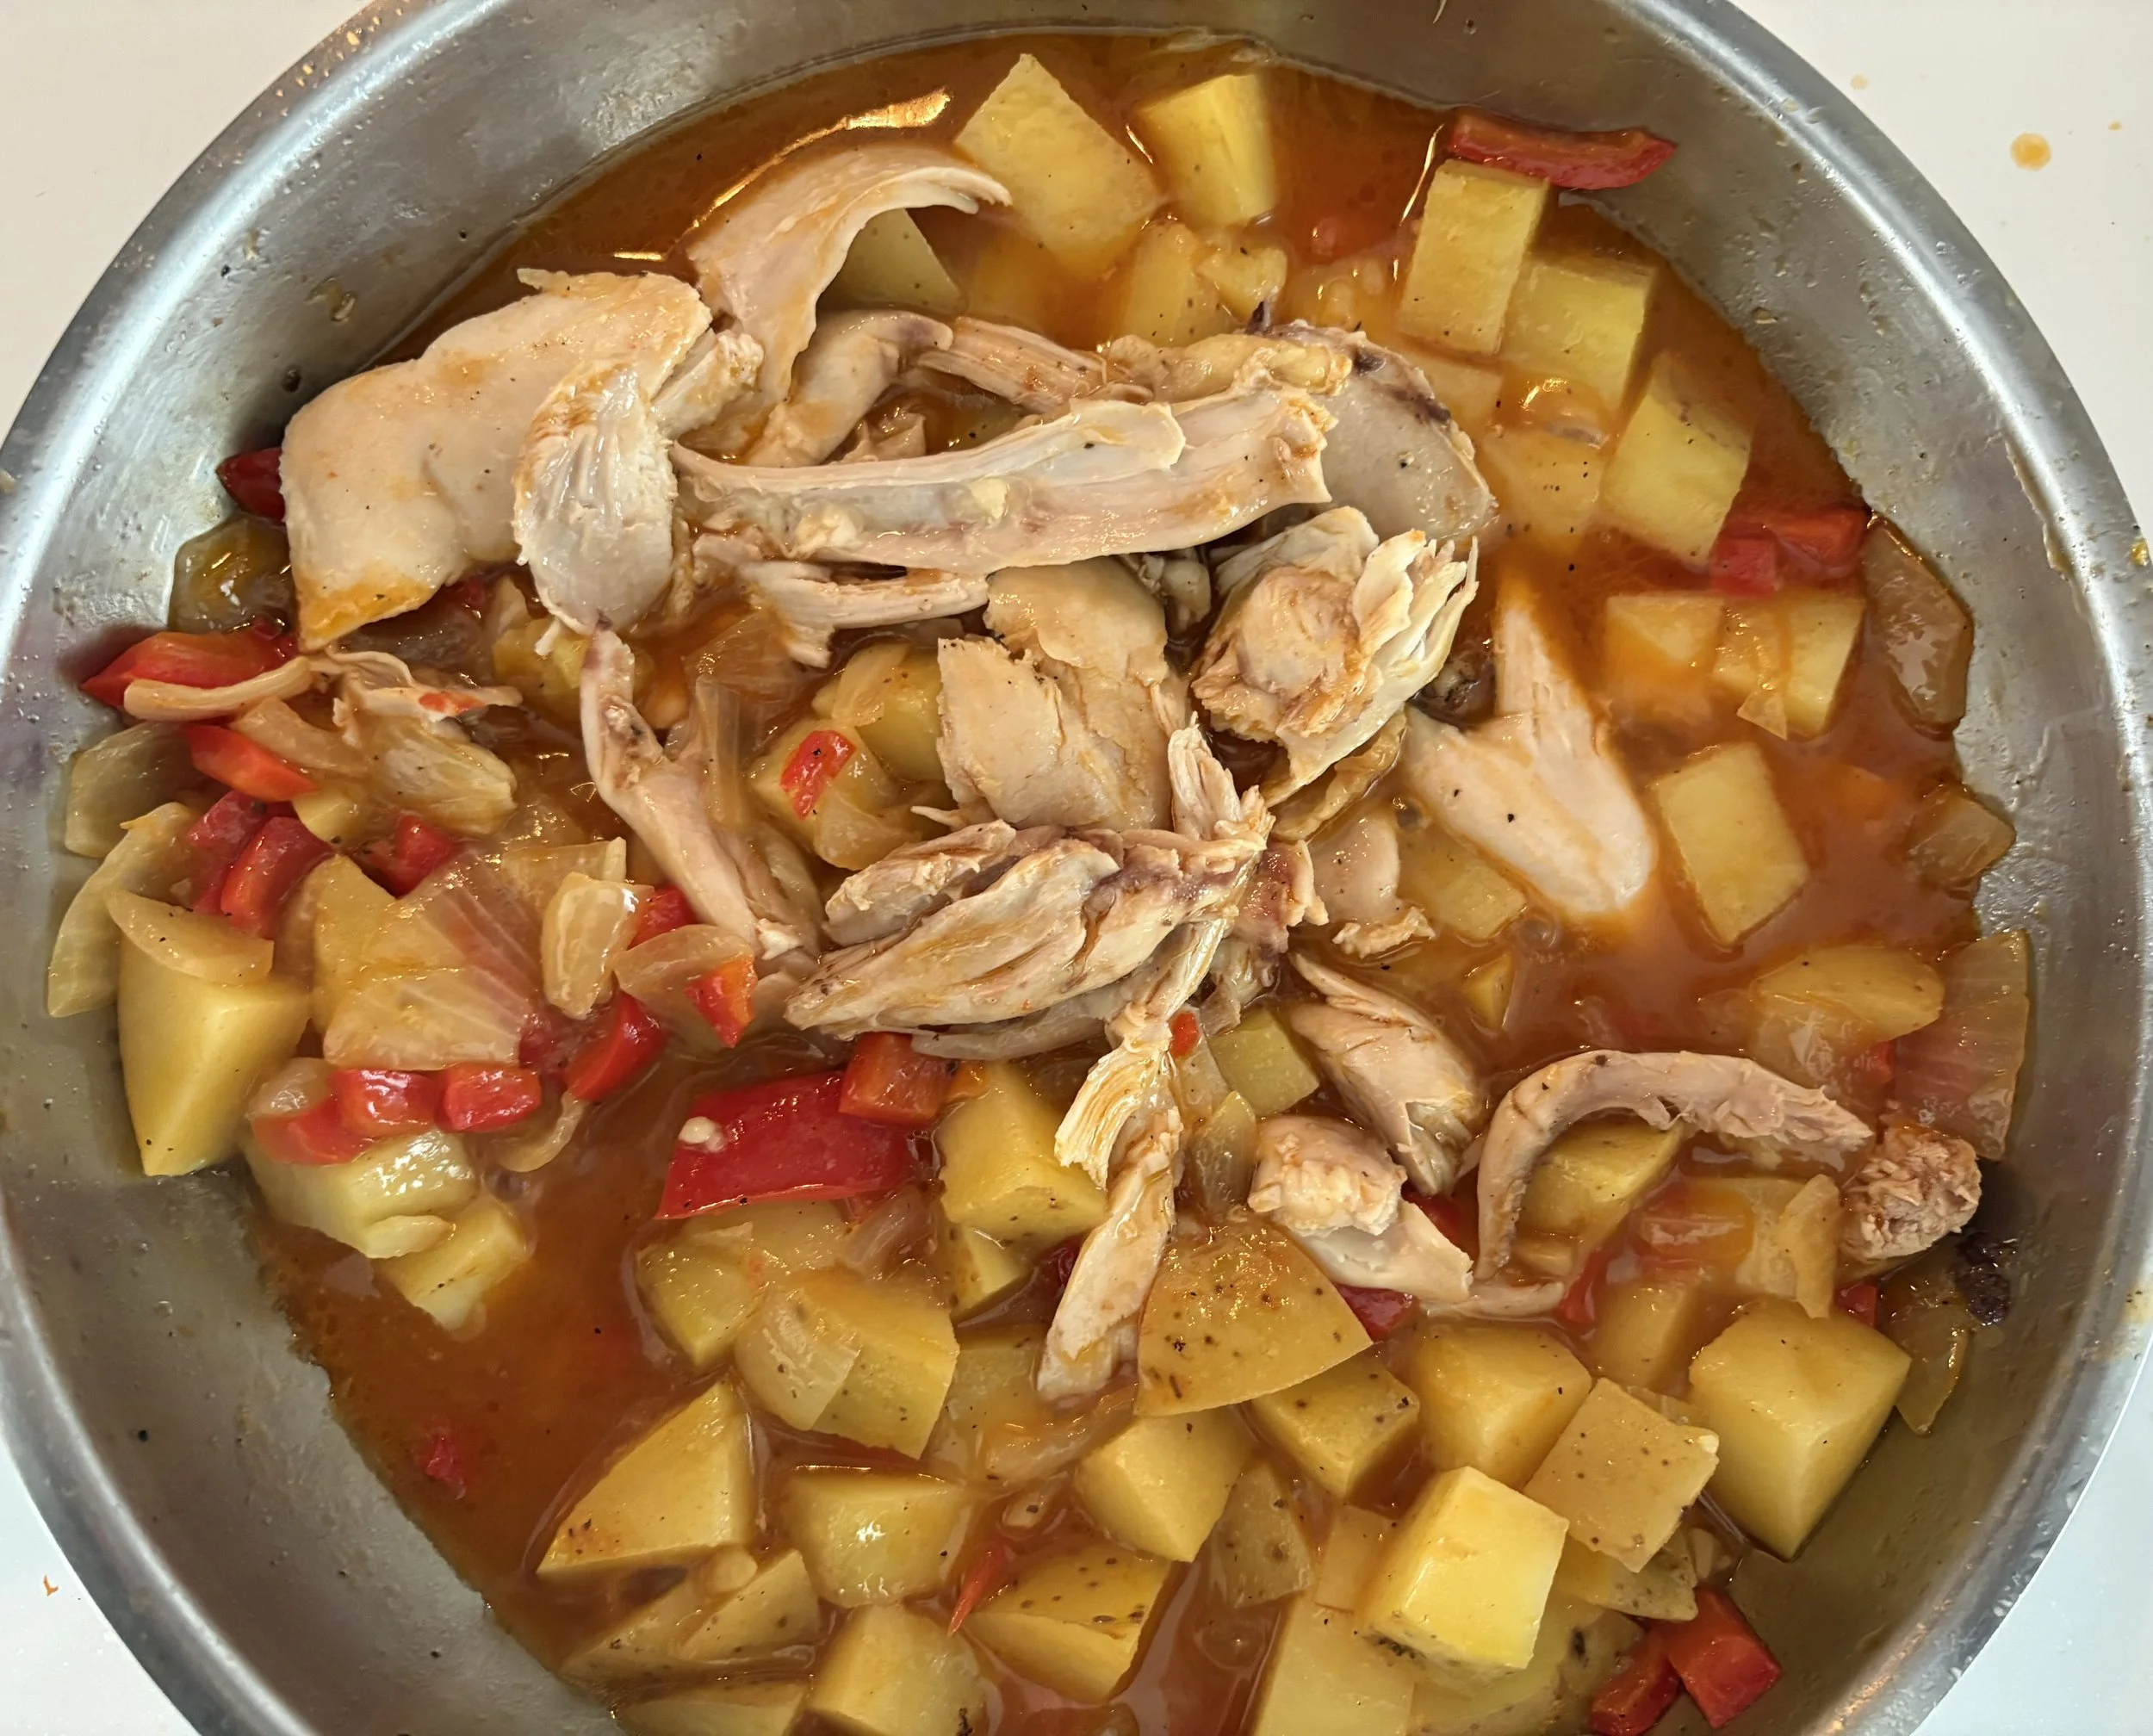
A generous amount of 2-inch chopped escarole is added, and the pan is covered until the escarole is wilted.
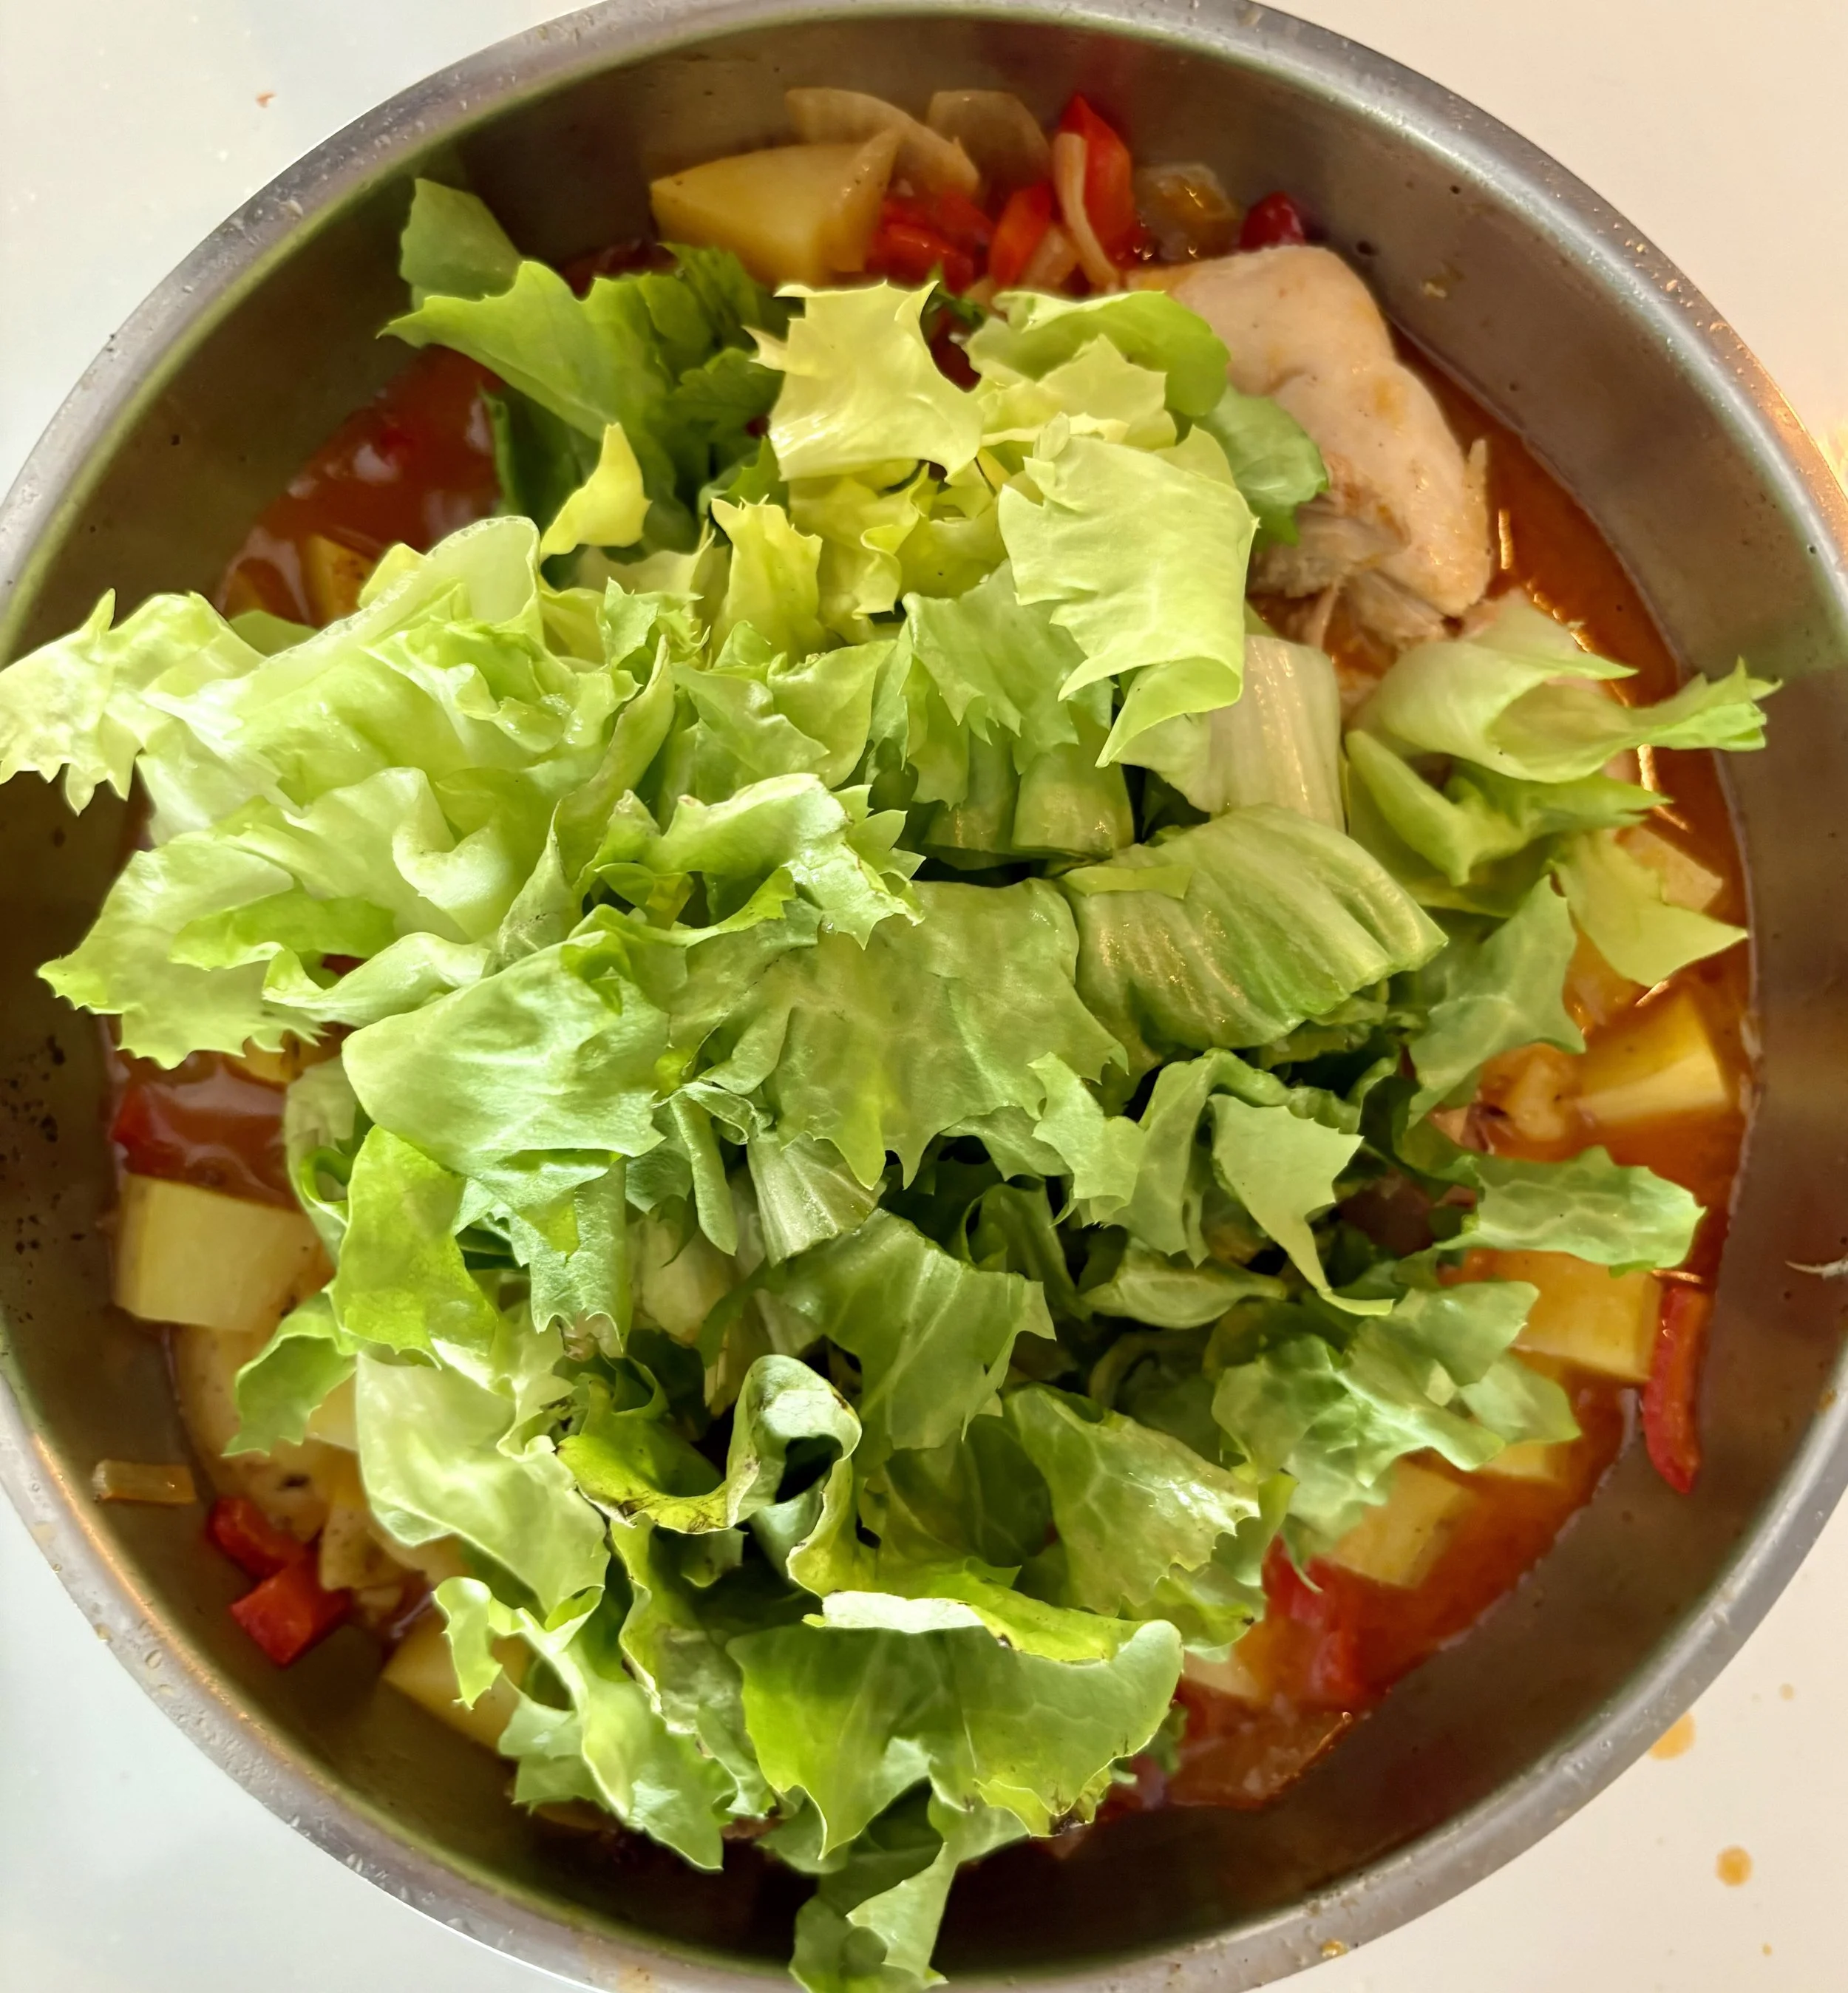
Served with fresh parsley and fresh ground pepper.
Absolutely delicious, and I bet it will be even tastier tomorrow.

Homemade Chicken Broth
Homemade chicken broth is aways in the BSK freezer. We use it for soups, sauces, risotto, and it can make make plain, white rice, extra special. It is simple to make, and your home will smell wonderful during the process. This is a cooking project that is mostly unattended, so it can done while you are working or relaxing at home.
CHICKEN BONES
Whenever you roast a chicken, you should always use the carcass to make broth. Remove, and set aside as much meat as possible before the simmering process. After about 10 mins of simmering, you should remove carefully remove the carcass from the liquid and see if there is any additional meat that can be pulled off and set aside.
If you use a store bought rotisserie chicken, you will be getting all sorts of salt and flavorings already included in your broth. You can therefore skip adding the vegetables and herbs.
Another option for chicken bones, are chicken backs and necks that can purchased independently at a good market.

A roasted chicken carcass is wonderful to have as it will generate lots of yummy broth.
VEGETABLES & HERBS
The standard vegetables used are onion, celery and carrot. You can also use any additional alliums you have on hand. You really do not want to vary from this standard as you want to be creating a fairly neutral broth.
For herbs, you want to add whole peppercorns, a couple bay leaves, and any fresh herbs you have, such as rosemary or thyme. If you don’t have fresh herb, you can just skip them.

onions, celery and carrot are the standard vegetables for chicken broth. You can also add garlic, scallions or other alliums you have on hand.
COOKING
Place everything in a large pot, add cold water until just covering the contents, and bring to a very slight simmer. Leave mostly unattended for 4 hours. Check periodically, adding a bit of hot water to keep the liquid level above the solids.

FILTERING AND COOLING
Once everything is cooked you should filter out the solids and chill. (Never put large quantities of hot liquids in your freezer as it will lower the temperatures of the entire freezer.)

a large canning jar in placed in ice

cheese cloth is slayed across a funnel to filter out solids

fill jar with hot broth

lay the sealed jar in ice until it is cool. (In the winter time if it’s super-cold just put outside)

Freeze the broth in 2 cup quantities. We find this is the most versatile volume to have on hand. Be sure to label and add to your freezer inventory.

Mini Pot Pies
Mini (but mighty) Turkey Pot Pies

What a fun and delicious way to use up leftovers from Thanksgiving dinner. Once prepared and frozen, these are available for an easy, but special weeknight dinner.
Planning Ahead
We already knew these were going to happen while I was planning Thanksgiving dinner so we factored this into dinner preparation. There is always leftover turkey and what an extra special way to enjoy it over the next few months!
When preparing vegetables for Thanksgiving dinner, we made extra carrots, and green beans so there would definitely be leftovers.
Vegetables were prepared simply, steamed until just tender, and served with butter and salt. I wanted the vegetables to be easily incorporated into the pot-pies with no extraneous flavorings.
Creating a turkey stock is always part of the Thanksgiving dinner as it is used in the gravy and stuffing. We made sure there were 2 cups leftover turkey stock to make the sauce
Pre-Work
These steps can be done early in the day or the day before.
Make room in your freezer for the cookie sheet with ramekins BEFORE you start assembling the potpies.
Make a batch of pâte brisée and chill at least 1 hour and up to 24 hours
Make a simple velouté sauce using the 2 cups of turkey stock and let cool. Don’t hesitate to use an ice bath to cool quickly if needed.
Assembling the Mini Pot-pies
Place ramekins on a cookie sheet and add to each your cold cooked veggies. We used leftover carrots and green beans and also added some frozen peas from the BSK Pantry (freezer).
Top each with lots of bite-sized pieces of turkey. Everything you add should be cool or cold - you don’t want to introduce any heat to the dough.
Pour the cool sauce over to fill
Roll out pâte brisée and cut circles of dough about 2cm bigger radius than a ramekin.
Top with dough and seal edges. Add a steam slit with a sharp knife
Place ramekins on a cookie sheet and freeze for 3 hours.
Once frozen, remove and wrap each pot pie individually in plastic wrap. Place back in the freezer being careful as the frozen crust edges will be very delicate.
Add these to your freezer inventory so you remember you have them when meal planning!
Baking and Serving
Pot pies are baked frozen and are not defrosted.
Make a simple egg wash (one egg and 1 tsp water) and brush the top of the frozen pie with wash.
If any bits of the frozen crust has broken off, just place on top and brush with the egg wash
Bake in a toaster oven at 350 until nicely brown and maybe you see some deliciousness bubbling out.
Serve with a starch such as potatoes or rice, and a large green salad.


Glorious Roasted Red Peppers
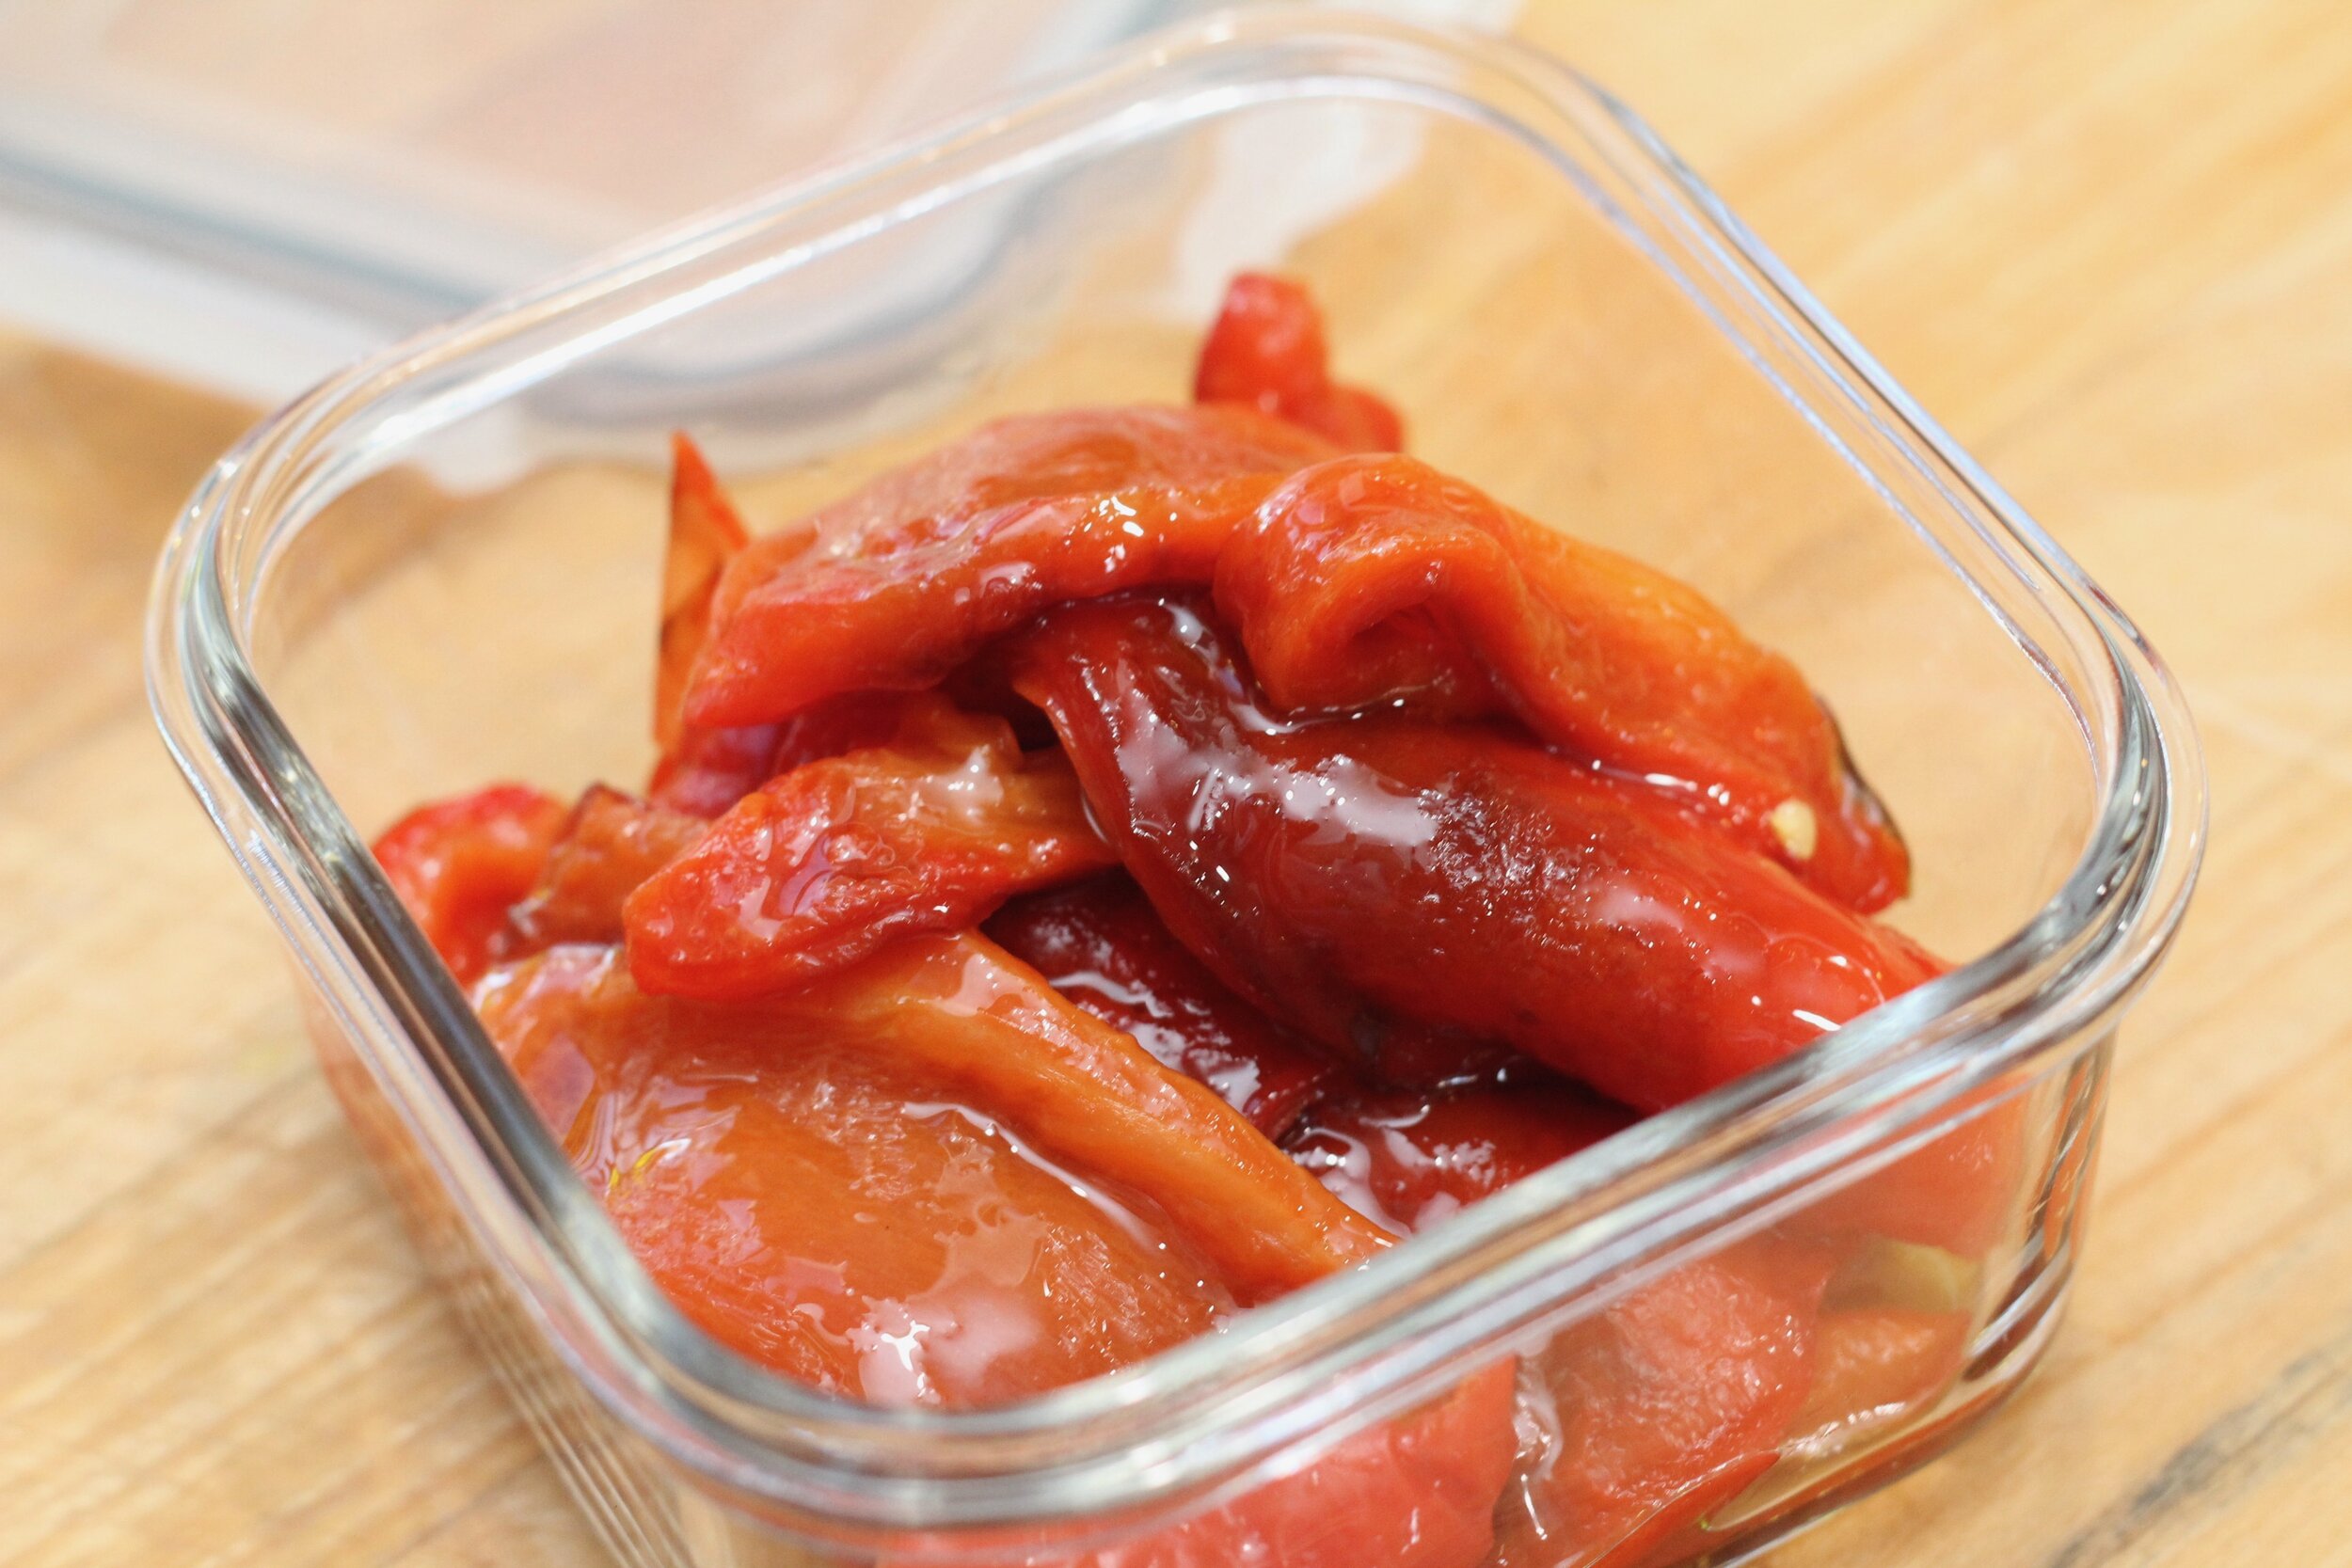
Roasted Red Peppers are a versatile ingredient with a unique flavor. They are a standard foundational intermediate we make many Sundays to have available during the week. They serve as a wonderful building block for many dishes.

Roasted red peppers are a versatile ingredient with unique flavor. A standard foundational intermediate at Buckman Street Kitchen, we make these many Sundays, and have available during the week. Roasted red peppers serve as a wonderful building block for many dishes.
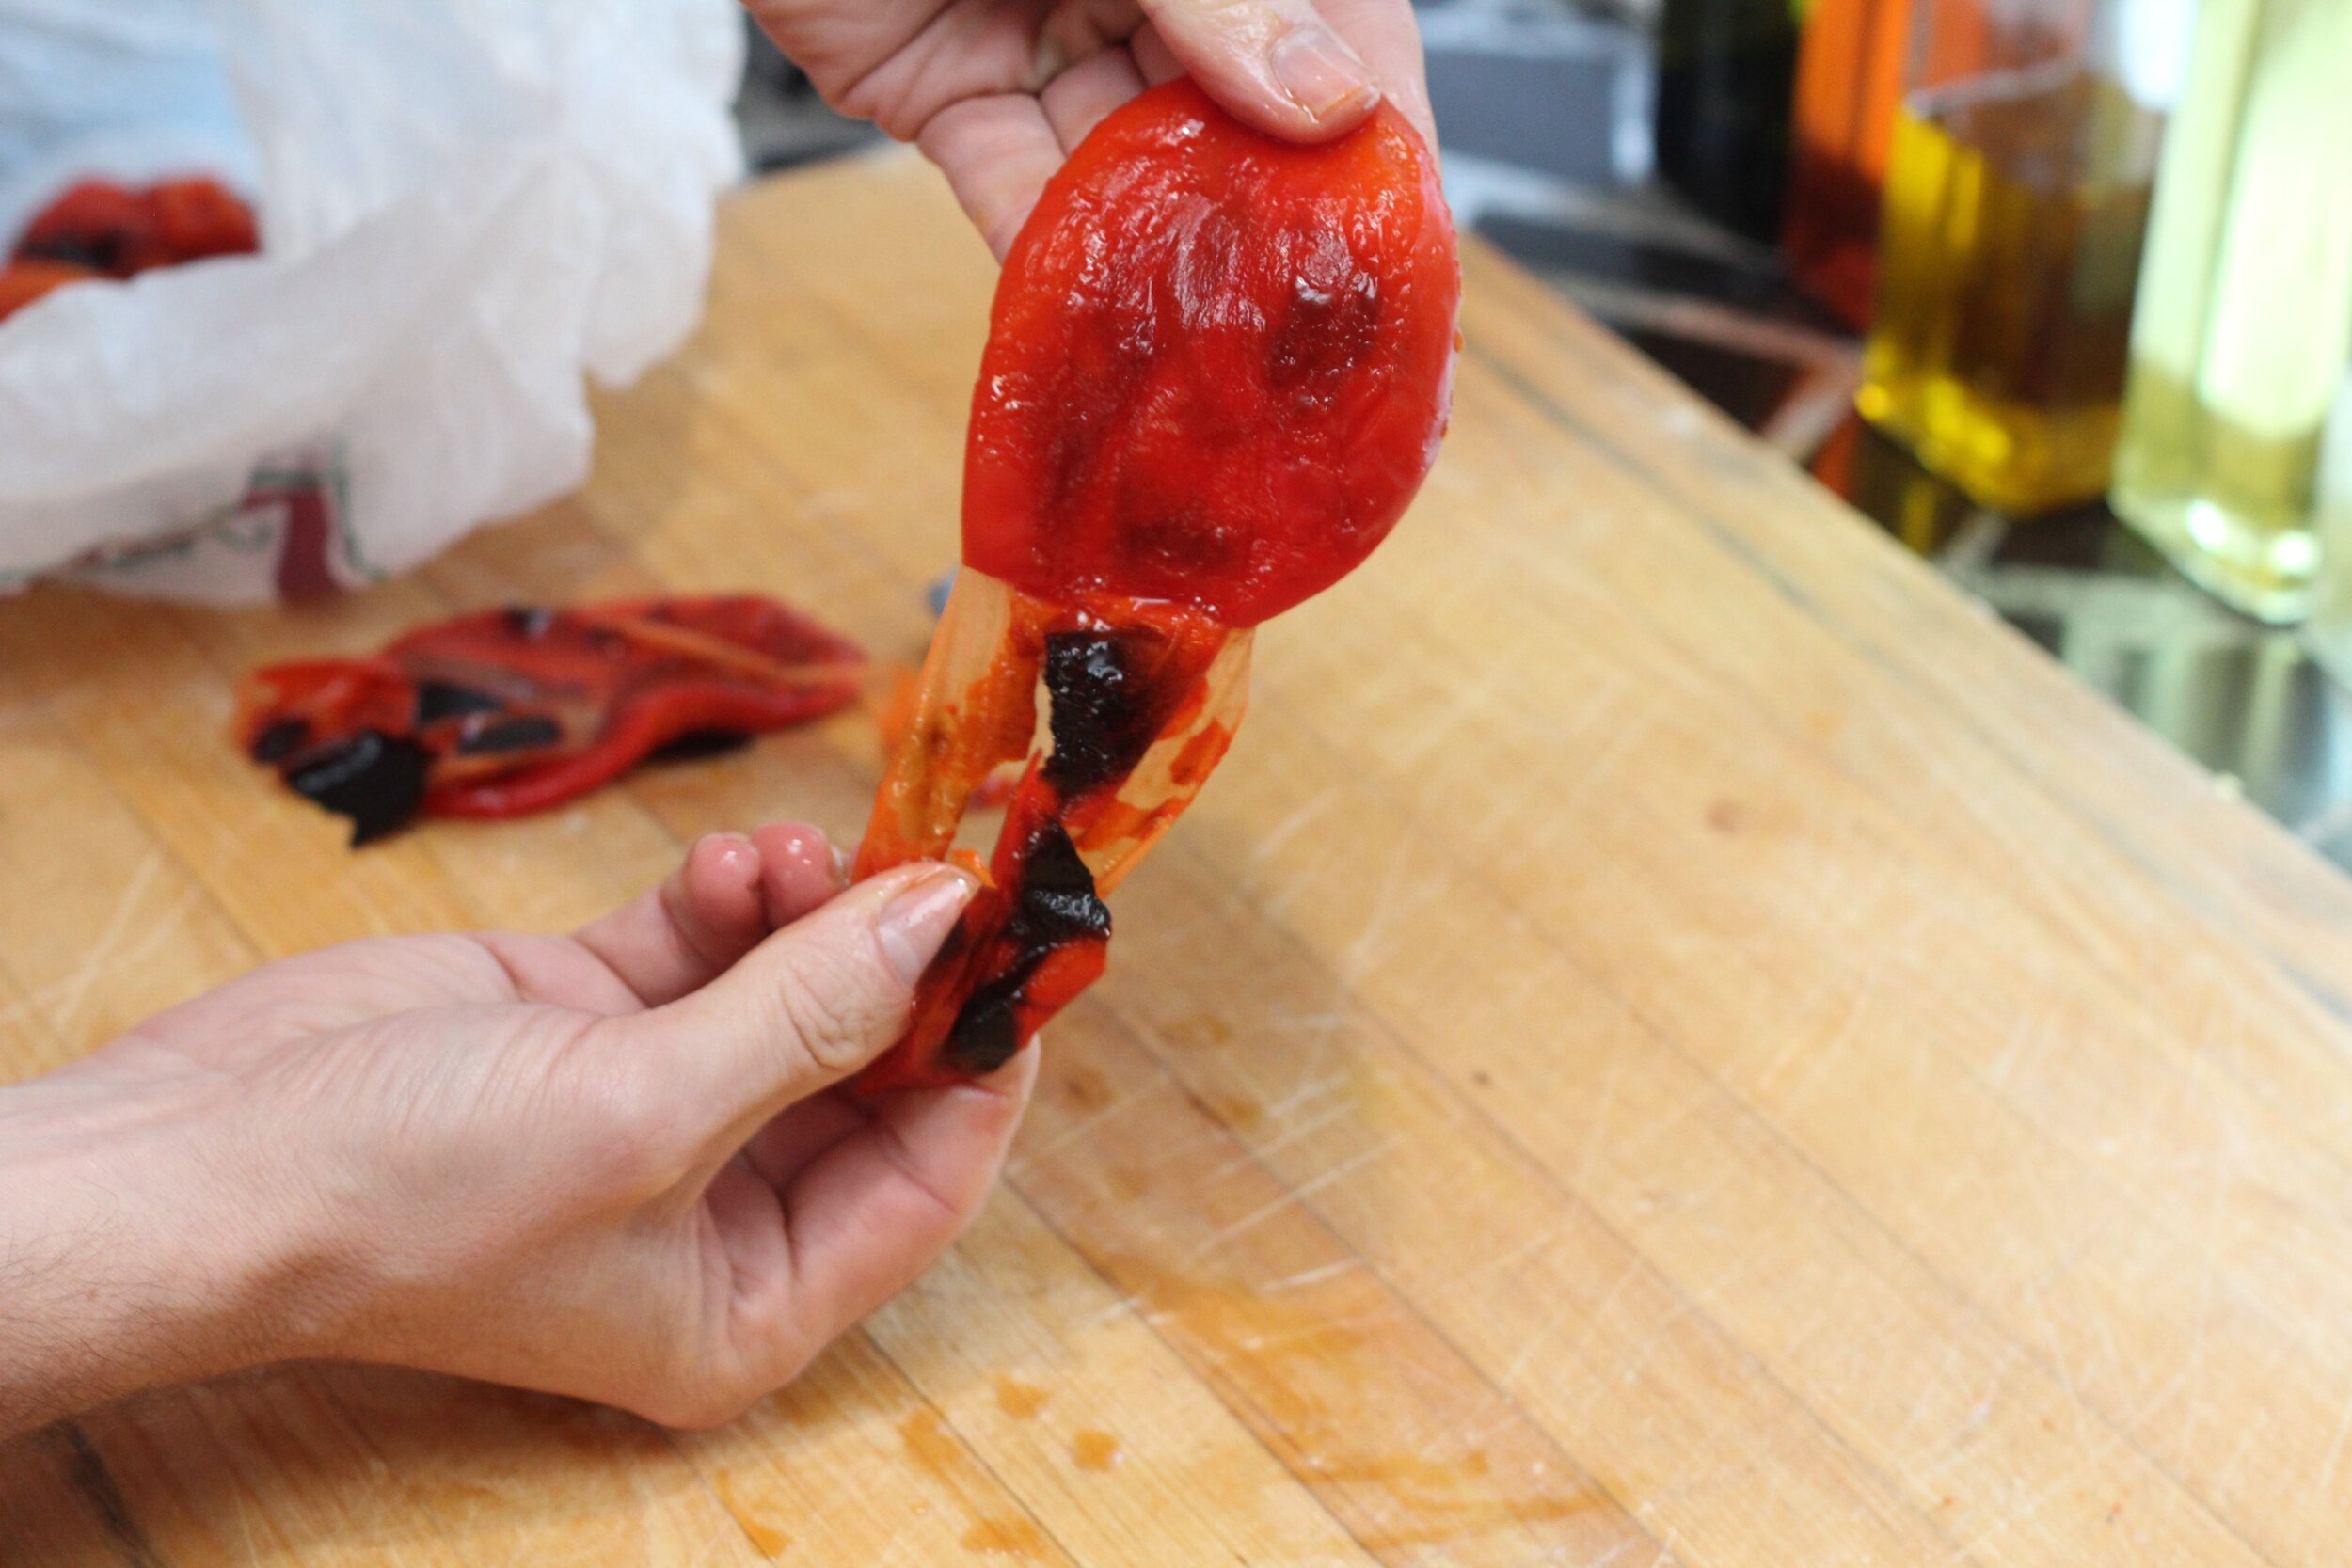
We use the standard red bell pepper. The roasting process accomplishes 3 things; removes the tough skin, softens the flesh, and transforms the flavor into something delicate and mild
To roast, the peppers are sliced into large, flat pieces and broiled skin-side up. The blackened peppers are then placed in a in a closed plastic bag to steam. Once cooled, the skin can be easily peeled off. Roasted peppers can be added to a variety of dishes including:
Salads [Creating a Salad Centric Week]
Sandwiches
Pizza Topping
Soups - as a soup addition or as the star of roasted red pepper soup
Egg dishes: omelette, frittata, crepe, quiche
Pasta [Simple Pasta Template]
Risotto
As you can see, roasted red peppers are a great foundational intermediate, and can be the building block of the standard array of dishes.


Creating a Salad-Centric Week
There is nothing better than a fresh, colorful salad prepared with homemade ingredients. Most days, we prepare a unique salad as a meal, or part of a meal. To ensure a variety of available ingredients, we make foundational intermediates early in the week that are suitable for salads. Also, the contents of the BSK Pantry are always at hand, so we have many options throughout the week.
Many Ingredient Options all Week
Early in the week we make foundational intermediates and often these are suitable as salad additions. Some examples:
hard boiled eggs
garbanzo beans
white rice
orzo pasta
plain cooked chicken
roasted vegetables
steamed vegetables
homemade croutons
roasted red peppers
We also have the full BSK Pantry available to us. The items found there relevant to salads are:
fresh greens, cucumbers, purple onion, (Refrigerator - crisper)
crumbled cheese such as gorgonzola, feta or goat (Refrigerator - dairy)
dried fruit, nuts (Dry Pantry)
dijon mustard (Refrigerator - condiments)
Prepping the Salad
Salad additions are selected by the chef, cut to appropriate size and set aside. A simple dressing is made right in the salad serving bowl. We start with salt and pepper, a splash of a vinegar, a squeeze of fresh citrus and some dijon mustard. This is also set aside until the final salad assembly.
Assembly and Serve
When salad is ready to serve, we finish up the salad dressing by whisking the ingredients in the salad bowl and then drizzling olive oil until the dressing emulsifies. The salad additions are added in, followed by fresh greens. Toss thoroughly to ensure the dressing evenly coats everything. Salad is now ready to be served.
We often serve salad as the last course before dessert and the final assembly step is done right before serving. This ensures everything is crisp and fresh. A well dressed salad does not keep very well as leftovers so be sure to eat all of your greens :)

A Simple Pasta Template
You can make a delicious and simple pasta dish with ingredients you have in your kitchen. It is a great way to transform vegetables or meat into a really wonderful meal. The key to this dish is that you finish cooking the pasta in the sauce’s sauté pan with some pasta cooking water. When I lived in Florence Italy, the restaurant cooktops were always covered with multiple sauté pans doing this final pasta cooking step.
At Buckman Street Kitchen, we always cook meats and vegetable for the week with no seasoning (learn more about what we call foundational intermediates) so that they can beautifully be used in a dish like this.
INGREDIENTS
Non BSK Pantry items:
raw or cooked meats such as chicken, pork, pork belly - Chef’s choice
raw or cooked vegetables such as mushrooms, summer squash, peppers, roasted peppers, broccoli, cauliflower - Chef’s choice
Fresh or dried herbs such as oregano, basil, rosemary - Chef’s choice
BSK Pantry Items:
thin pasta or large pasta
onion / garlic (or any allium you want to use)
olive oil / grape-seed oil / salt
grated cheese
chopped parsley
italian sausage (an option the chef may choose)
tomotoes (an option the chef may choose)
frozen spinach (an option the chef may choose)
canned chicken or tuna (an option the chef may choose)
COOKING PROCESS
Get salted water boiling for pasta
If including a raw animal protein, such as Italian sausage, chicken or pork, start by browning the meat on high heat with a bit of grape-seed oil in a large sauté pan. You don’t need to cook the meat completely at this step but just give it some color. Once a bit browned, remove the meat from the pan and set aside on a plate.
Drain and discard excess oil from the sauté pan. Use the pan with the browed bits for remaining steps.
Sauté until soft and fragrant, onions, garlic (or any other allium you want to or use up) in a generous amount of olive oil. We always seem have a collection of cut-up onions, shallots or scallions in our crisper drawer and this is a perfect way to use them up.
Add your additional ingredients in the order the need to be cooked.
raw vegetables such as mushrooms, tomato, summer squash, would go first
browned meat that needs to be finished cooking would go in early
cooked vegetable or pre-cooked meats go in later
greens such as spinach, arugula or escarole would go in very last
Continue cooking on med-low heat until everything is cooked as desired. You can add any dried herbs you desire. Dont be stingy with olive oil, the sauce should have lots of it. If sauce is cooked before the pasta is done, just remove from heat.
When pasta is cooked one minute less than package instructions, turn heat of sauté pan up to high and transfer the pasta to the sauté pan with tongs or a pasta spoon.
Collect about1/2 cup of the hot pasta water and add it to the sauté pan.
The pasta and sauce should cook on high heat and until most of the liquid is gone - the bottom the sauté pan should have a bit of a thin, not watery sauce. Once you reach this point, remove from heat.
Transfer to a serving dish, drizzle with iliv oil, grated cheese* and chopped parsley and fresh basil if desired.
*grated cheese is generally not used when seafood if included in the dish
A new approach to cooking for the week
When cooking for the week, don’t create complete dishes, instead make building blocks for meals, to be assembled throughout the week. This approach yields more variety and interest to meals. At Buckman Street Kitchen, meal building blocks are called “foundational intermediates” and they are prepared early in the week.
Foundational Intermediates examples [prepared early in the week]
Steamed White rice
Garbanzo beans
Creamy vegetable soup
Hard-boiled eggs
Simple broiled chicken
Grilled vegetables
Roasted vegetables
Foundational intermediates are prepared with no seasoning other than olive oil, salt, and pepper. Therefore, there is no flavor commitment and the cook can decide which direction to go when the meal is created.
At the time of meal preparation, an impactful, simple way to introduce flavor is a combination of olive oil, minced allium, dried spice, salt, and pepper. At Buckman Street Kitchen we call these “flavor bumps”. Flavor bumps can be easily made in single-use amounts for each meal.
Flavor bump examples [quickly prepared for each meal]
Olive oil + minced garlic + salt and pepper
Olive oil + minced red onion + cumin + salt and pepper
Olive oil + minced yellow onion + oregano + salt and pepper
Olive oil + minced scallion + curry + fresh cilantro+ sat and pepper
Simple combinations [prepared at each meal]
Steamed White rice + frozen veggies + flavor bump
Garbanzo beans + canned tuna/chicken + olive oil + red onion
Creamy vegetable soup with: chicken | cream | butter | garbanzos | flavor bump
Chicken + flavor bump
Salad Greens with a few foundational intermediates + citrus/olive oil
Roasted vegetables + flavor bump
This strategy is a way to allow creativity and options as you navigate through your week. Let me know how this approach works for you!
Every day, account for the next 48 hours’ meals.
PLANNED KITCHEN
Being proactive in anything yields better results and managing your kitchen is no exception. With decisions made in advance, you can avoid meal choices that are influenced by hunger or stress. When making forward-thinking eating choices, consider a few factors:
What perishable ingredients need to be used?
Is there time to do a cooking project in the next day?
Is a quick stop at the grocery store needed?
I eat 3 meals a day, so a 48-hour planning process involves the next 6 meals. Again, I account for the next 48 hours’ meal every day, which means some of “today’s” meal should have already been planned.
I meal planned while taking my lunch break at the art studio today. I knew there was a serving of delicious pesto gnocchi from yesterday’s lunch with my sister at Toscana. Also, I recently visited my friend Jerry’s herb garden and stocked up on fresh basil and rosemary. As always, I maintain the BSK Pantry, so I can plan with confidence knowing all of those ingredients are stocked.
———————————
TODAY
Grocery Stop [middle-eastern bakery]
fresh pita bread
fresh falafel
Cooking Project
make orzo salad with sun-dried tomatoes, feta, and fresh basil
prepare herb vinegarette
Meal 03 [dinner]
pesto gnocchi
fresh salad with herb vinaigrette
lime sorbet (homemade, currently in the freezer)
———————————
TOMORROW
Meal 01 [breakfast]
high protein cereal with whole milk
plain whole-milk yogurt with blueberries, honey, and walnuts
Meal 02 [lunch]
Pita bread stuffed with falafel, salad stuff and herb vinaigrette
Fruit
Meal 03 [dinner]
creamy broccoli soup with fresh herbs (soup is homemade already in the refrigerator)
orzo salad
sliced Bananas with sugar and a touch of cream
————————————
WEDNESDAY
Meal 01 [breakfast]
high protein cereal with whole milk
plain whole-milk yogurt with blueberries, honey, and walnuts
Planning just 48 hours is a small, simple activity that will quickly yield results. It’s a small period as not be overwhelming or complicated.
Let me know how this works for you!
Rick
Welcome to Buckman Street Kitchen
Buckman Street Kitchen helps people become inspired, knowledgeable, equipped, planned, and operational in their kitchen.
I am passionate about consistently creating wonderful food from the simplest of ingredients.
I often ask people about their cooking habits. I find most people eat out more than they would like and wish they cooked at home. I believe people can prepare great foods from simple ingredients with some inspiration, planning, and making it a priority. You will get results where you put your time and your mind. Buckman Street Kitchen is intended to help you operate a functional, efficient kitchen that consistently creates great food from simple ingredients.
The foundation of all of this is the BSK Pantry. This a comprehensive list of items you should always have on hand in your kitchen. When preparing a shopping list, the inventory of these items should first be checked to ensure a well-stocked pantry. This way you will never run out. Having this baseline of diverse, key ingredients will make the process of planning and creating much less complicated.
The recipes I share may be created by me or from other sources. They will always be presented in the context of the BSK Pantry. I will assume you are all stocked up so I will highlight what items you will need to buy. Sometimes there are no additional items to buy; you will have everything needed already stocked in your kitchen (these are called BSK Gold Star recipes).
I am looking forward to sharing my passion and my kitchen with you!